19 Best Discord Bots in 2026: Complete Guide

Last Updated: Jan 13 2026
Introduction
Along with the rise in users and servers, Discord bots play a significant role in that evolution. In fact, the bot ecosystem is a crucial part of Discord, and many kids' first coding language is DJS (Discord JavaScript). Bots automate moderation, add fun games and music, run support desks, schedule events, and generally make running a server easier.
With thousands of bots to choose from, picking the right ones can be overwhelming. This guide rounds up some of the most useful Discord bots in 2026, divides them by category, and provides an objective comparison of features, pricing, and use cases.
Each recommendation was selected based on reliability, breadth of features, popularity among active servers and transparent pricing. Where possible, we looked at the bot’s official documentation or reputable industry reports to confirm the numbers and capabilities cited here.
Where possible, we looked at the bot’s official documentation or reputable industry reports to confirm the numbers and capabilities cited here.
Want to 4x your Discord engagement and get free nitros & steams every week✌?
Best Discord bot in sub-categories
If you are looking for bots in specific categories, you can refer to our list of Best-of as a reference:
- Best Discord music bots
- Best Discord fun bots
- Best Discord moderation bots
- Best Discord ai bots
- Best Discord ticket bots
- Best Discord levelling bots
Table of content
- Multi-function vs single-purpose bots
- Quick comparison table
- Free vs premium Discord bots
- Our Data‑Driven Methodology
- Best overall Discord bots
- Best Discord bots for moderation
- Best Discord music bots
- Best Discord Fun bots
- How to install and configure Discord bots
- Discord Bot Security: Best Practices
- Discord bot FAQ (People also ask)
- Conclusion
Multi-function vs single-purpose bots
In the Discord universe, you will find two basic categories of bots: the first type of bots are multi-functional. You can turn any features on or off, depending on your preferences. Developers in these categories tend to have been around Discord for a very long time, and you are pretty familiar with a lot of these bots.
Use multifunction bots when you first start building your Discord. Your community workload is not very high, and you should spend more time engaging with your new members than figuring out the best bot.
As you grow, start replacing generic bots with single-purpose ones. Single-purpose bots are great because they specialize in one aspect, and some of them do extremely well. The first special category to replace is verification. There are some excellent verification bot that does far more than what MEE6 can offer.
Quick comparison table
The table below summarises the key information for all 19 bots in this guide. Each entry highlights core features (only the most important phrases, not a full description), current pricing (rounded to USD where possible), and the situations where the bot excels. Longer explanations follow in the detailed sections.
| Bot | Best For | Key Strengths | Pricing |
|---|---|---|---|
| Sapphire | New or budget-conscious servers needing an all-rounder | Auto-moderation, role & logging tools, highly customizable messages | Free |
| Dyno | Communities wanting reliable, fine-grained moderation | Stable moderation tools with timed punishments & best-in-class logging | Free (basic), Premium tiers available |
| ProBot | Communities seeking a multipurpose moderation & welcome bot | Custom welcome images, auto-moderation (anti-raid), leveling, robust logging | Free (core features), Premium $5–$10/mo (two tiers) |
| CommunityOne | Communities focused on engagement & data | AI Q&A (Spark) assistant, gamified quests, analytics, cross-community growth | Free (basic), Premium from $15/mo |
| Carl-bot | Servers that rely on reaction roles & suggestions | Reaction roles, automod, suggestion system | Free (basic), Premium from $7.99/mo |
| Arcane | Communities gamifying engagement via leveling | Free auto-role rewards, leaderboards, prestige, XP via chat & voice | Free (most features), Premium $7/mo |
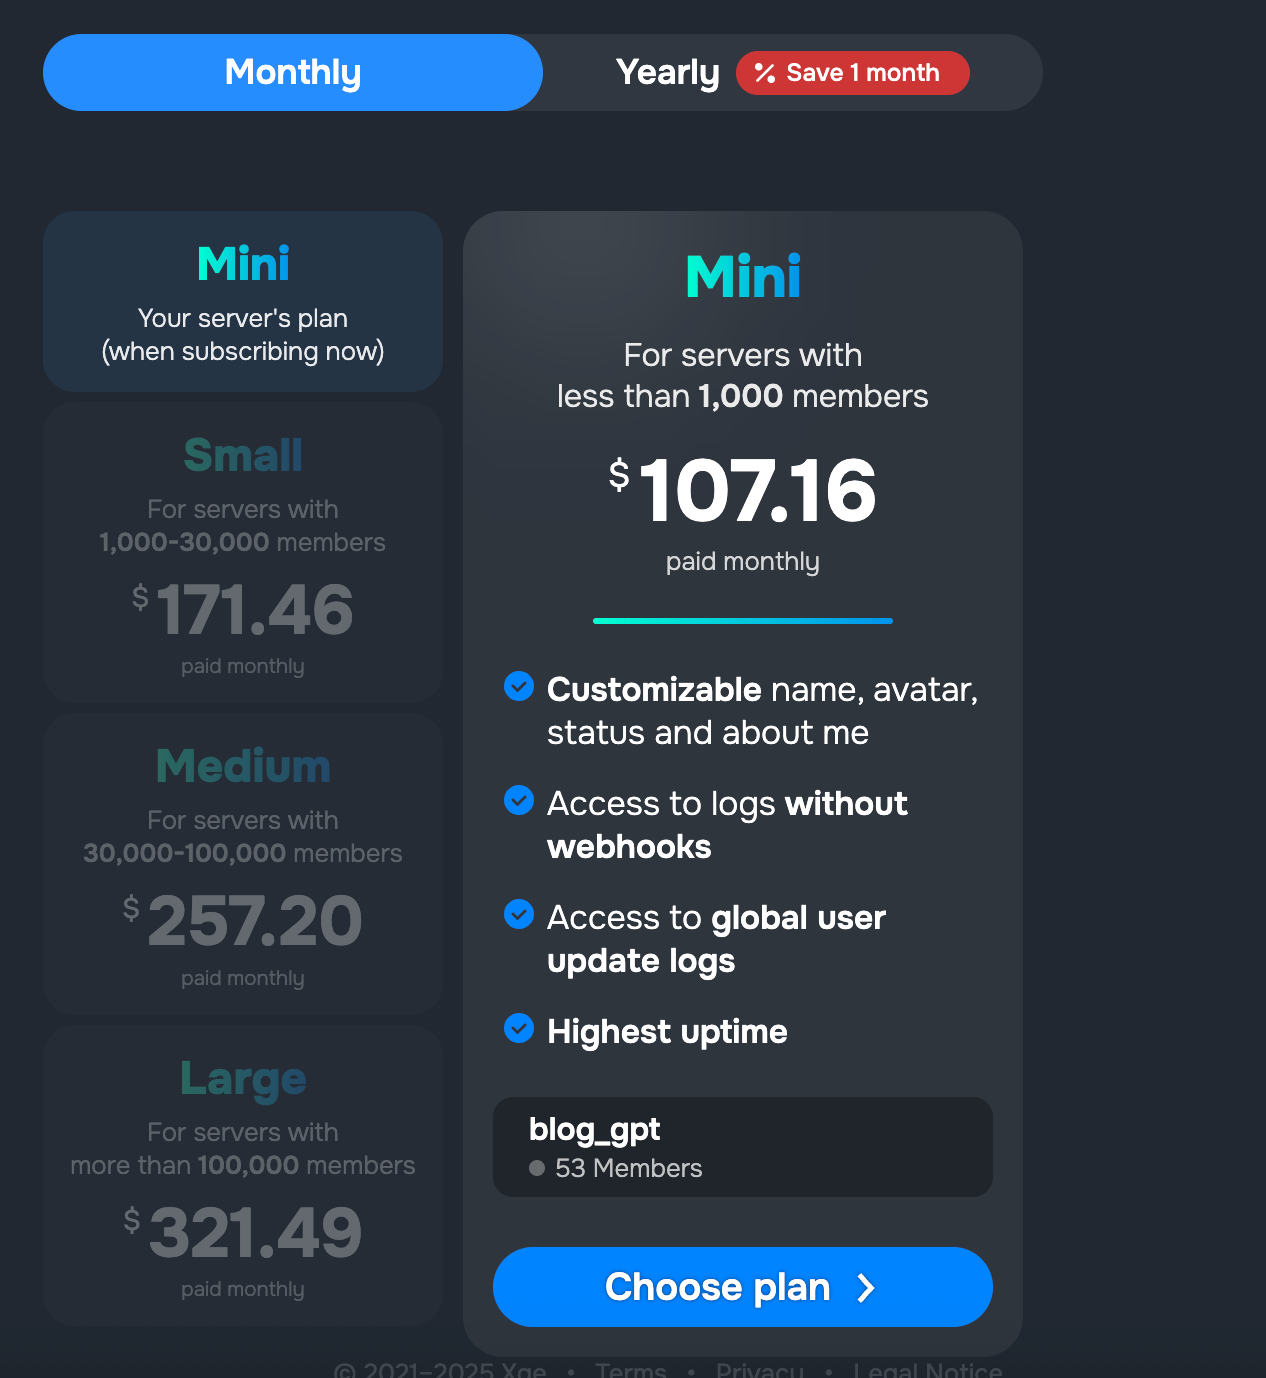
| Xenon | Servers needing backups & templates | Automated server backups & template cloning | Free (basic), Premium ~$110/mo |
| Invite Tracker | Servers running invite contests or verification | Tracks invites & messages, giveaway system, verification (captcha) | Free (basic), Premium ~€9.99/mo |
| Ticket King | Servers needing structured support & appeals | Ticket panels, custom forms, transcripts & analytics | Free (basic), Premium $2.49/mo |
| Lara Music | Servers wanting 24/7 background music | Always-on music with button-based controls | Free |
| RythmCore | Small/medium servers wanting AI-driven music | Natural-language music requests, high-quality playback | Free (basic), Premium $5/mo |
| Rythm | Large/formal communities wanting legal music | Fully licensed, modern UI, group listening sessions | Limited free, Premium required |
| MEE6 | Early-stage servers that want an all-in-one starter bot | Bundled features: moderation, leveling, auto-messages, role reactions, YouTube/Twitch alerts | Free (limited), Premium $11.95/mo or $89.90 lifetime |
| YAGPDB | Large servers needing advanced automod | Highly customizable automod with regex filters & strike system | Free (core), Premium $3.50/server/mo |
| Dank Memer | Servers wanting fun, memes & economy | Gamified currency system, memes, humor-driven engagement | Free (basic), Premium $4–$50/mo |
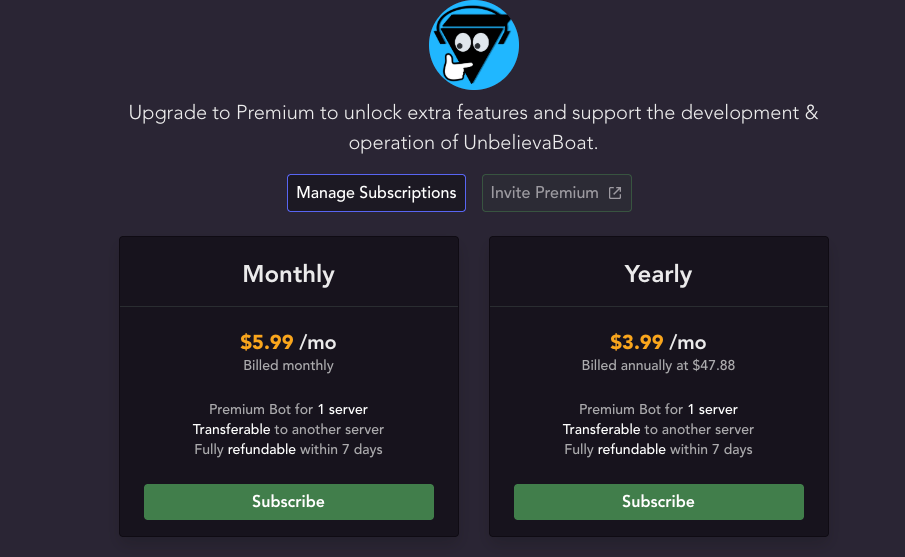
| UnbelievaBoat | Servers that want a customizable, balanced economy system | Fully adjustable economy with jobs, shop, leaderboards & moderation tools | Free (core features), Premium $5–$15/mo |
| Pokétwo | Gaming communities and Pokémon fans | Pokémon-catching game, trading & battles in chat | Free |
| Mudae | Anime/gacha communities & collectors | Character rolls, scarcity, gifting, community-driven gameplay | Free |
| Subo | Communities needing polls & feedback | Privacy-first surveys, gamification, AI summaries/drafts | Free (basic), Premium tiers + AI credits |
Free vs premium Discord bots
Many bots offer generous free tiers. Moderation bots like ProBot and YAGPDB include core features at no cost, while MEE6, Dyno, Arcane and Carl‑bot lock advanced functionality (such as unlimited custom commands, levelling or higher role limits) behind monthly subscriptions. Music bots typically stream for free but charge for continuous playback and filters. Whether premium is “worth it” depends on your server’s size and needs:
- Free is often enough for small communities. ProBot, YAGPDB, Dyno and Mudae provide robust features with no cost.
- Premium becomes valuable when you manage large servers, need multiple bot instances or rely on advanced analytics. For example, Xenon’s premium backups protect large role/channel sets. Mee6 can be a worth investment when you get them at the right time and purchase the life time access with multiple servers.
Our Data‑Driven Methodology
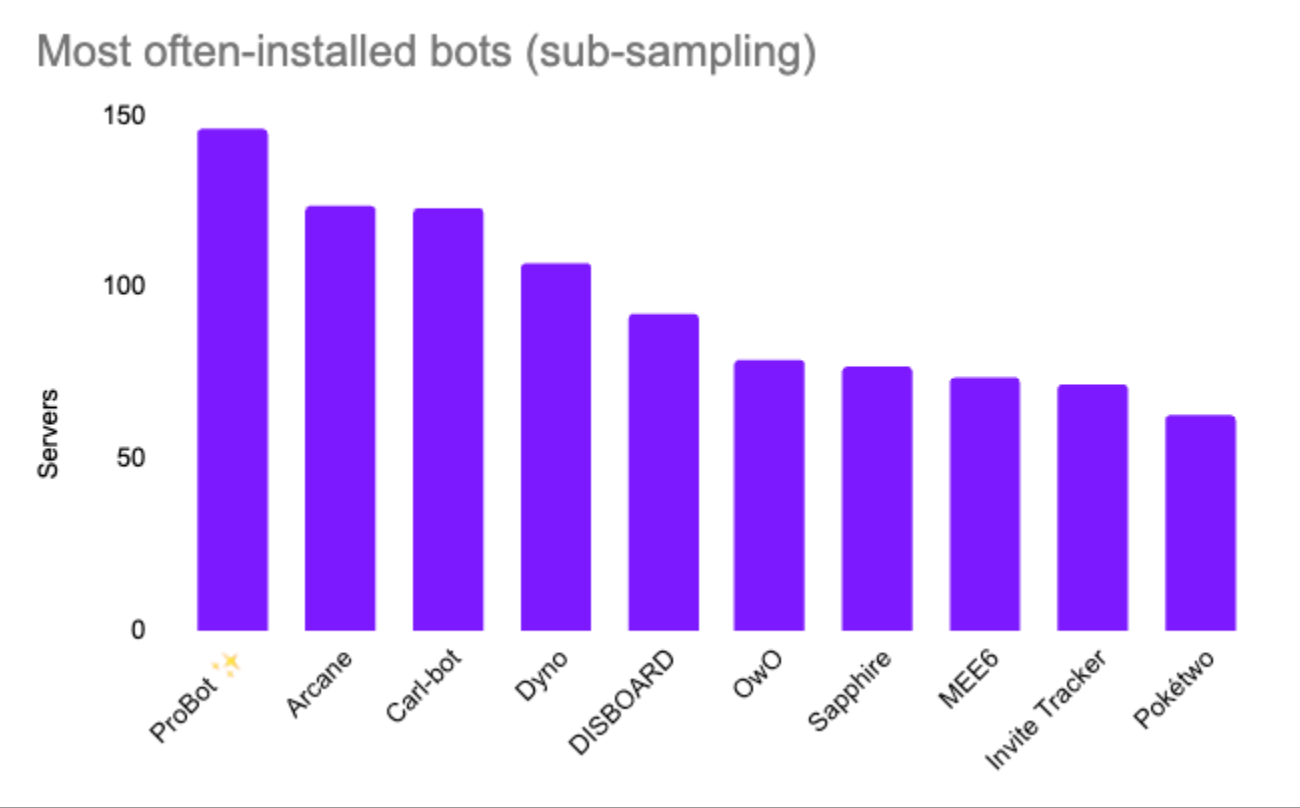
Most Often-Installed Bots (Subsample of Discord Servers): We based our “best bots” selection on proprietary data from a broad range of actual Discord servers (web3, gaming, anime, social etc), rather than just opinions. Using a statistically significant subsample of servers, we identified which bots are installed most frequently. The chart above shows the top bots by how many servers have added them — with ProBot, Arcane, Carl-bot, and Dyno leading the pack in popularity. These bots appear in a large fraction of servers in our sample, indicating their broad appeal and trust within the community.
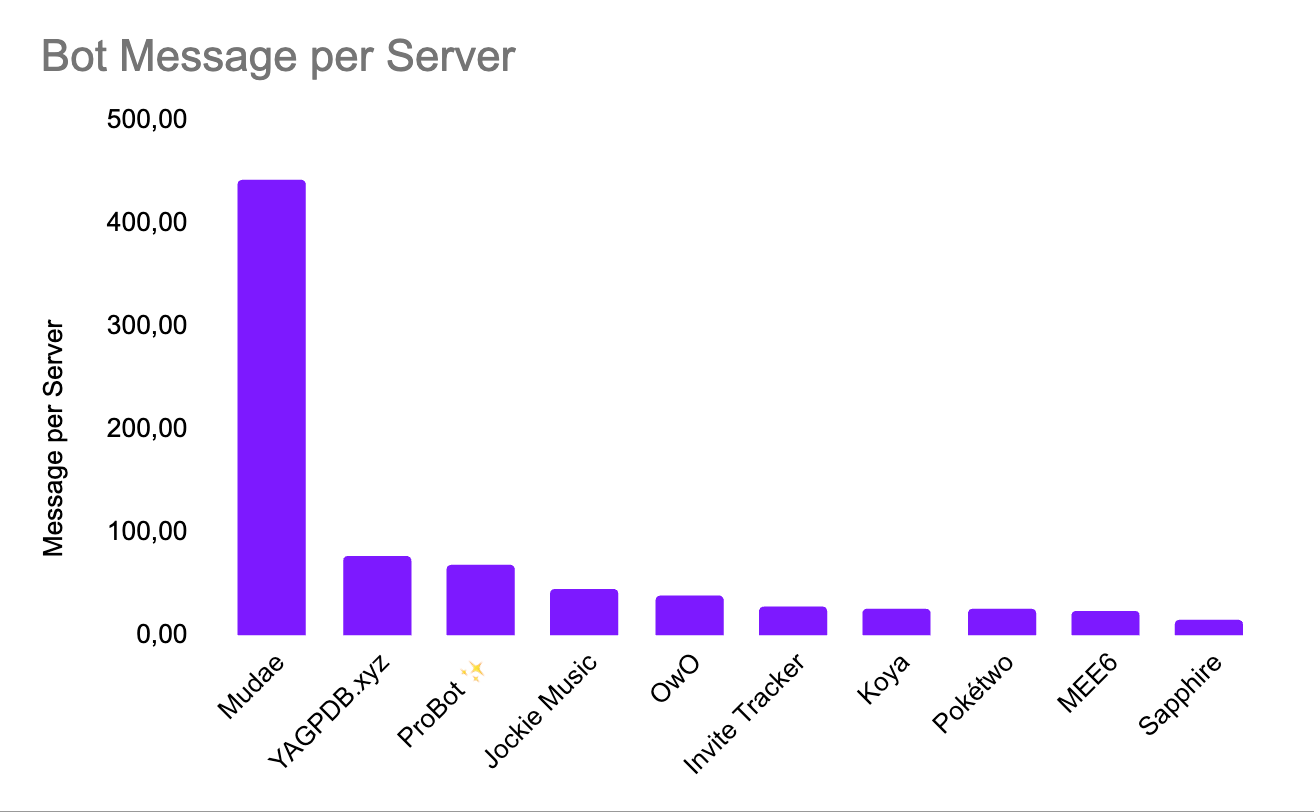
Bot Messages per Server (Activity Level): Installation alone doesn’t tell the full story, so we also measured how actively each bot is used by looking at the average number of messages the bot posts per server. The chart above highlights that Mudae far outpaces others in messages sent, showing it’s heavily engaged by users (with frequent game interactions). YAGPDB, ProBot, and Jockie Music also show high messages-per-server, meaning they perform many tasks or interactions in each community. A bot that sends more messages on average is likely being used regularly for moderation logs, games, or commands – a strong indicator of an actively useful bot. By combining these two metrics – how many servers use a bot and how busy that bot is in each server – we focused our guide on bots that are not only popular installs, but also proven to deliver steady value through active usage in real communities.
(For privacy reasons, the data is presented in aggregate. This methodology ensures our recommendations are rooted in real-world usage patterns, lending credibility and transparency to our picks.)
Best overall Discord bots
The bots in this section offer broad functionality and are suitable for most community servers. They combine moderation, automation and engagement tools in one package.
Sapphire Overview
Sapphire is a mostly free and highly customizable multi-purpose Discord bot that many consider a feature-rich alternative to MEE6. It offers an advanced moderation system (including an auto-moderation module), welcome messages, reaction roles, join/leave logging, and more out of the box. Essentially, Sapphire “does it all,” but unlike Mee6, it doesn’t paywall its capabilities – every feature is available without a premium plan.
One of Sapphire’s key strengths is its customizability. Nearly every message the bot sends can be tailored via its web dashboard, allowing server admins to maintain a consistent style and tone. This means your welcome greetings, moderation alerts, and other bot outputs can be edited to fit your community’s personality. For servers that want a personalized touch or operate in multiple languages, this flexibility is invaluable.
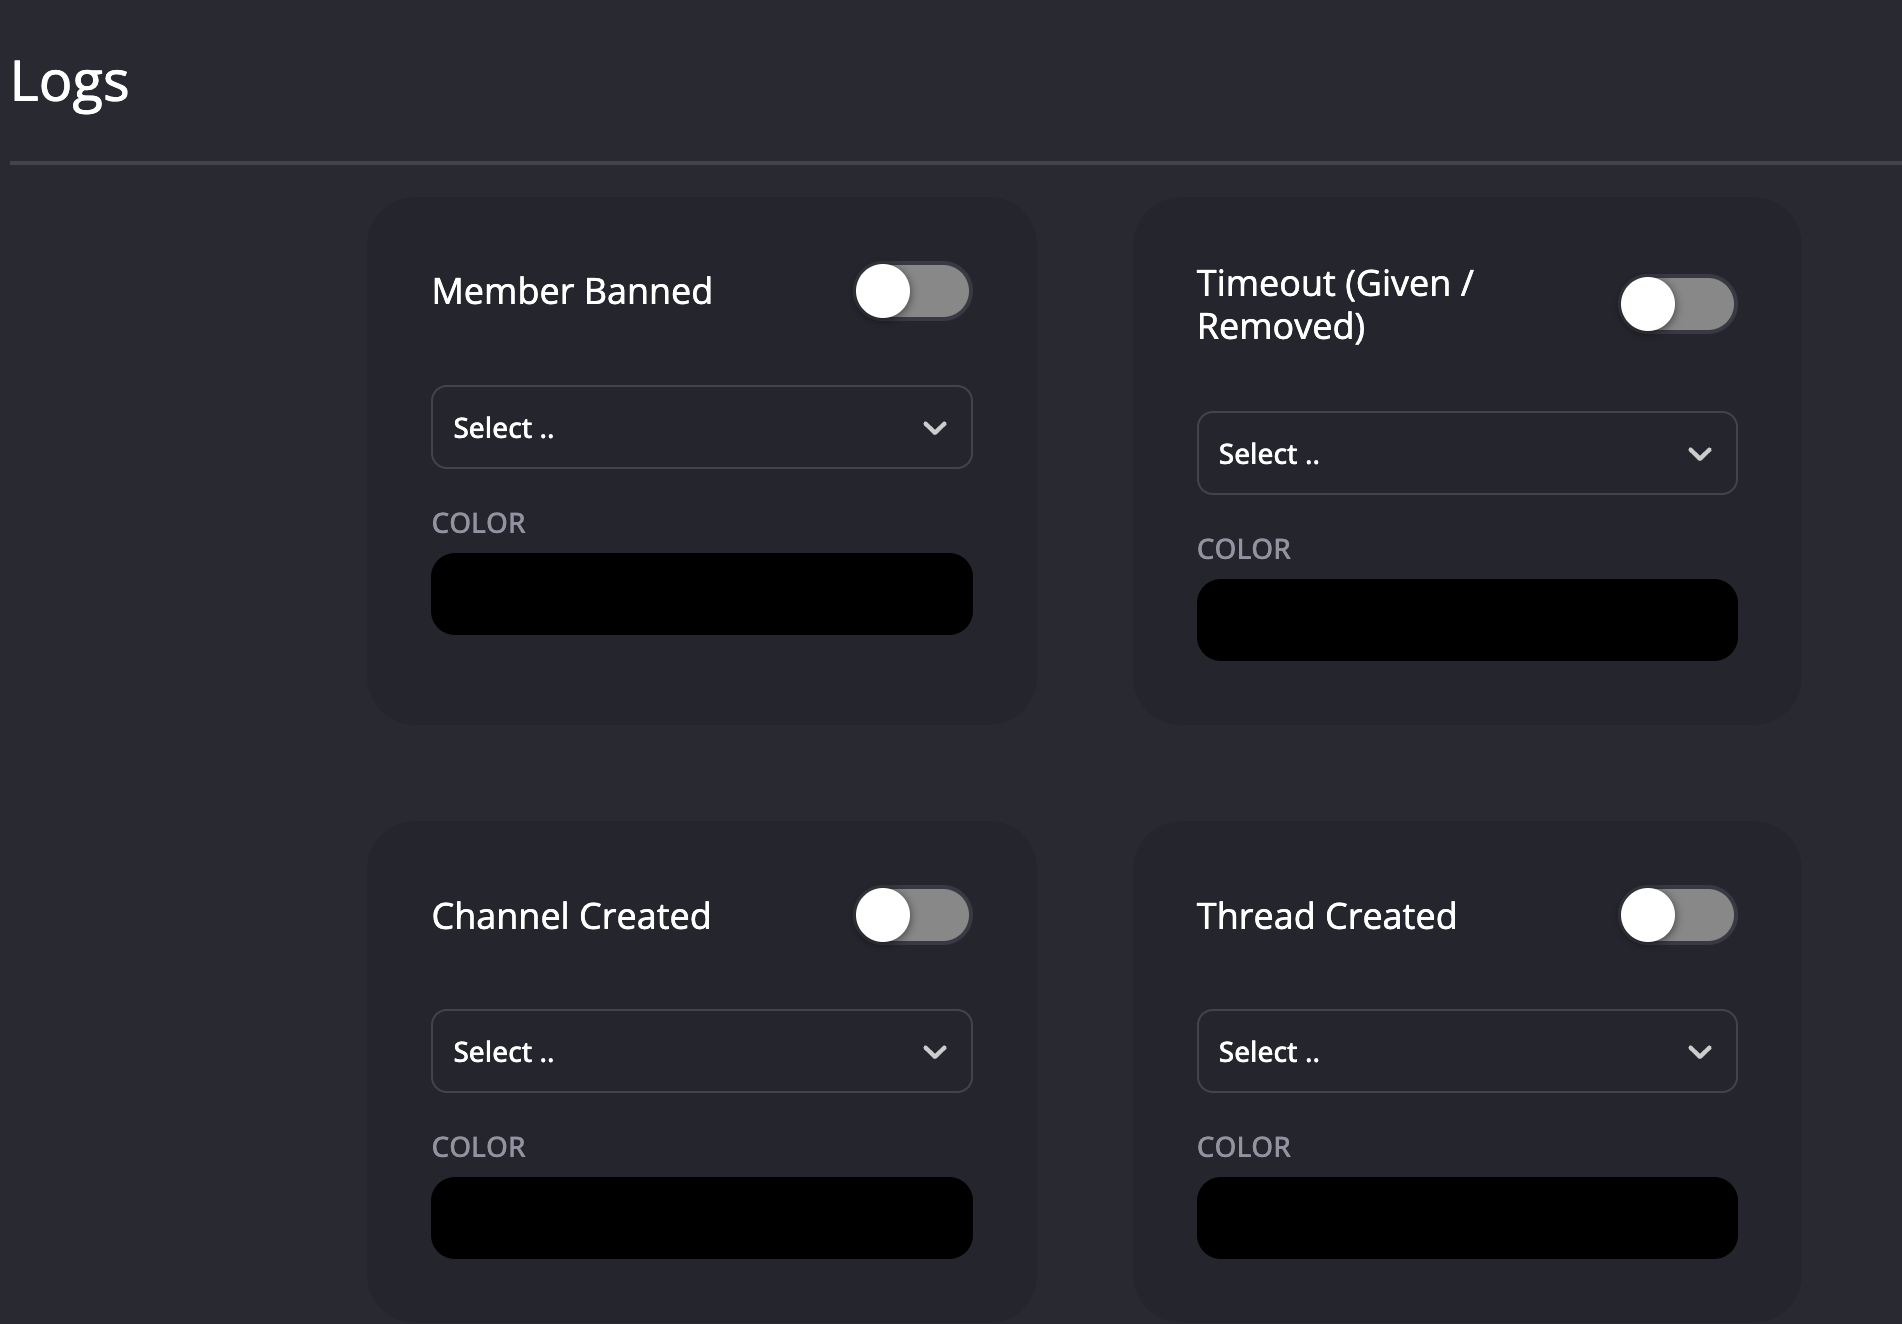
Despite being free for most servers, Sapphire doesn’t skimp on functionality. It supports custom slash commands and buttons, social media notifications, auto-moderation with multiple condition groups, and detailed logging of server events. For example, you can set up auto-mod rules to catch spam or certain keywords (similar to YAGPDB’s filters), and Sapphire will enforce them automatically. Reaction roles and join roles make onboarding new members simple, and the bot’s logging lets you audit member joins, leaves, edits, and deletions easily from the dashboard.
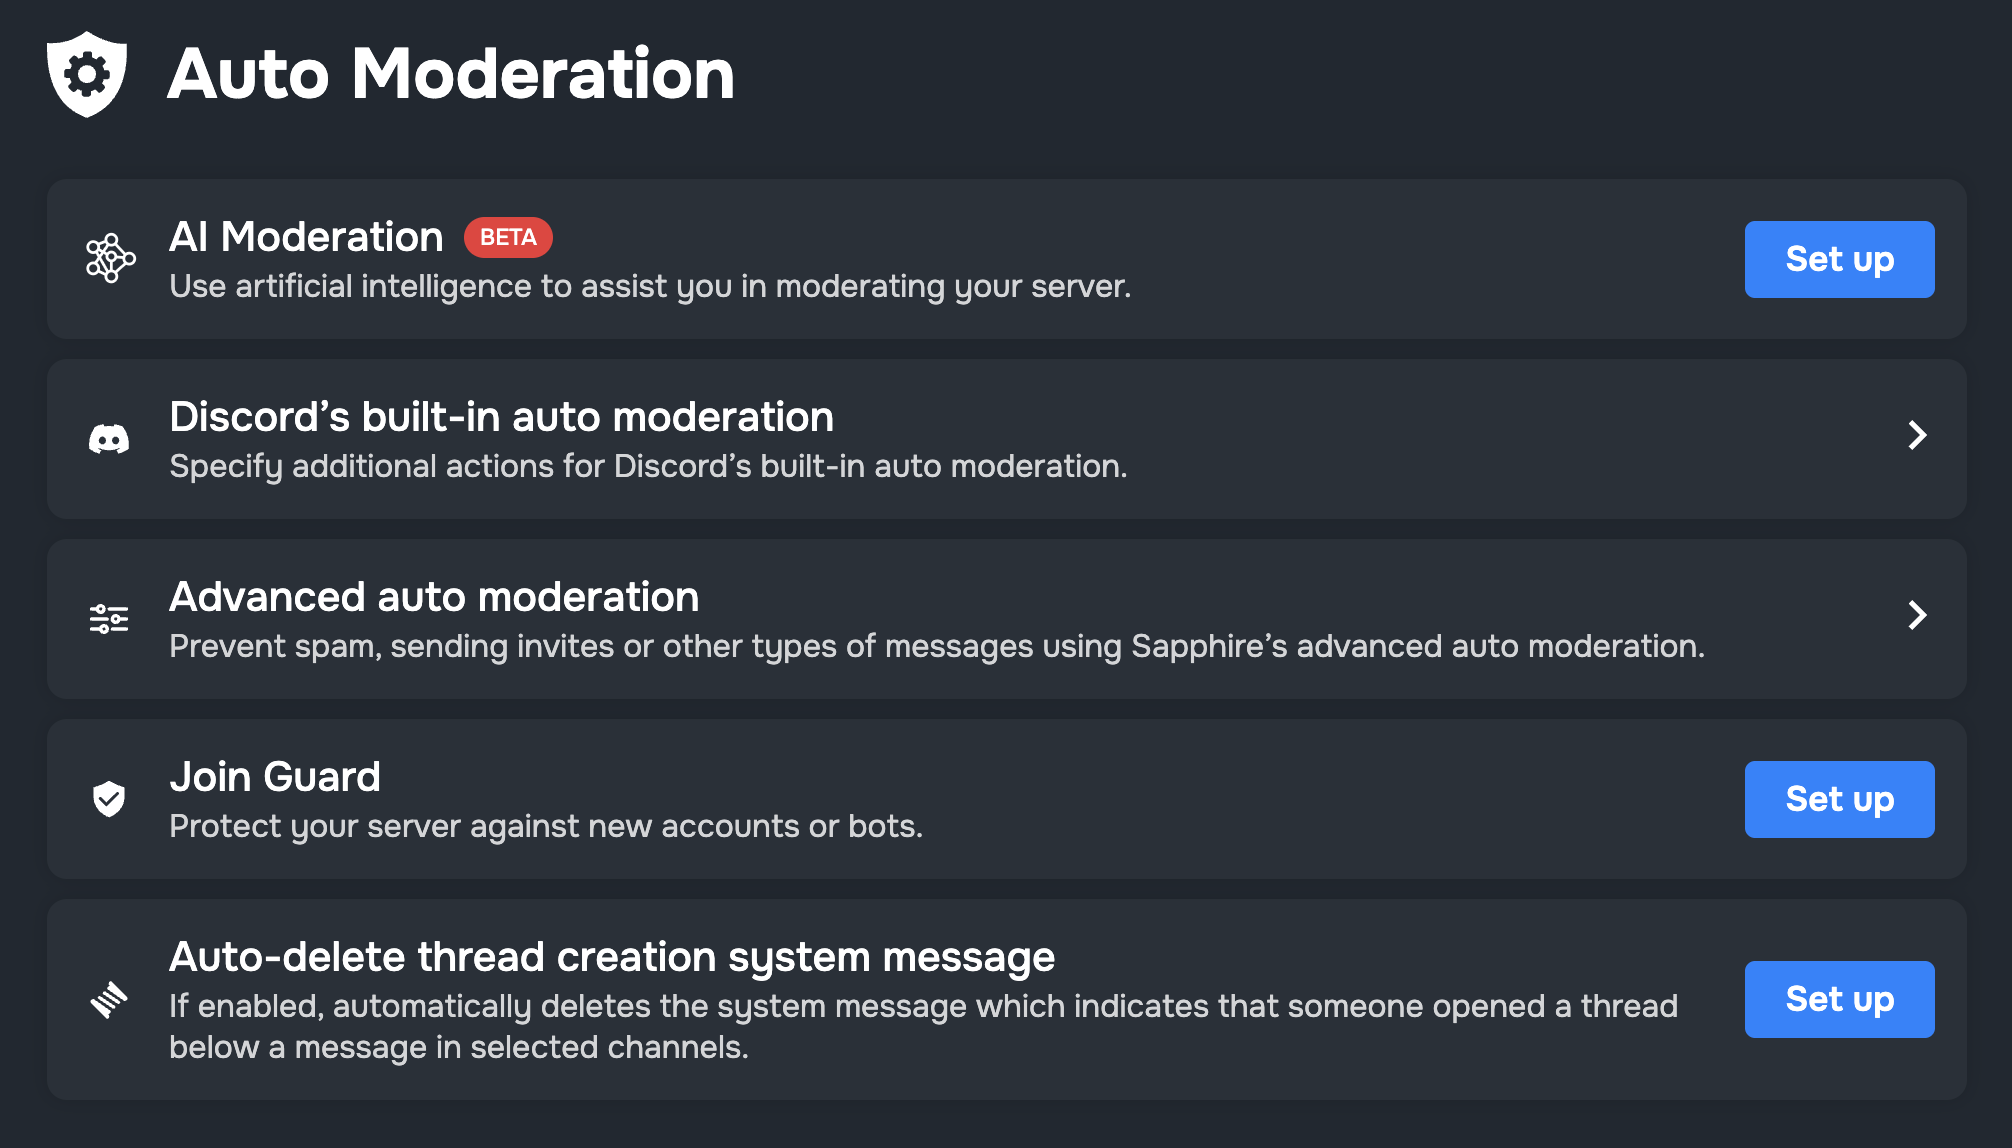
In terms of auto moderation, Sapphire has some interesting features such as AI moderations where it flags messages (with some rate limits), or allow you to kick out bot accounts per your own customization (vs Wick where it just kicks out members on its own), and our favorite feature of automatically delete threads in channels that are not supposed to be written.
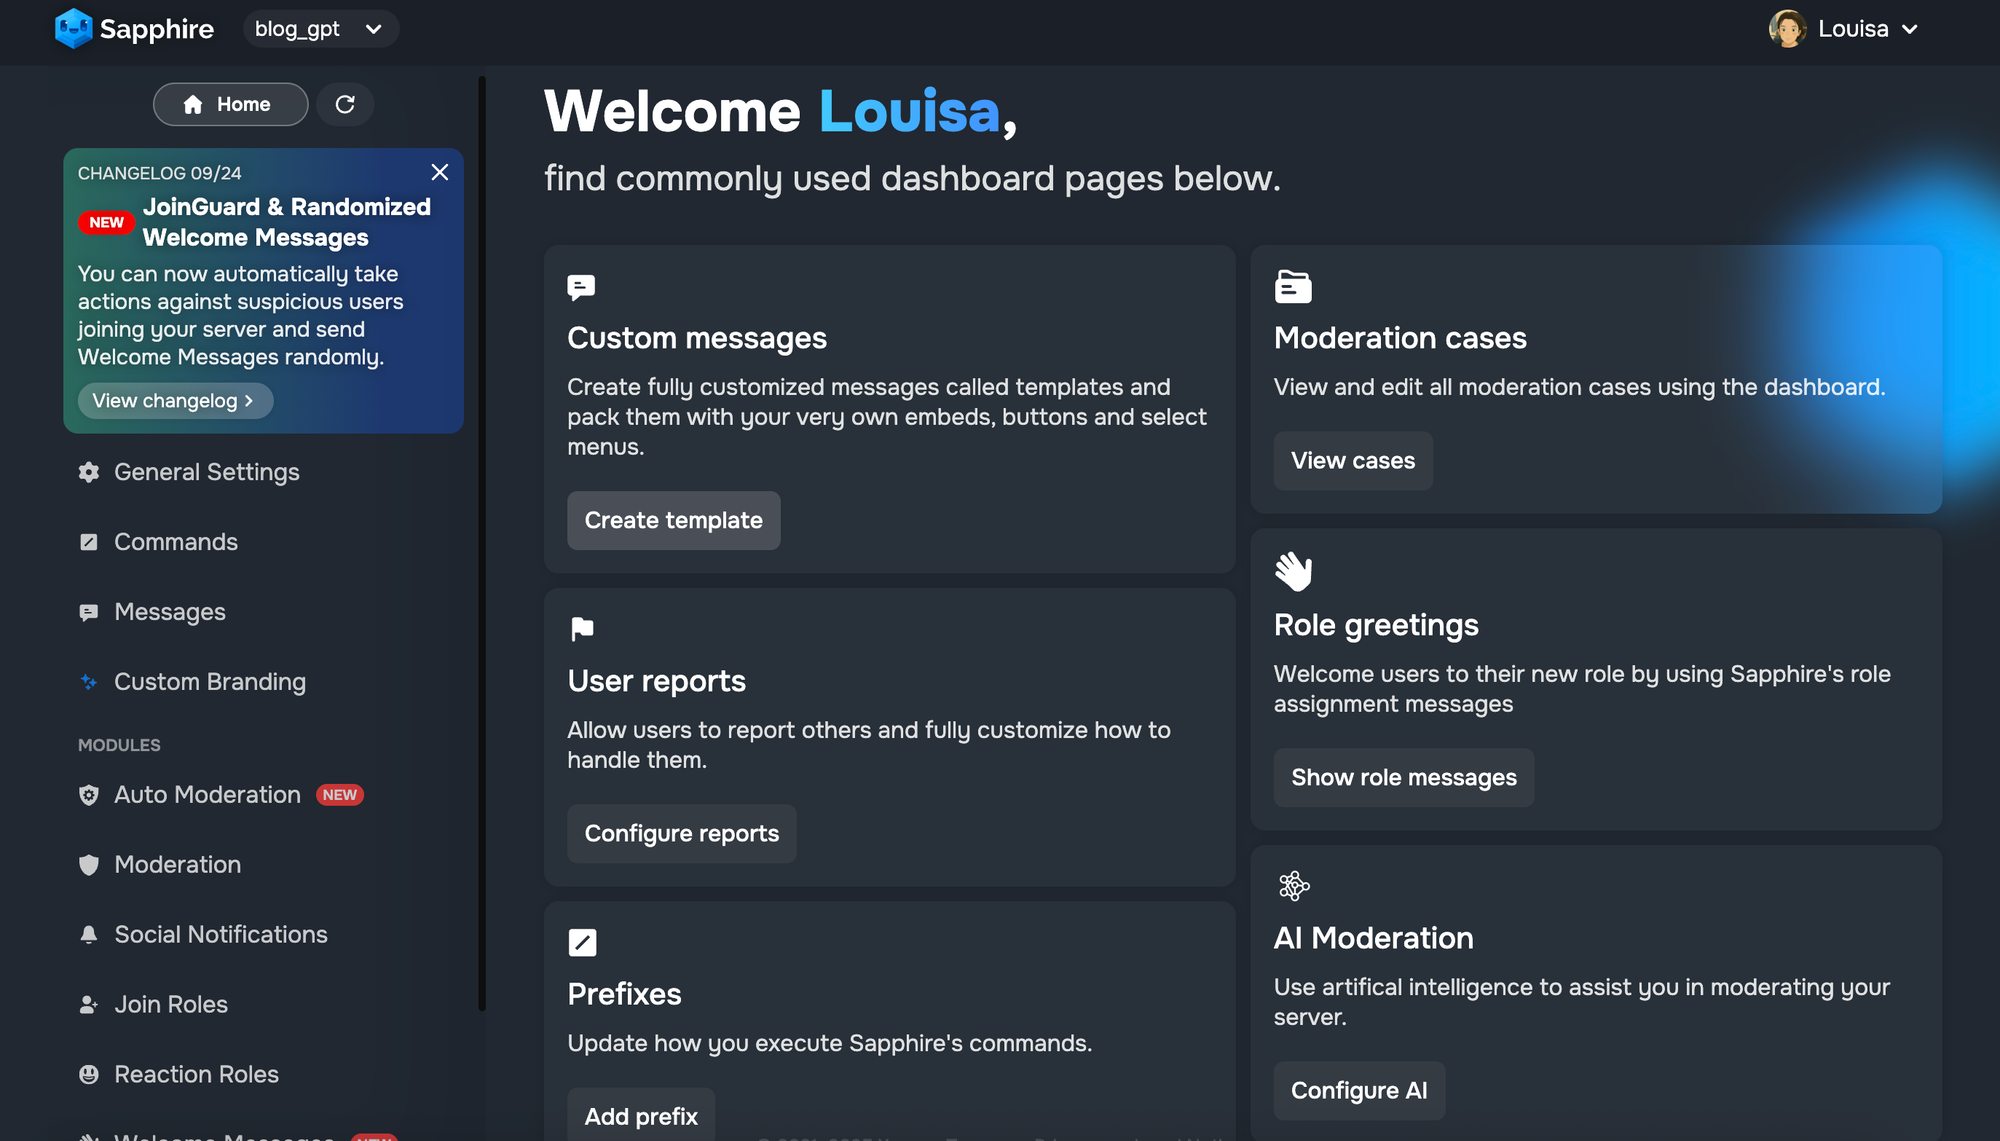
Setting up Sapphire is straightforward: invite it and use the online dashboard at sapph.xyz for configuration. The interface is clean, and since the bot consolidates numerous features, you save time by not having to juggle multiple bot dashboards. It’s maintained by a dedicated team (the bot is open-source, with an active support server), so updates and community-requested features roll out frequently.
Setting Up Sapphire on Your Discord Server
Step 1: Invite Sapphire
- Use the invite link from top.gg or the official site to add Sapphire to your server.
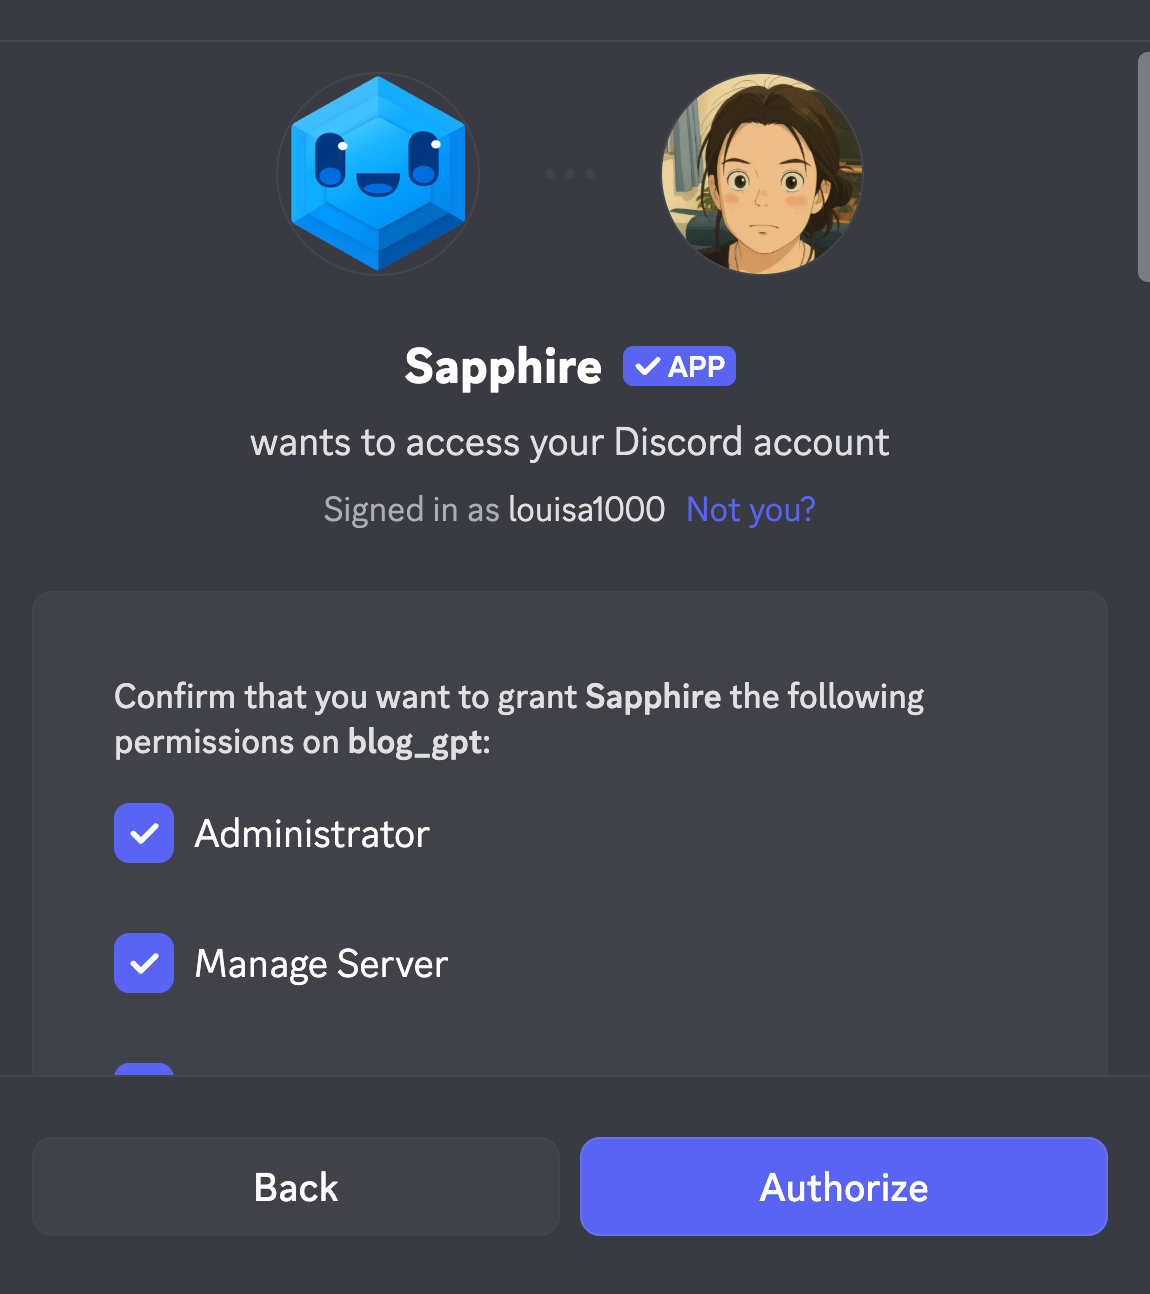
- Authorize the bot and select your server, granting the requested permissions (Admin, Manage Roles, Manage Messages, etc.).
- In your server’s role settings, place Sapphire’s role above any roles it needs to manage.
Step 2: Configure via Dashboard
- Go to sapph.xyz and log in with your Discord account to access the Sapphire dashboard.
- Navigate through modules (Moderation, Auto Moderation, Roles, Notifications, etc.) and enable or disable features as needed.
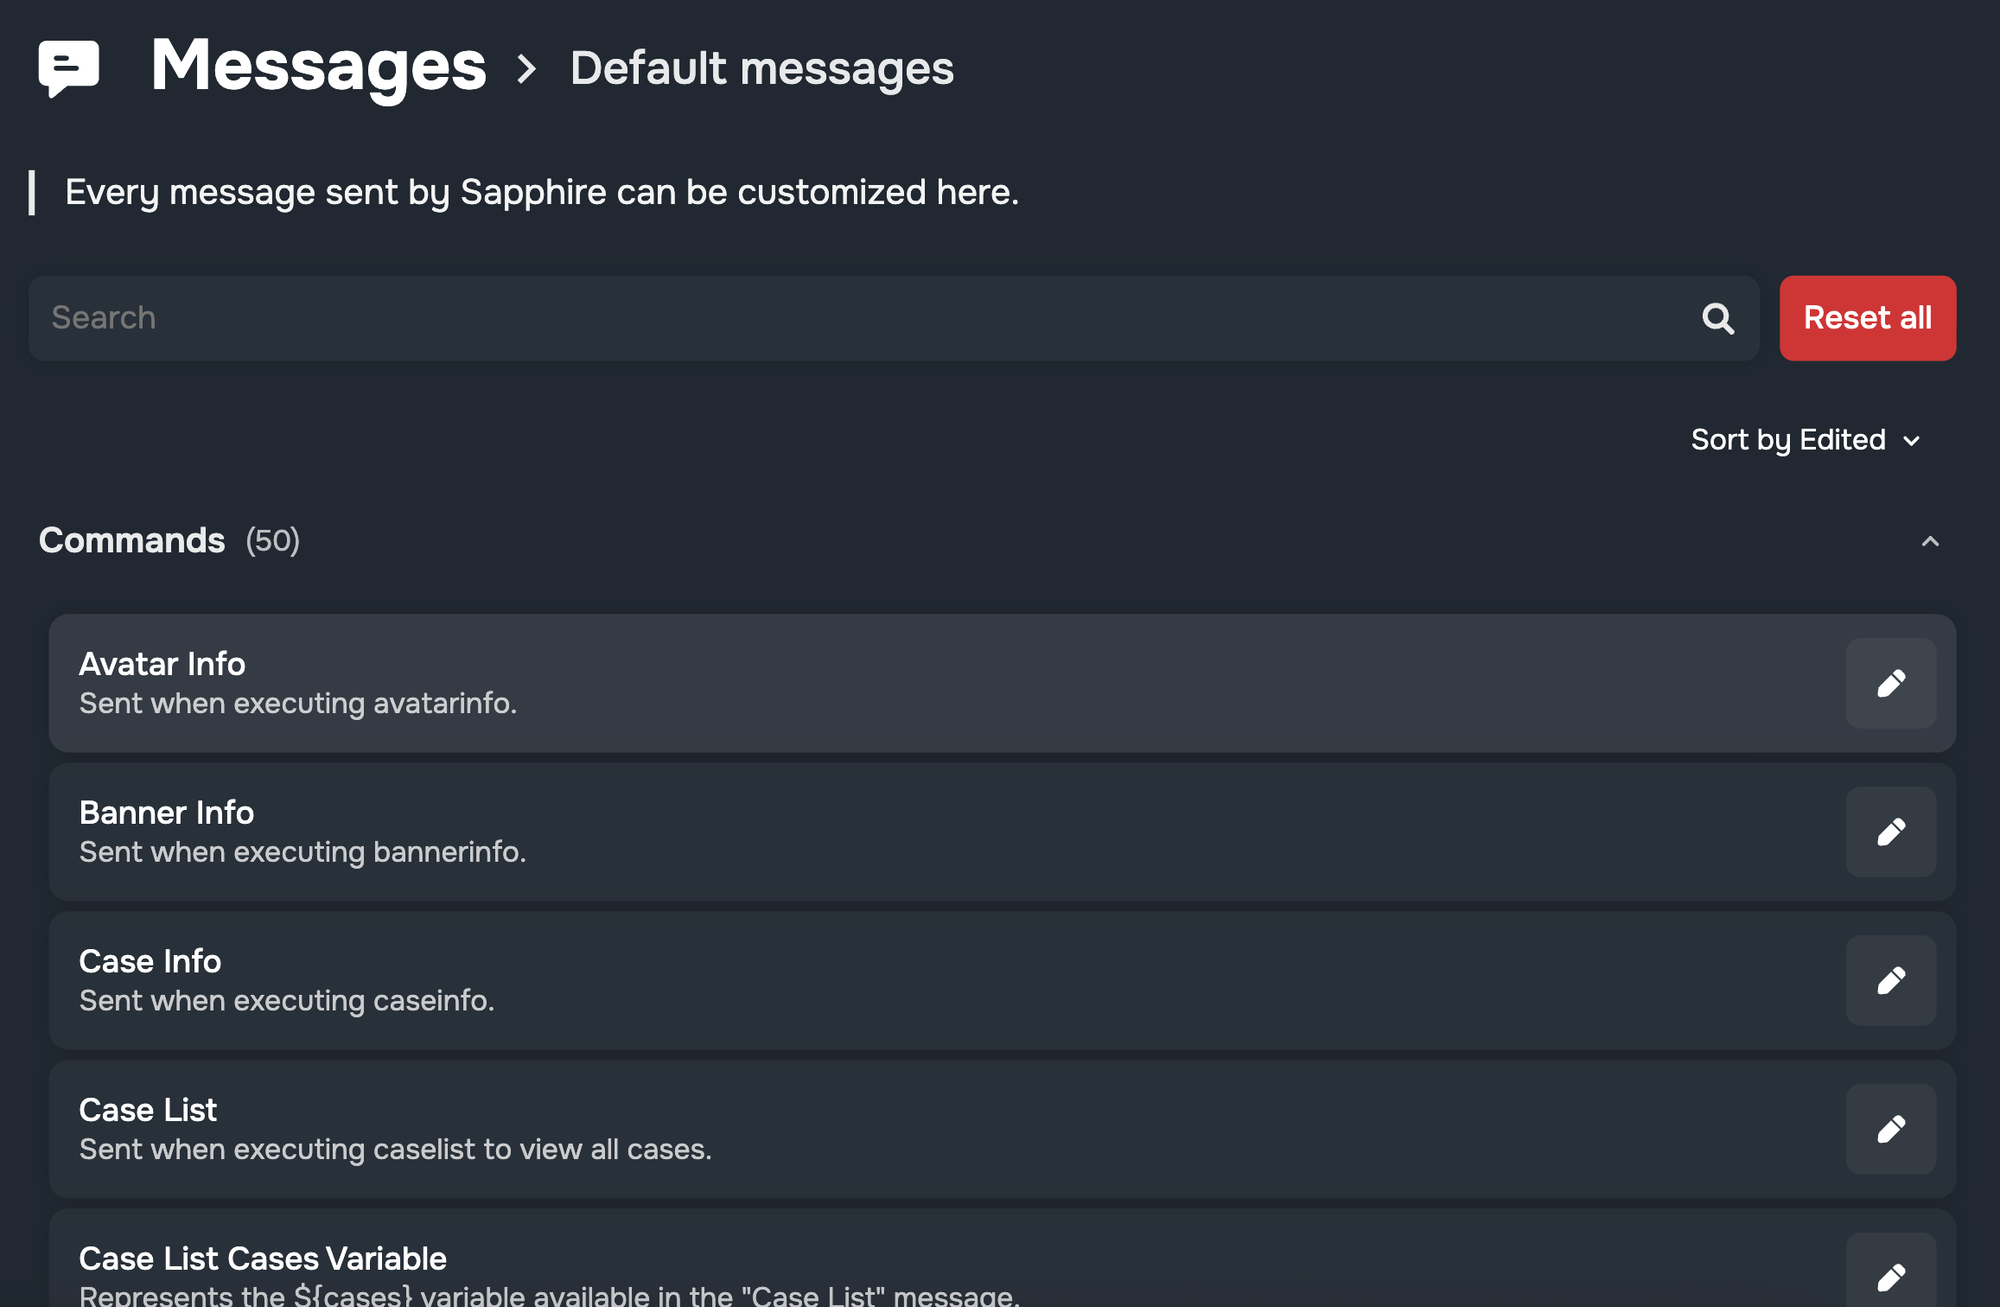
- Customize messages under the Messages -> Templates section: you can edit the text Sapphire uses for mod logs, warning messages, etc., to perfectly fit your server’s style.
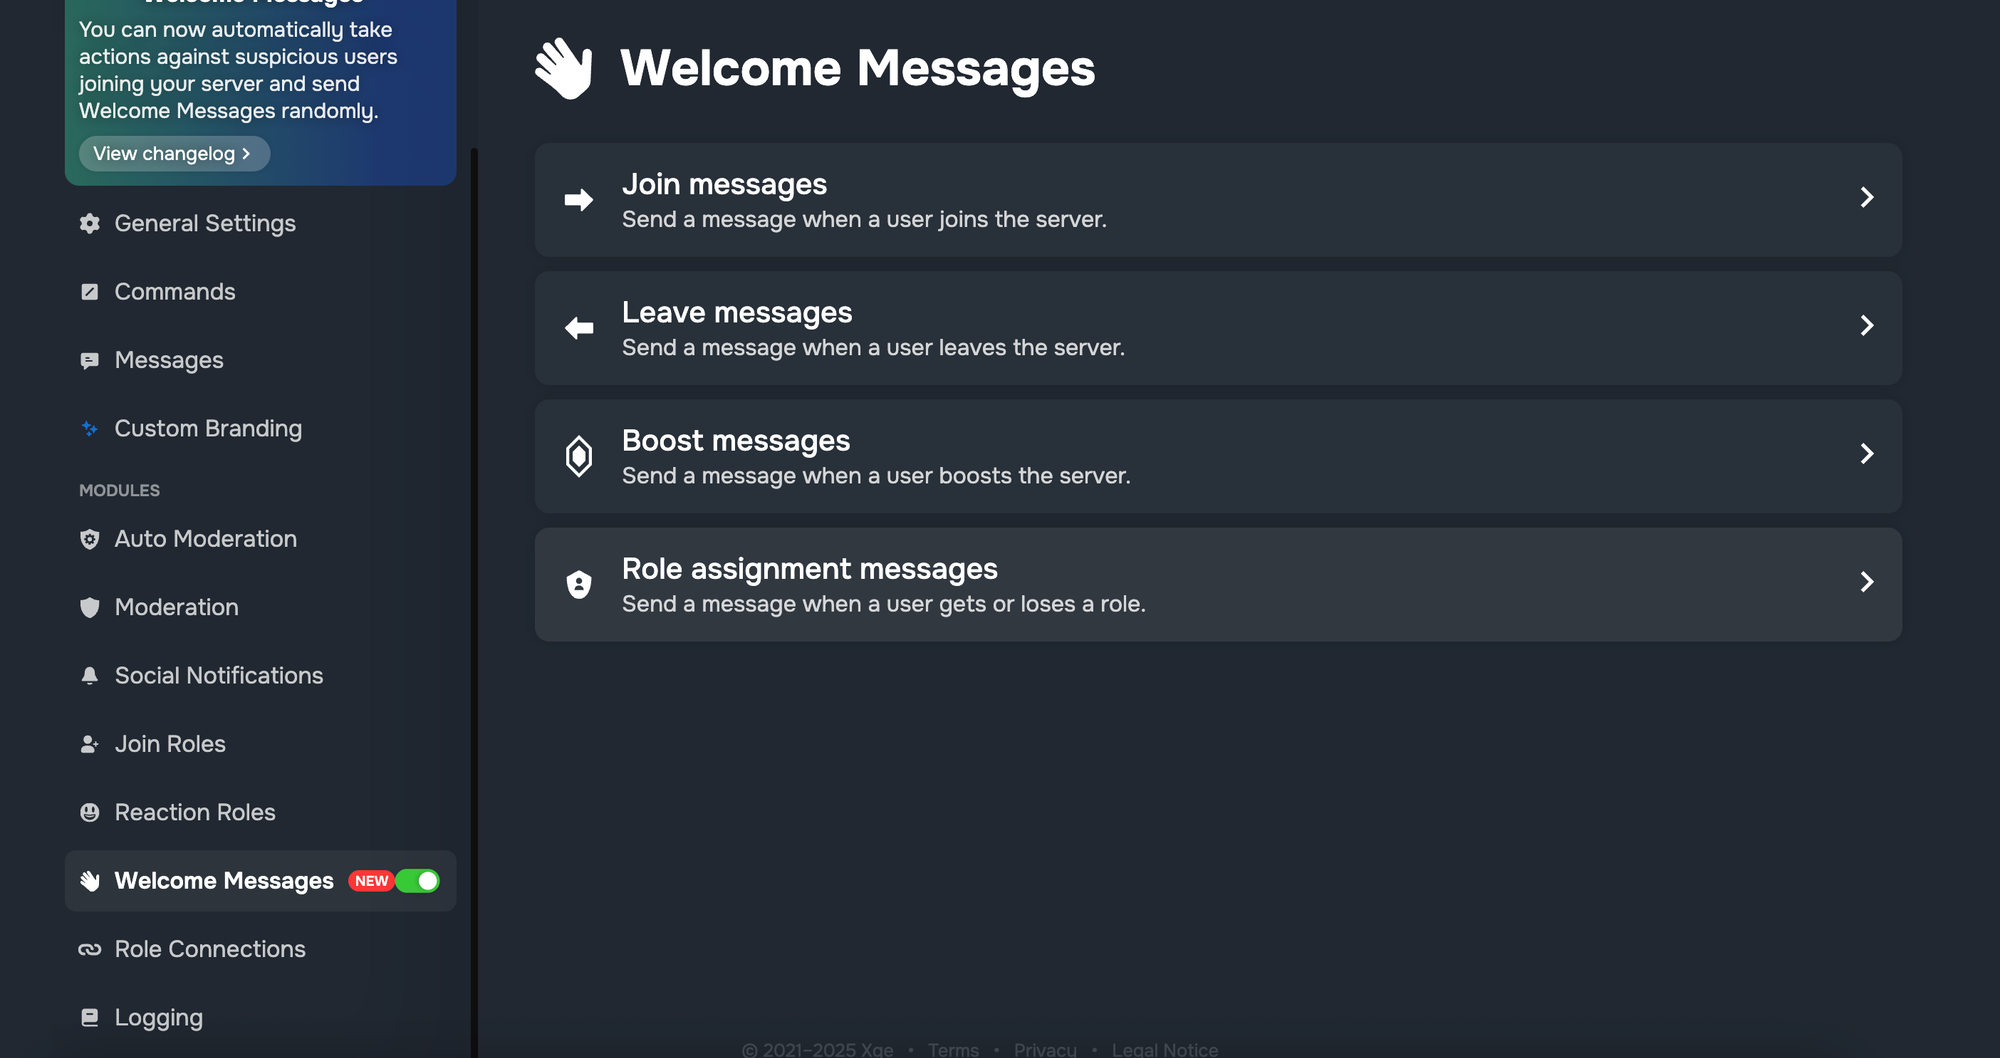
- To setup welcome messages (one of the most used features per our data), go to Welcome Messages and customize your messages.
Step 3: Set Up Key Features
- Auto-Moderation: In the dashboard, define rules (e.g., max mentions, banned words). Sapphire allows multiple conditions and actions for each rule.
- Reaction Roles: Create a reaction role message by selecting a channel and adding roles with corresponding emojis or buttons. Members can then self-assign roles with a click.
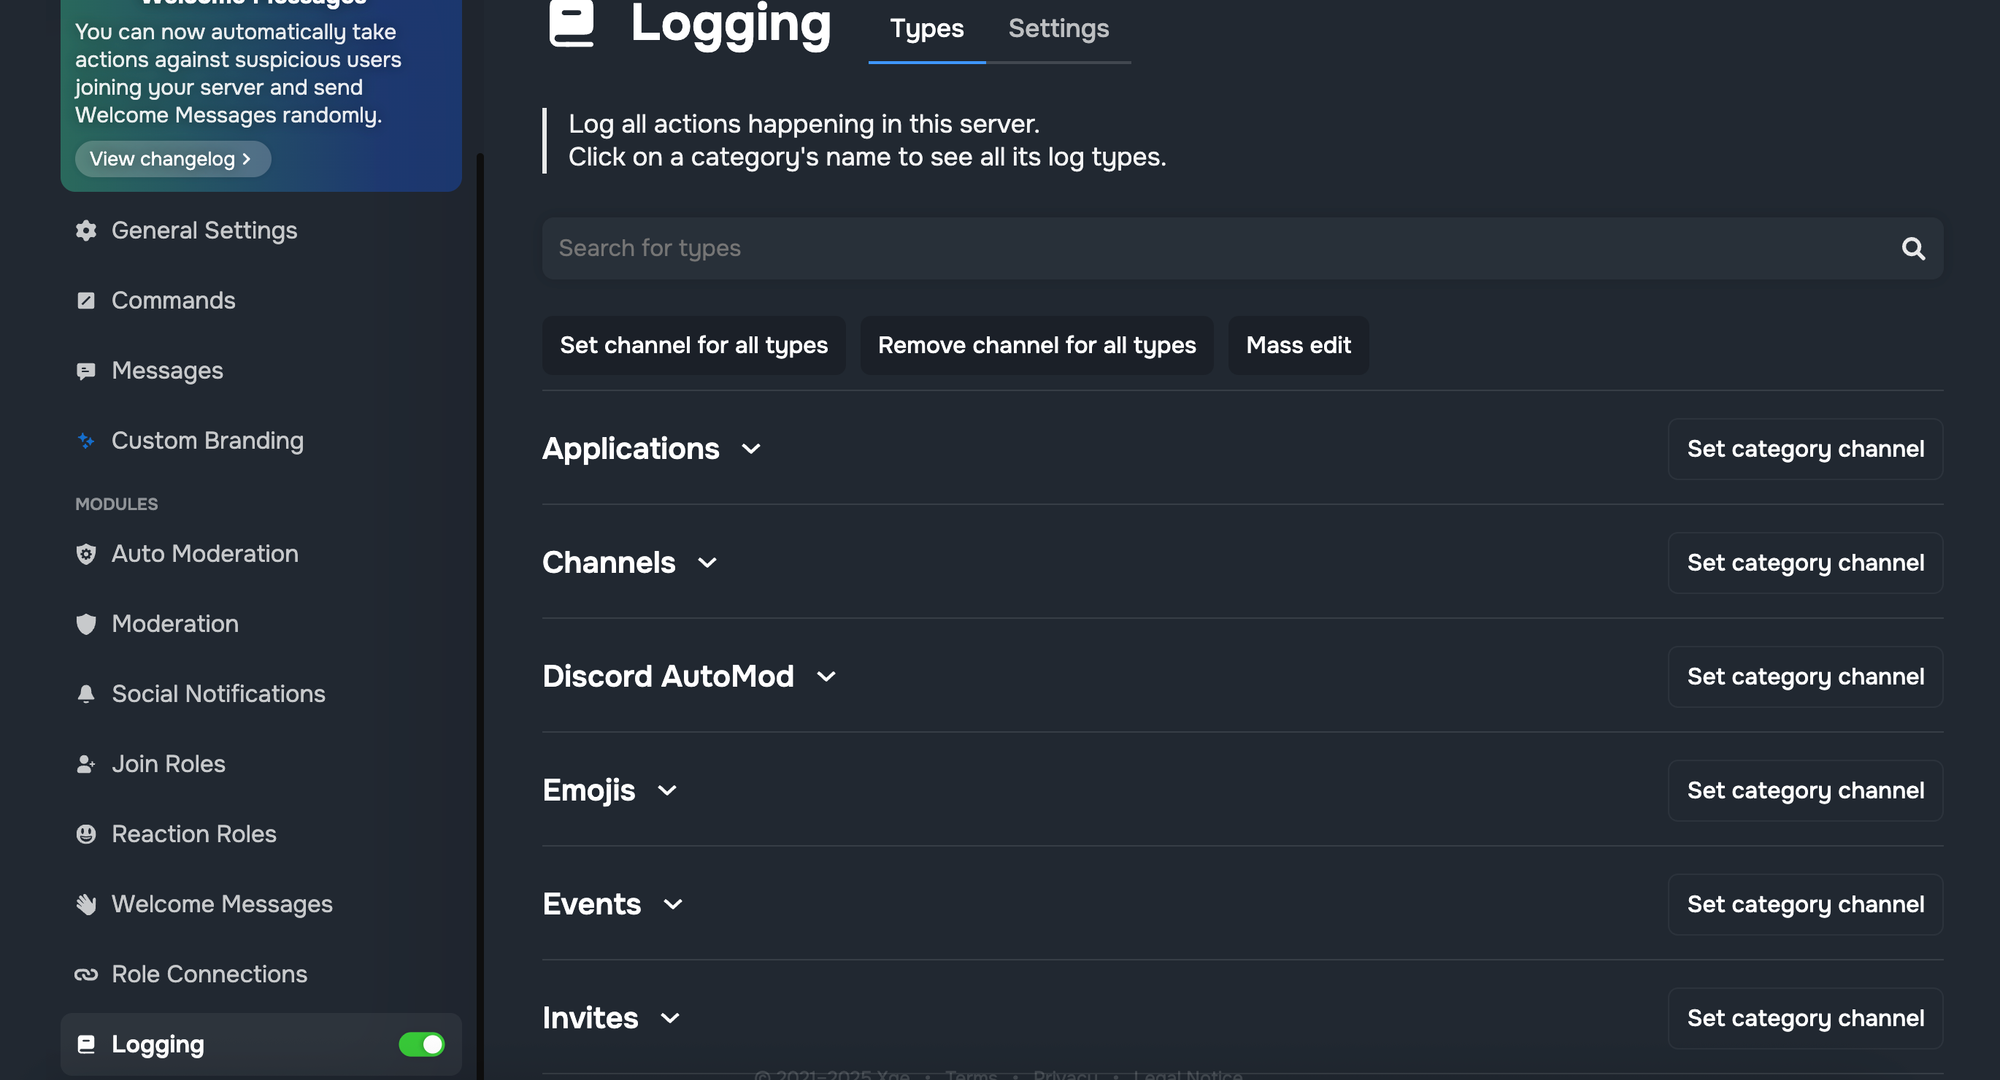
- Logging: Ensure Sapphire has a channel (or several channels) for logging joins, leaves, message deletions, edits, etc. This helps in auditing and moderation transparency.
Sapphire Pricing
Free for almost all features. All features of Sapphire are available to every server at no cost, except for Custom Branding (The developers may accept donations or offer an optional patronage, but functionality is not paywalled.)
If you'd like Sapphire to have your avatar and your name, it will cost from $100+/month
Discord Servers Best For Sapphire
New or small servers that need a powerful all-in-one bot without budget for premium upgrades. Also great for communities that want to heavily customize bot messages and behavior. If you’re looking for a no-cost solution that handles moderation, roles, and basic utilities in one, Sapphire is an excellent choice.
Sapphire Limitations
Because Sapphire is free and community-supported, very large servers might run into the bot’s rate limits or performance issues during peak times (it doesn’t have the extensive infrastructure of some paid bots). Additionally, it doesn’t have specialized features like music streaming or economy games – its focus is utility and moderation. For those, you’d use dedicated bots alongside it. Finally, while customization is a strength, it also means setup can take a bit longer as you tweak every message to your liking.
ProBot Overview
What makes ProBot stand out is its focus on combining moderation with a warm welcome experience for new members. ProBot is a very popular all-in-one bot (used on over 10 million servers) that provides advanced moderation tools alongside customizable welcome/goodbye images and messages. Essentially, it’s like getting MEE6’s key features plus a polished welcome system in one package.
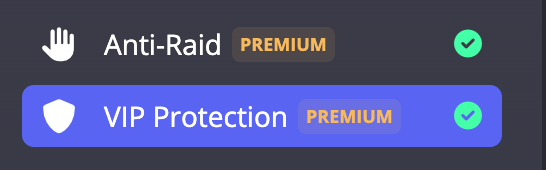
On the moderation side, ProBot includes automoderation capabilities to detect spam, offensive language, excessive mentions, and raids. It can automatically mute or kick users who trip the anti-raid protections (a big reason many large servers use ProBot), although both Anti-Raid and VIP Protection are Premium features
Its logging is in-depth, capturing edited/deleted messages and member join/leave events for review. ProBot also supports custom commands and reaction roles, letting you automate responses and role assignments without needing additional bots.
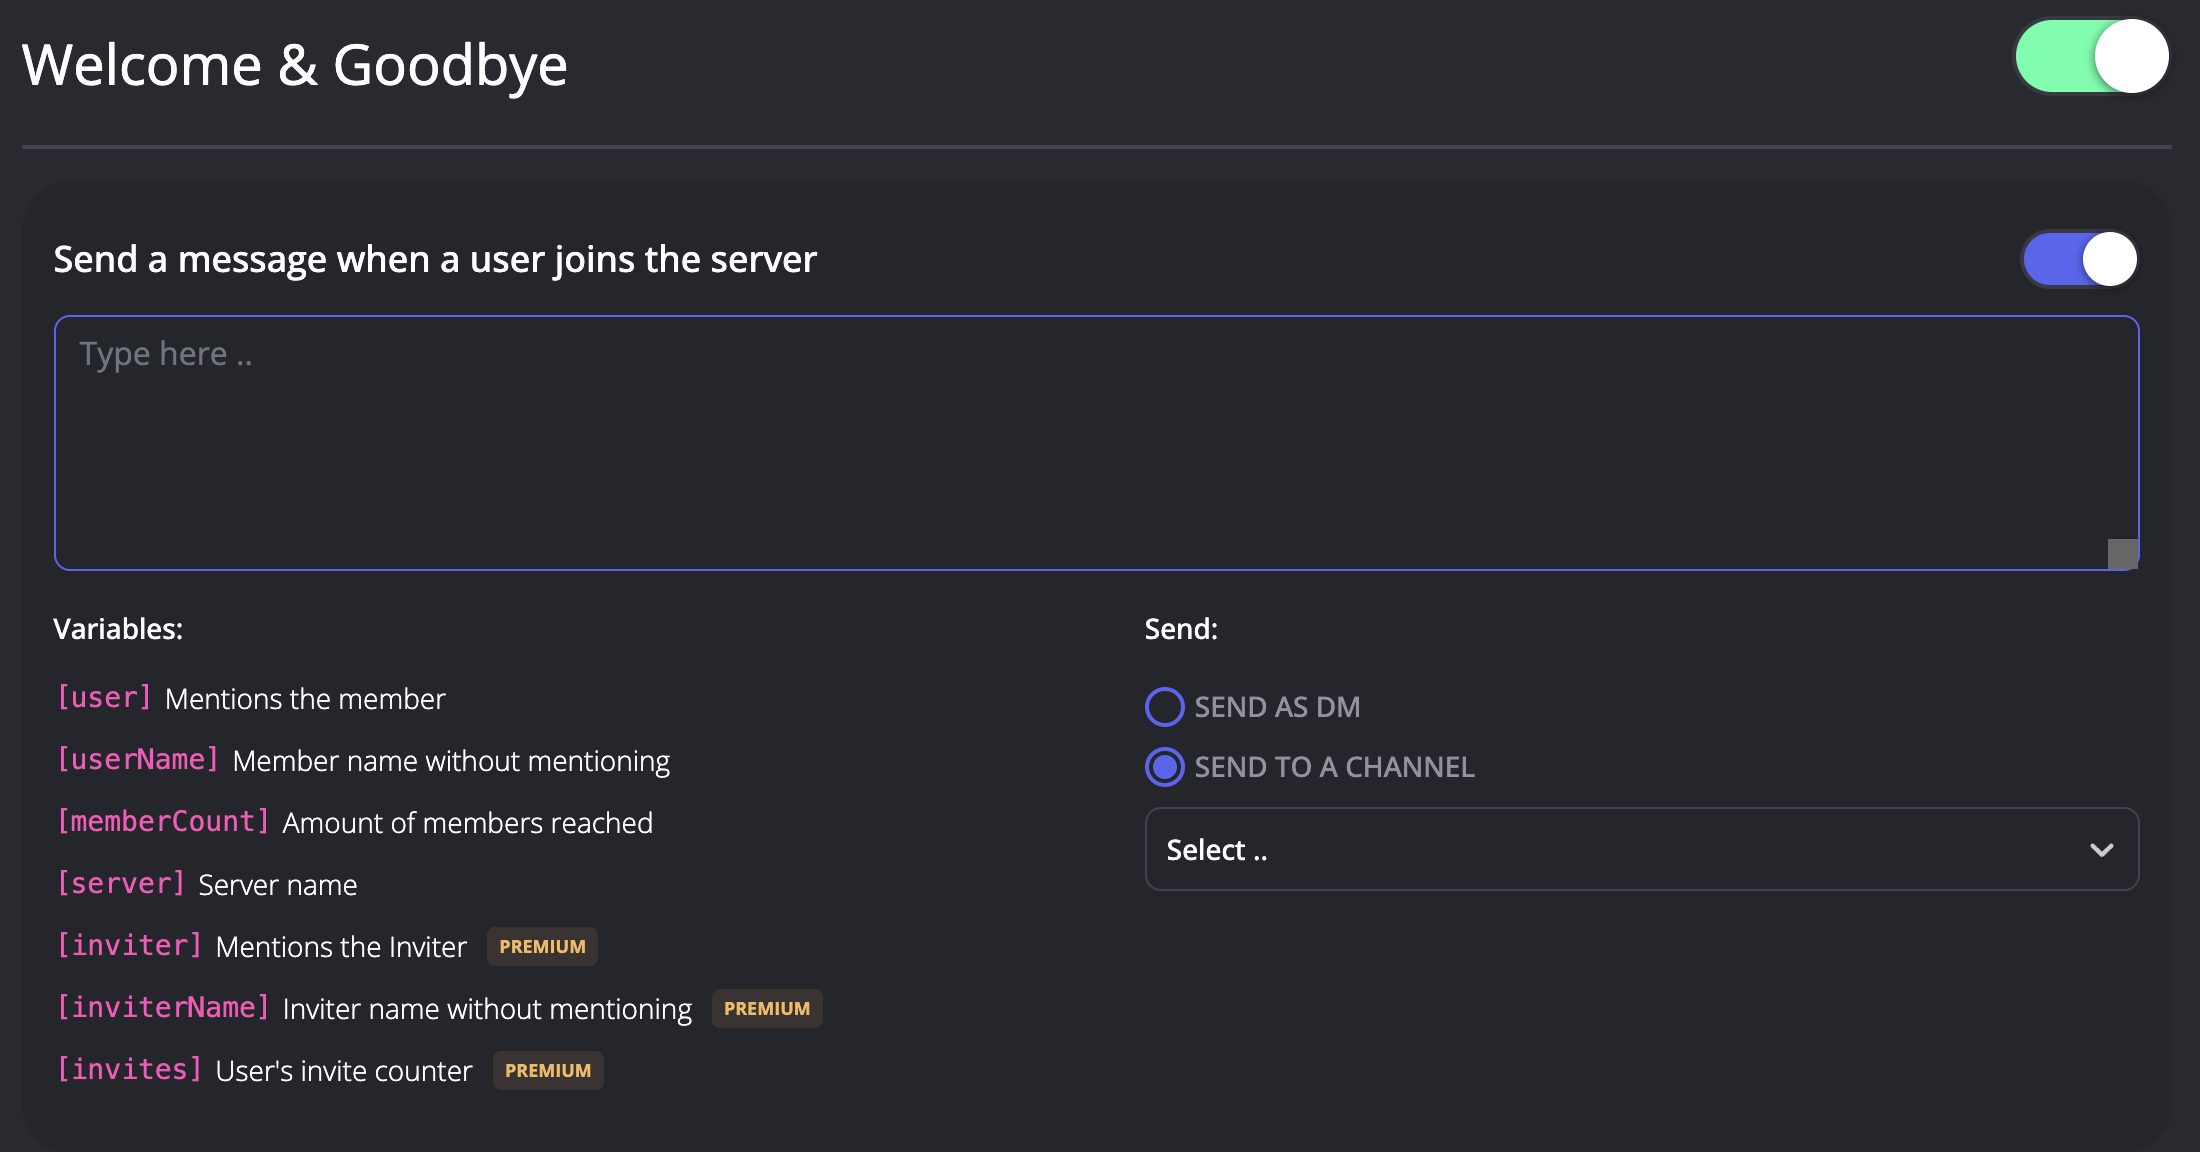
Where ProBot truly shines for community growth is its welcome module. You can design welcome images with the new member’s username and avatar embedded, choosing from templates or adding your own background. A personalized welcome card posted in your channel helps newcomers feel recognized immediately. You can also set custom welcome and leave messages, giving your server a friendly, on-brand first impression. For example, ProBot might greet a user with a colorful image that says “Welcome, @User!”—something far more eye-catching than a default text message.
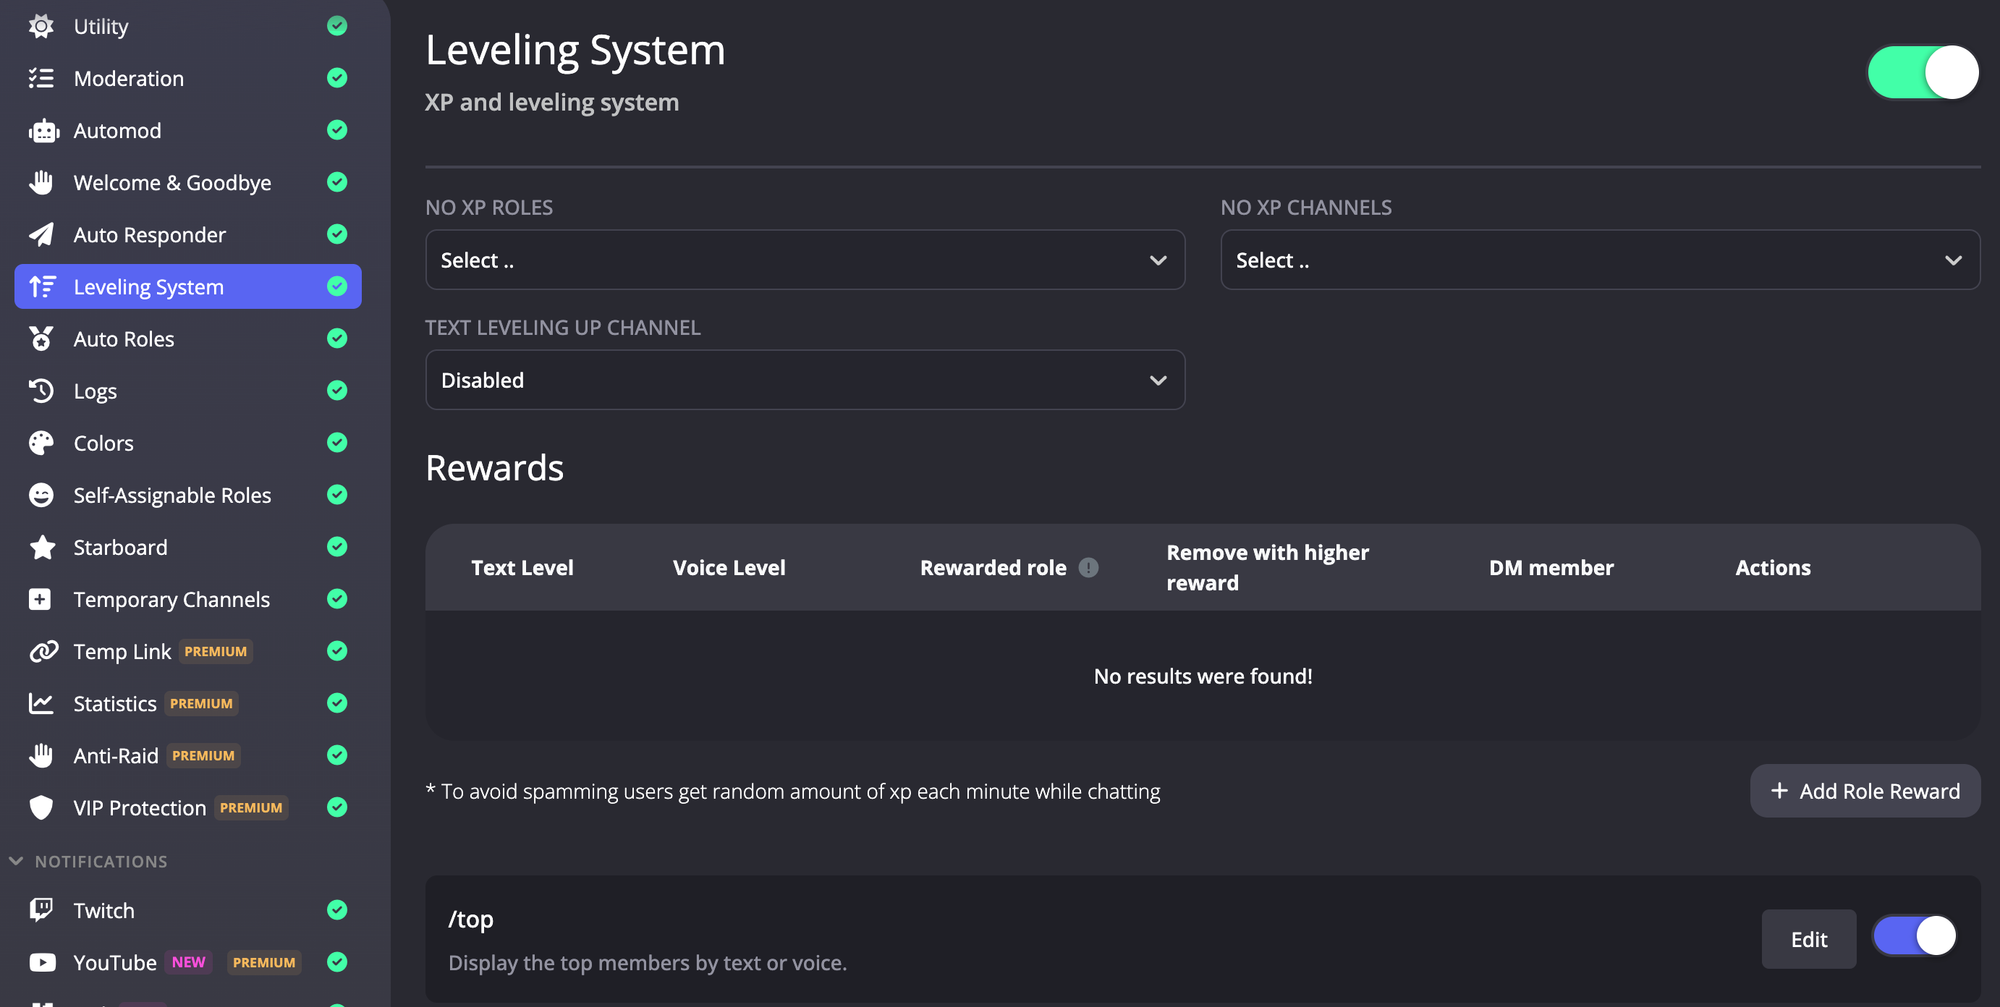
ProBot’s leveling system and economy features are similar to other multi-purpose bots: members earn XP for chatting to level up, and you can configure role rewards for participation. It even has fun social commands (like generating memes or random jokes), making it an engaging general-purpose bot.
Despite offering so much for free, ProBot does have premium tiers that unlock even more. Premium primarily increases limits (for example, more auto-response slots, higher quality music playback, and an anti-raid protection toggle for big communities). However, the free tier is generous enough for most medium-sized servers.
Setting Up ProBot on Your Discord Server
Step 1: Invite ProBot
- Visit the ProBot website and click Add To Discord.
- Authorize the bot with your Discord account and select the server where you want to add ProBot.
- Grant ProBot the recommended permissions. It may request Administrator for full functionality, but you can skip that and manually give specific rights like Manage Roles, Manage Messages, Kick/Ban, etc.
- Once invited, you’ll typically get a welcome DM or message from ProBot confirming it’s in your server.
Step 2: Configure Welcome Settings
- Go to the ProBot dashboard online. Under Welcome & Goodbye, upload or choose a background image for welcome cards. Customize the text (you can use variables like
{user}for the username).
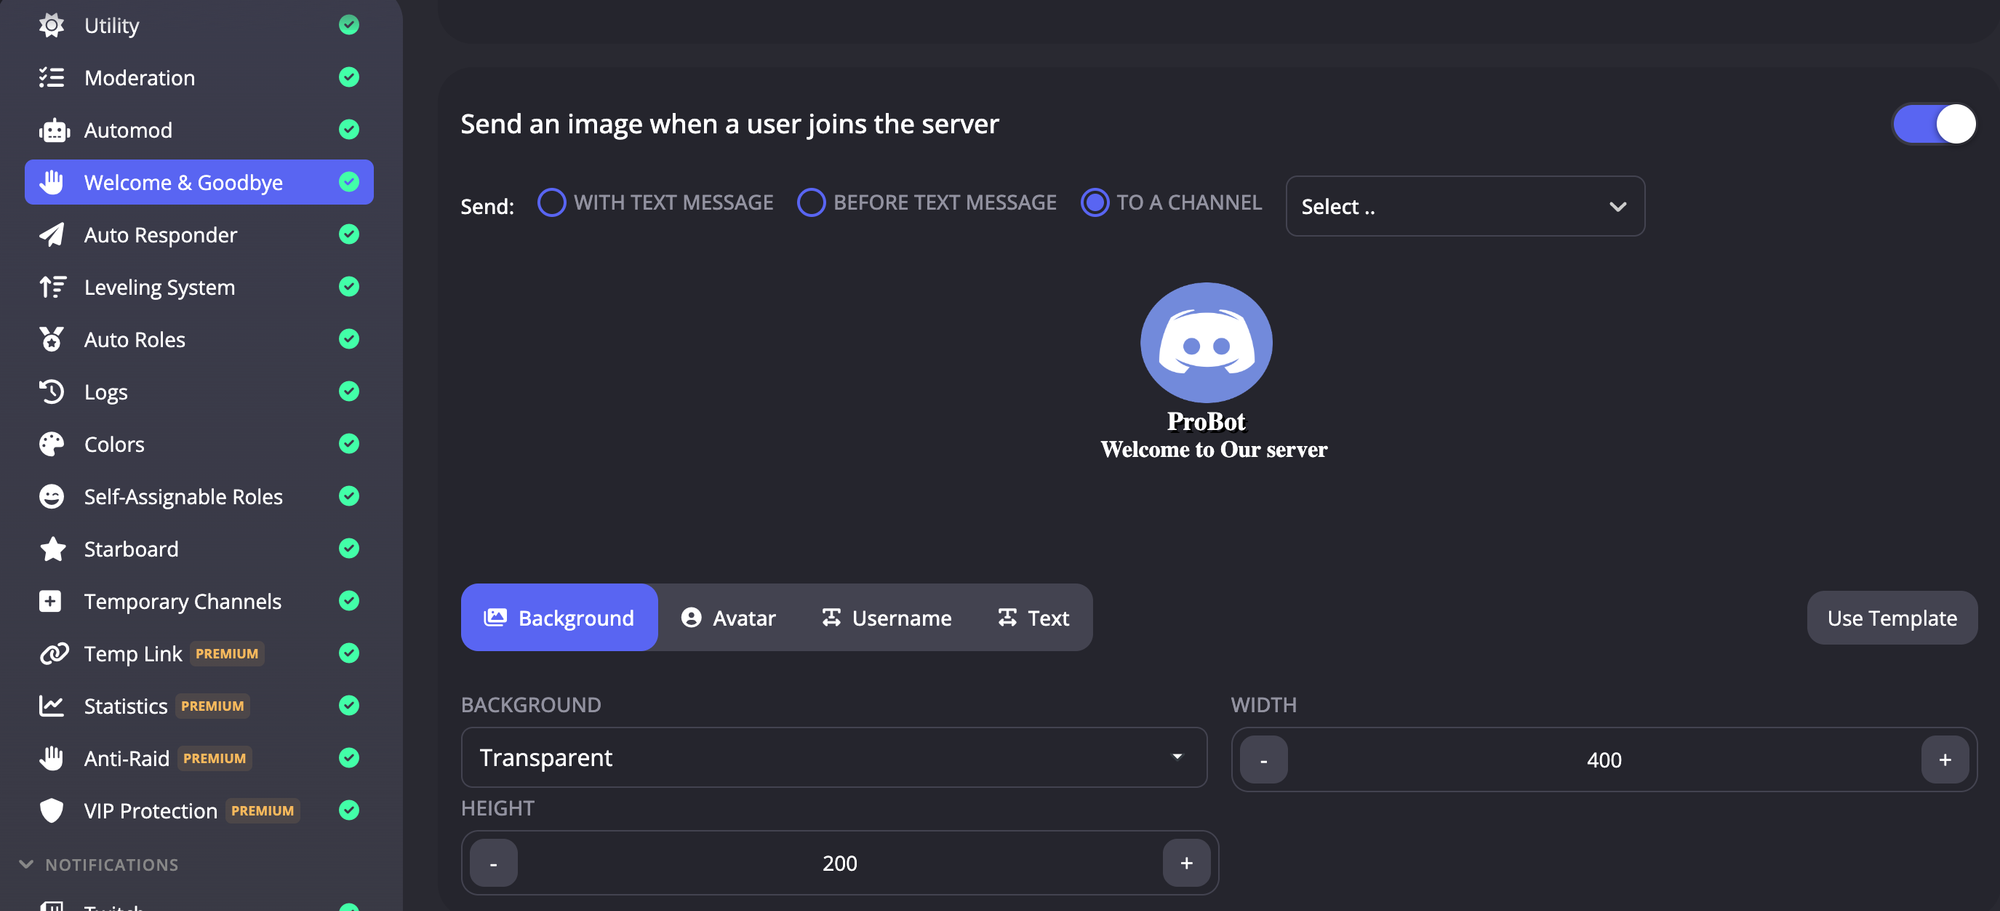
- Set the channel where welcome messages should be posted. Do the same for leave messages if you want ProBot to announce departures.
- Test by using the
+welcomecommand (or appropriate command) to see how the welcome image looks.
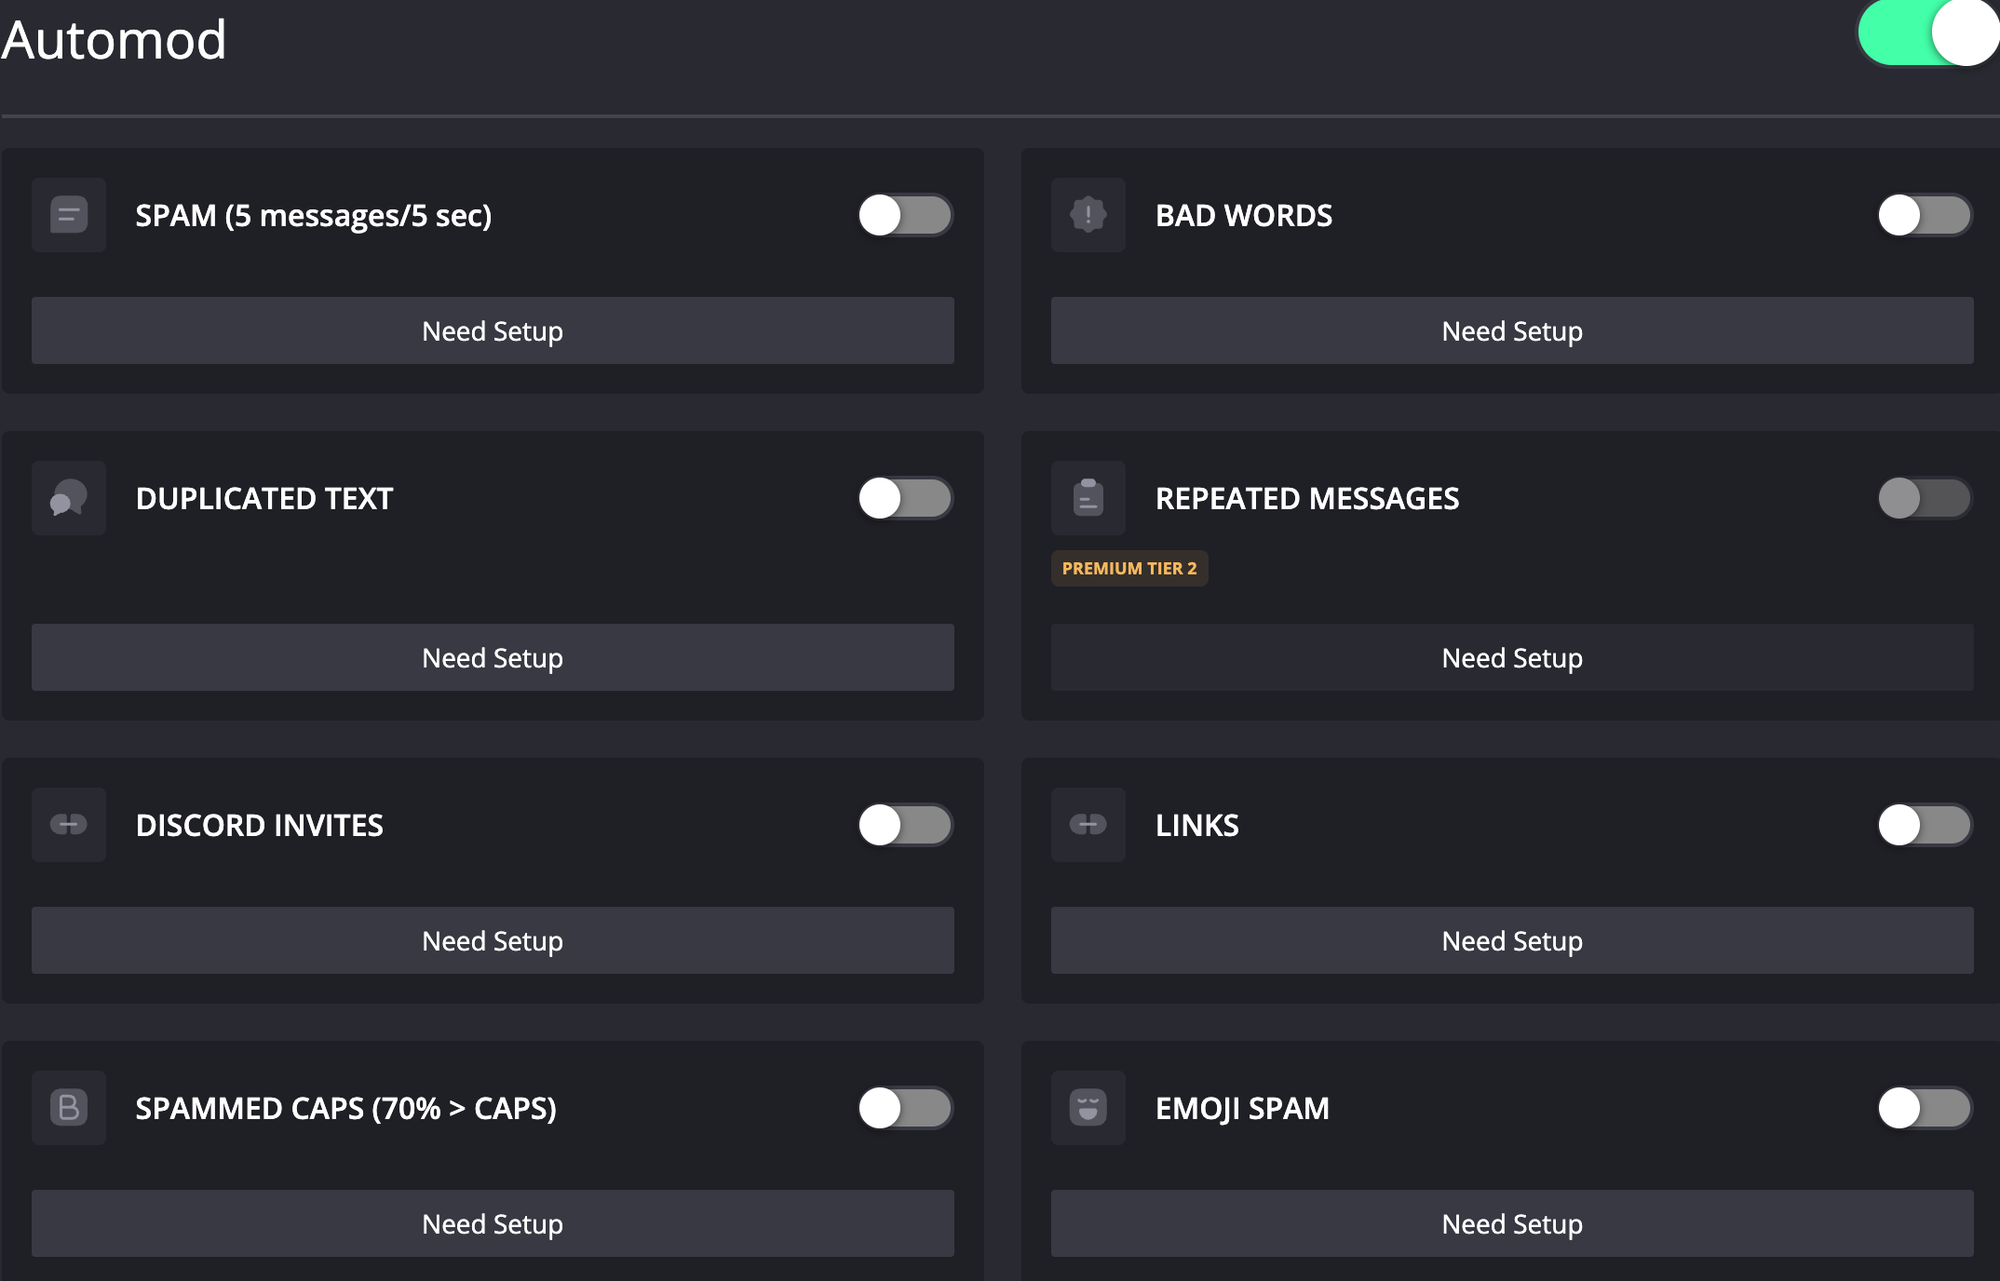
Step 3: Enable Auto-Moderation
- In the dashboard, check the Automod section. Enable filters such as anti-spam, bad words, link filtering, and raid detection.
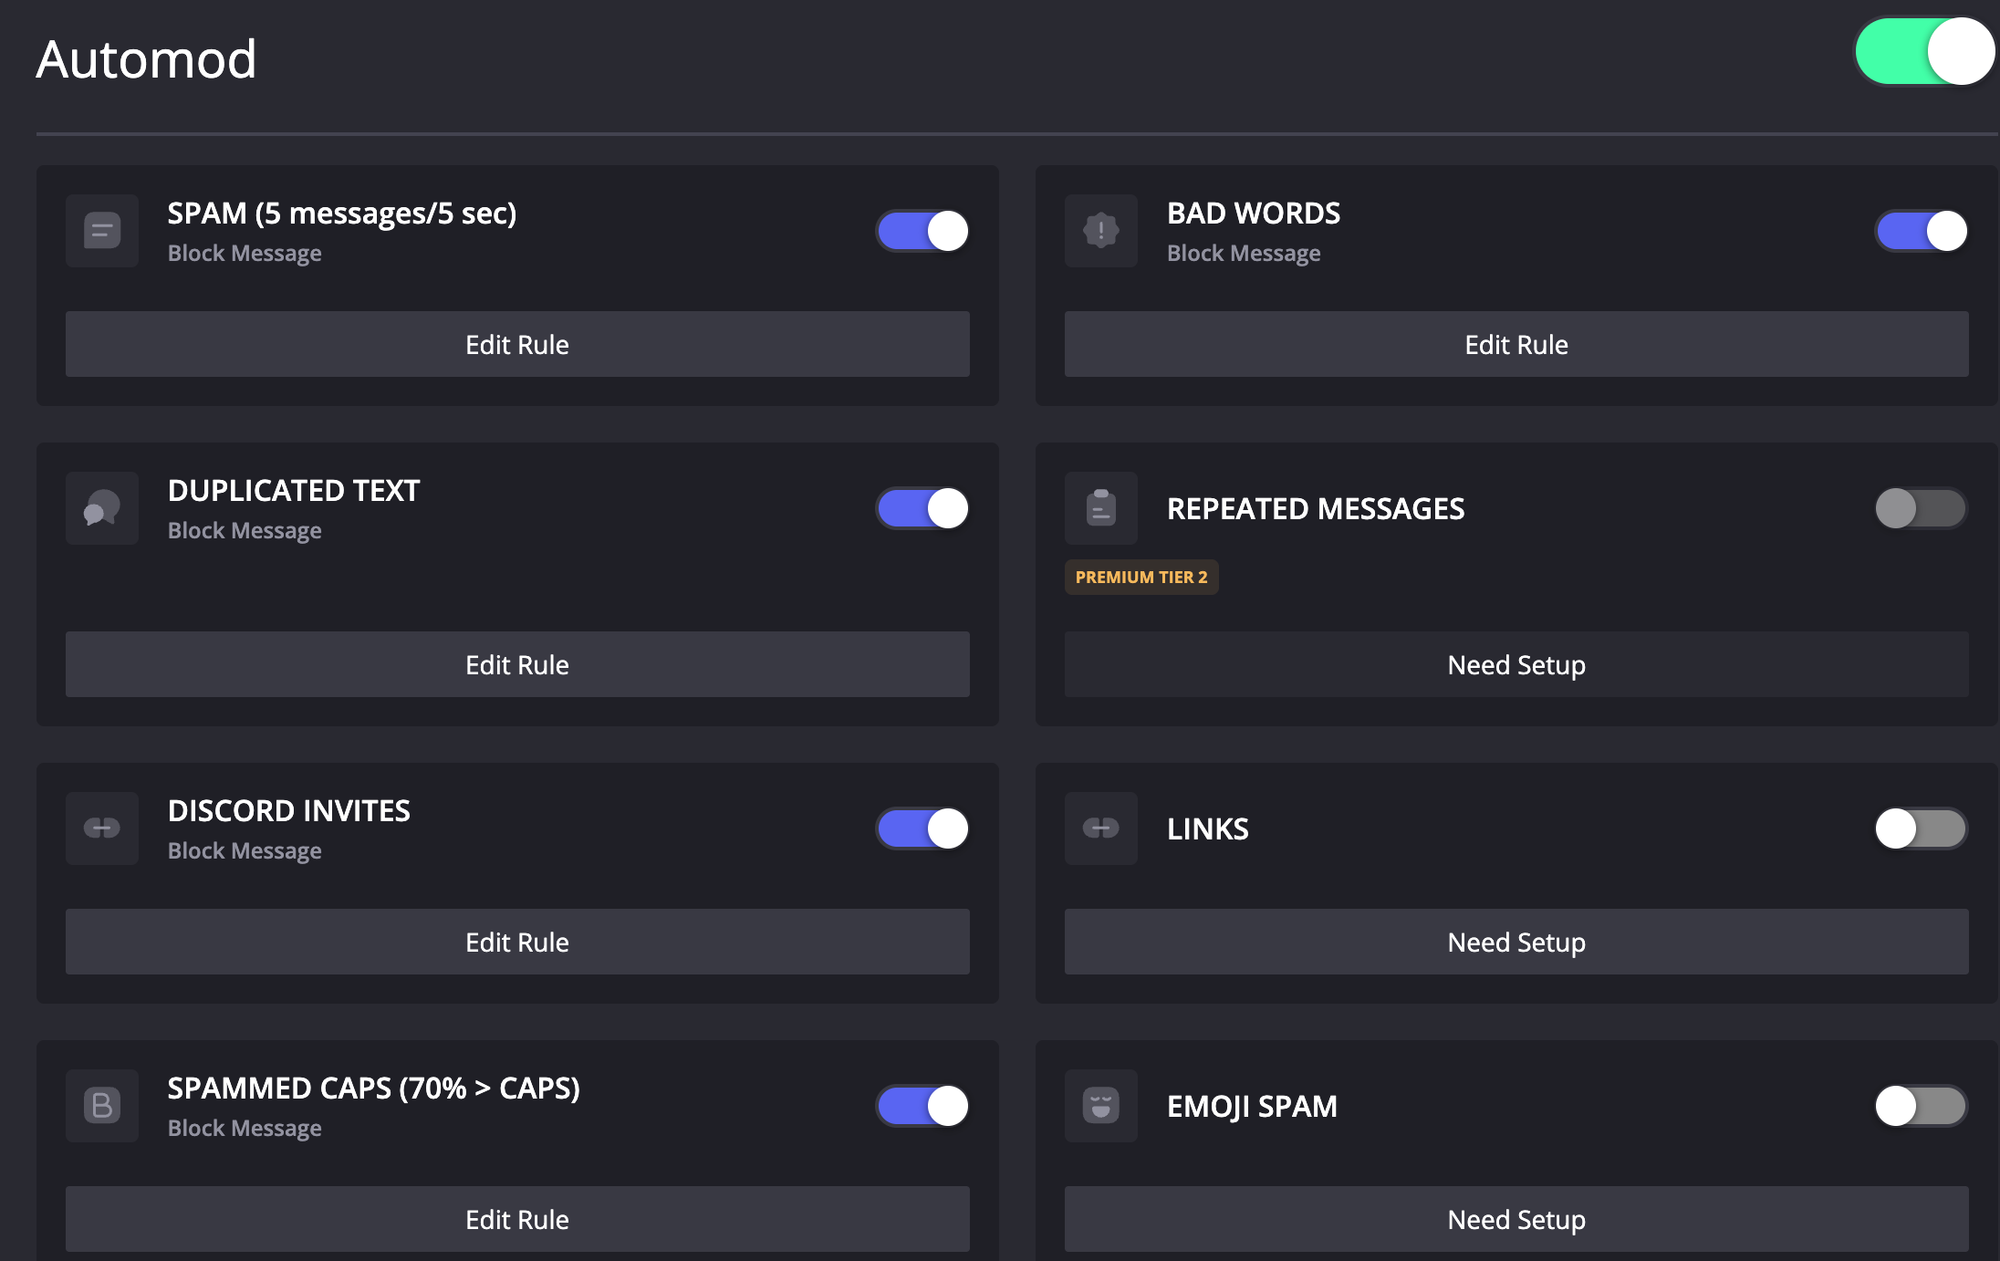
- Adjust thresholds (e.g., 5 messages in 10 seconds = mute) and actions (warn, mute, kick, ban). ProBot’s premium users can toggle a more aggressive anti-raid mode for large servers.
- Set up a #logs channel where ProBot will post moderation logs (configurable in settings).
Step 4: Explore Leveling Features
- If you want leveling, make sure it’s enabled (ProBot has a leveling system that’s on by default). You can customize XP rates or role rewards for certain levels.
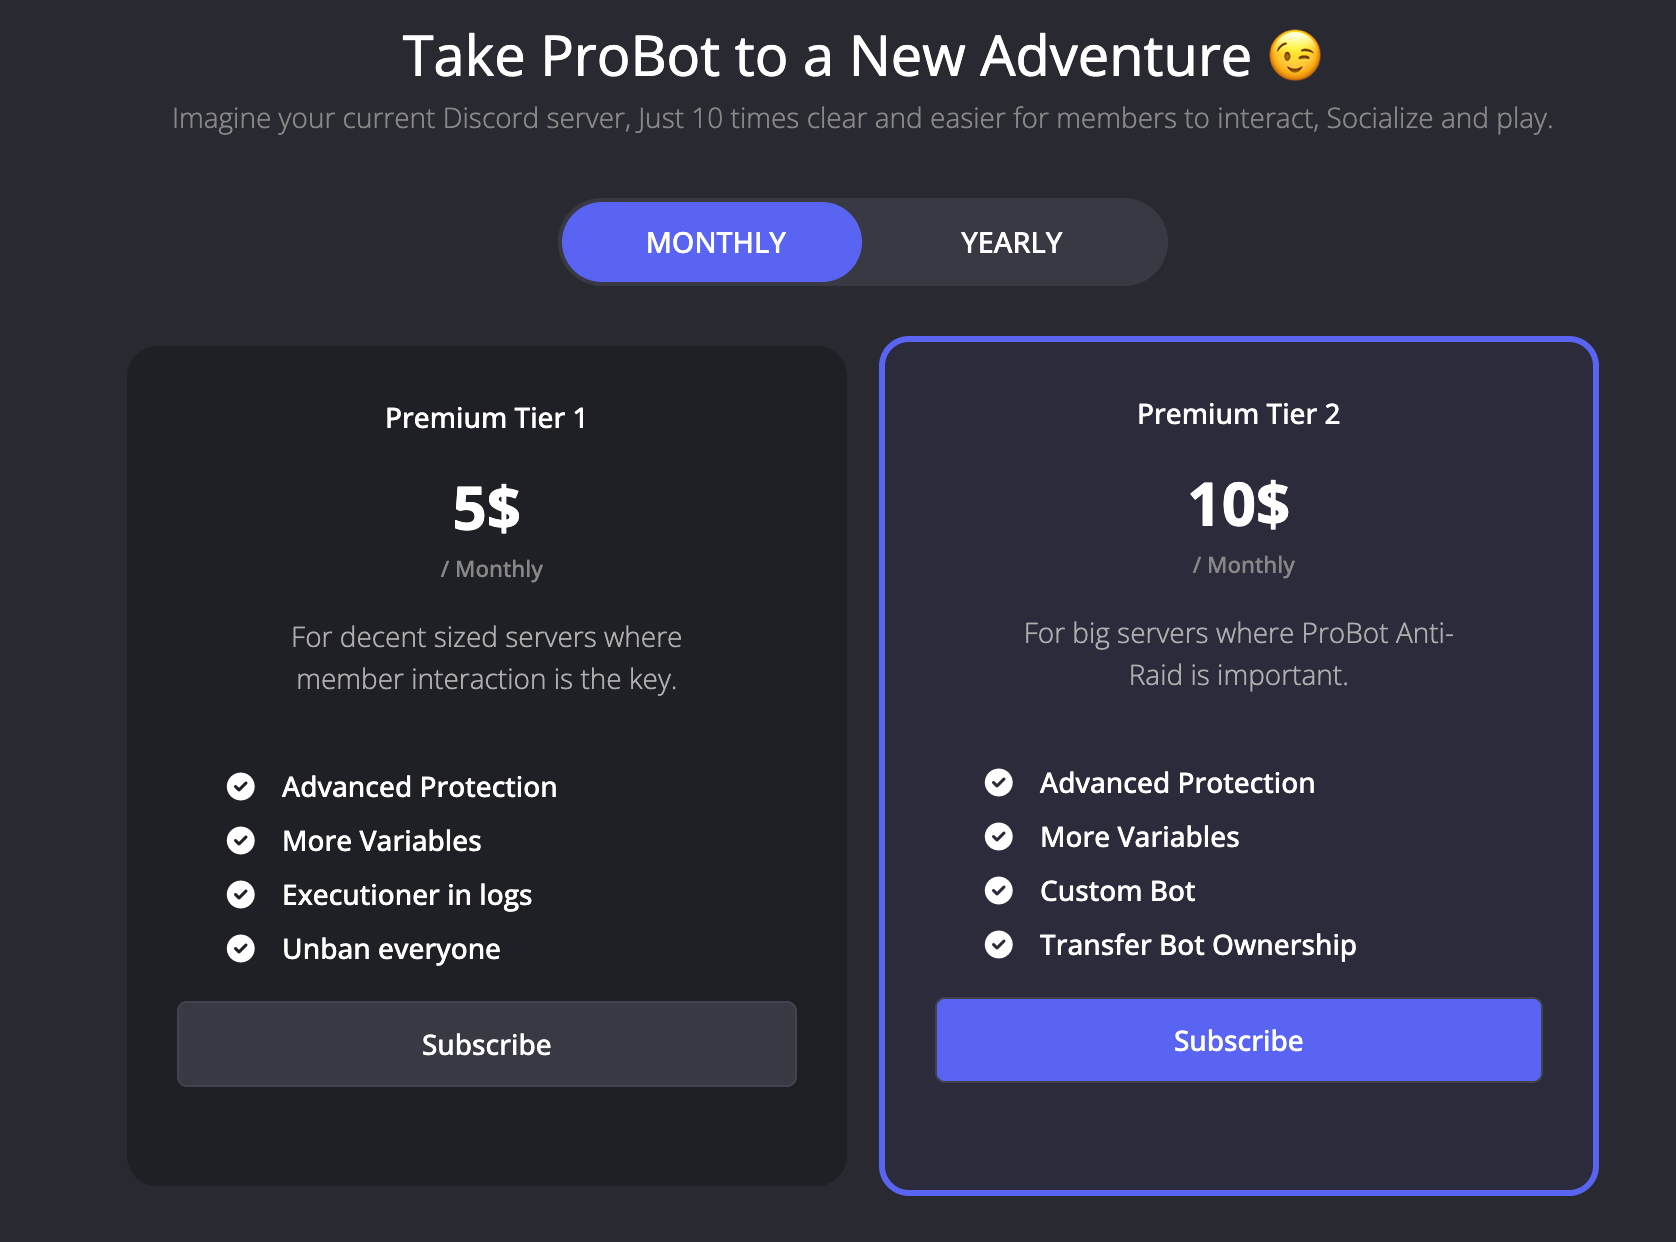
ProBot Pricing
Most of ProBot’s features are available for free. They offer two premium tiers for those who want advanced capabilities: Premium Tier 1 at about $5 USD/month, and Tier 2 at about $10 USD/month. Premium gives extra perks such as higher automod limits, more welcome card variations, priority support, the ability to use a custom bot avatar/name, and stronger anti-raid protection. Each premium subscription applies to one server.
Discord Servers Best For ProBot
Servers that want a friendly all-in-one bot with strong moderation plus a personalized welcome experience. It’s ideal for mid-sized communities where you need to manage raids or spam, but also care about making new members feel at home. ProBot fits well in gaming communities, fan clubs, or any server that wants both robust protection and a warm, customized greeting for newcomers.
ProBot Limitations
Some of ProBot’s coolest features (like fully custom welcome images with no watermark, or the highest anti-raid settings) require a premium subscription. Also, because ProBot tries to do so much, it can overlap with other bots – if you already use a dedicated bot for, say, leveling or music, you might prefer to disable those modules in ProBot to avoid conflicts.
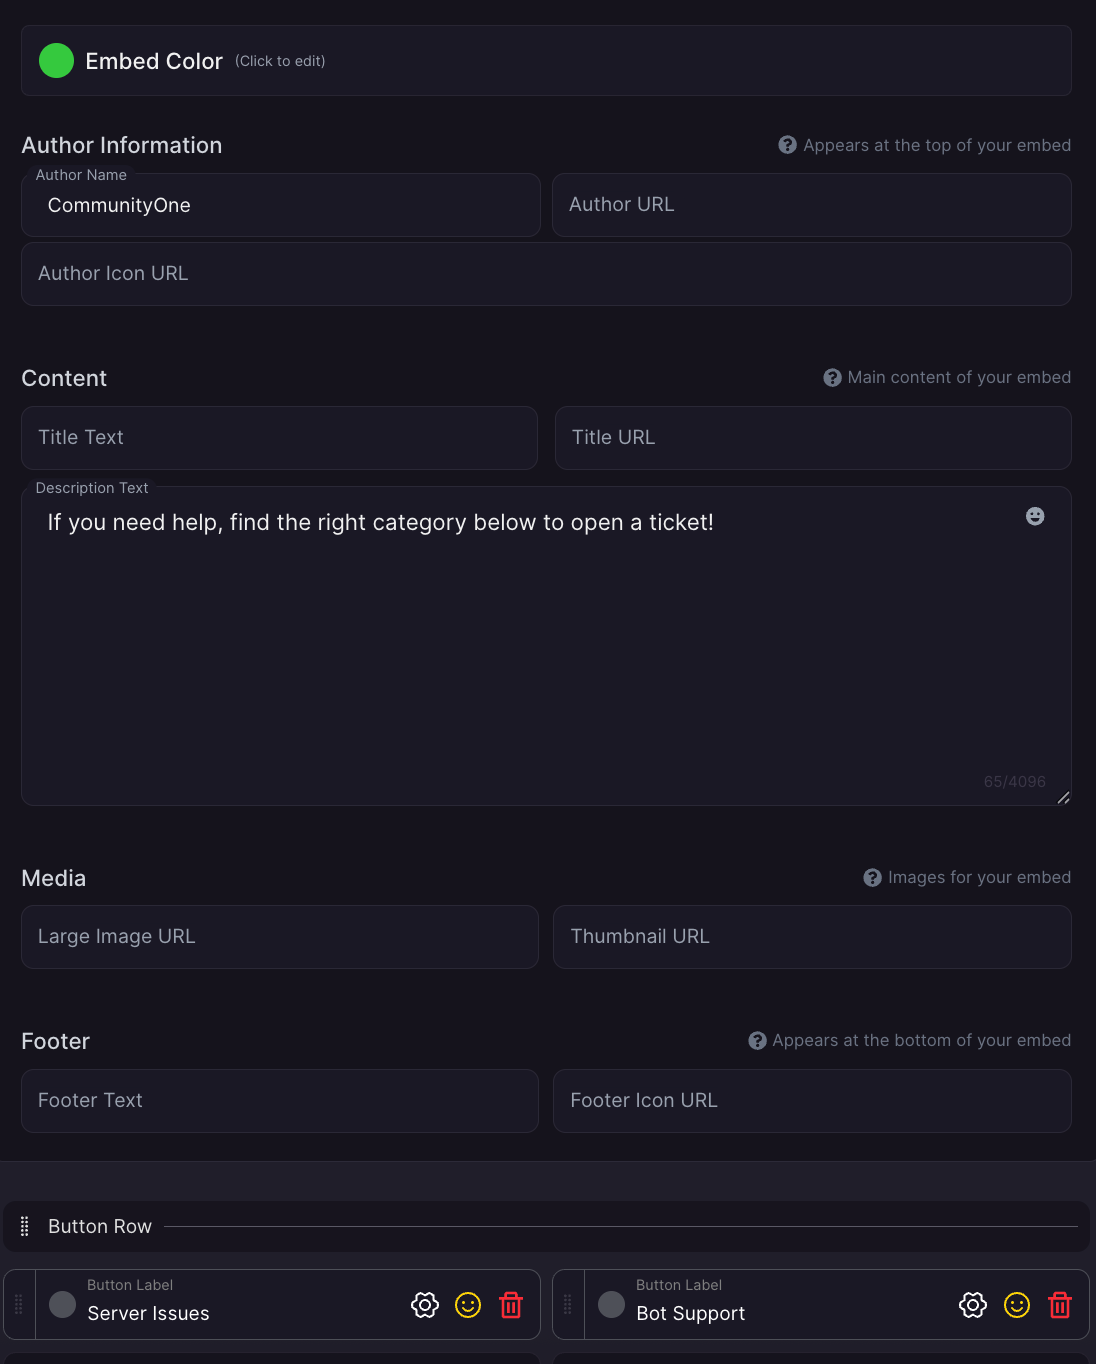
Communityone Overview
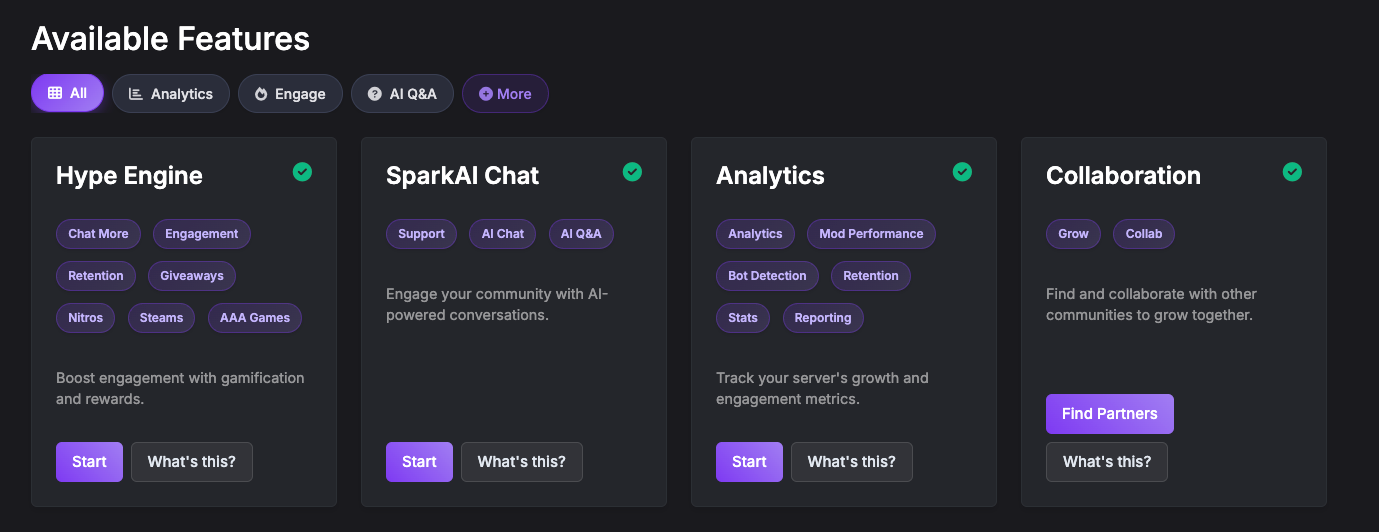
What makes CommunityOne stand out is how it combines multiple powerful functions into a single, streamlined bot designed for growth and engagement. While most Discord bots cover one niche—like moderation, leveling, or Q&A—CommunityOne integrates them all with AI-driven depth. Its Spark AI Assistant turns server documentation and FAQs into instant, accurate responses, reducing repetitive support tasks and ensuring members get help right away. Meanwhile, the Hype Engine gamifies participation with personalized quests, raffles, and rewards that make activity fun, boosting engagement up to four times more than usual. Add to this the Collab feature, which links your server with like-minded communities, and you have a bot that doesn’t just manage your members but actively helps you grow them.
Want to 4x your Discord engagement and get free nitros & steams every week✌?
Beyond engagement, CommunityOne shines as a data-first platform. Its advanced analytics dashboard gives community managers clear insights into what’s happening in real time—who’s active, which channels are thriving, how moderators are performing, and even sentiment across conversations. This makes it possible to plan events at the right time, optimize mod coverage, and see exactly where the community is strongest or needs more focus. Paired with built-in AI moderation tools like spam detection and smart onboarding, CommunityOne balances growth with safety, giving managers confidence that their server is both thriving and secure.
For community managers short on time, CommunityOne’s appeal lies in its simplicity and efficiency. You can set it up within minutes via its user-friendly dashboard, train Spark on your own resources, and immediately see results—whether in automated support, higher engagement, or actionable insights from analytics. While some advanced features sit behind the premium plan, even the free tier provides enough functionality for smaller communities to benefit. In short, CommunityOne isn’t just another bot—it’s a complete community management system that can replace multiple tools, making it one of the most valuable options for serious server owners.
Setting Up CommunityOne on Your Discord Server
Step 1: Invite CommunityOne
- Go to the official CommunityOne website or the Discord App Directory.
- Click Add to Discord.
- Authorize with your Discord account and select your server.
- Confirm the permissions (CommunityOne usually needs message read/write, manage channels, and manage server permissions).
Step 2: Assign Bot Role & Permissions
- In Server Settings → Roles, move the CommunityOne role above the roles it will manage.
- Limit unnecessary permissions — avoid giving full Administrator unless required.
- Ensure it has access to:
- Read/Send Messages in engagement channels.
- Manage Roles (for quest rewards).
- Manage Channel (for bot analytics)
Step 3: Configure Spark AI (Q&A Assistant)
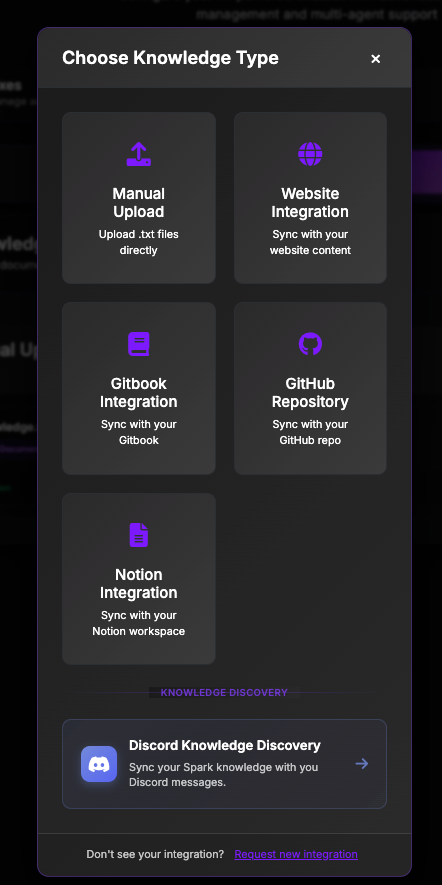
- Open the CommunityOne dashboard.
- Upload your server docs, FAQ, wiki, or onboarding guides so Spark can learn from them.
- Customize Spark’s personality:
- Custom Prompt/AI Style: friendly, professional, or playful.
- AI Rules: limit Spark to answering only from your provided docs (to avoid “hallucinations”), or really anything you want.
- Decide where Spark is active:
- Example: only in #support or #help.
- Optional: enable Spark in threads for private Q&A.
Step 4: Activate the Hype Engine (Gamified Engagement)
- Go to Hype Engine and make sure that it is toggled on.
- Create custom quests (optional):
- Trivia, polls, or community-specific challenges.
- Check out your website
- Configure rewards (optional):
- Special roles (e.g., “OG”).
- Special merch

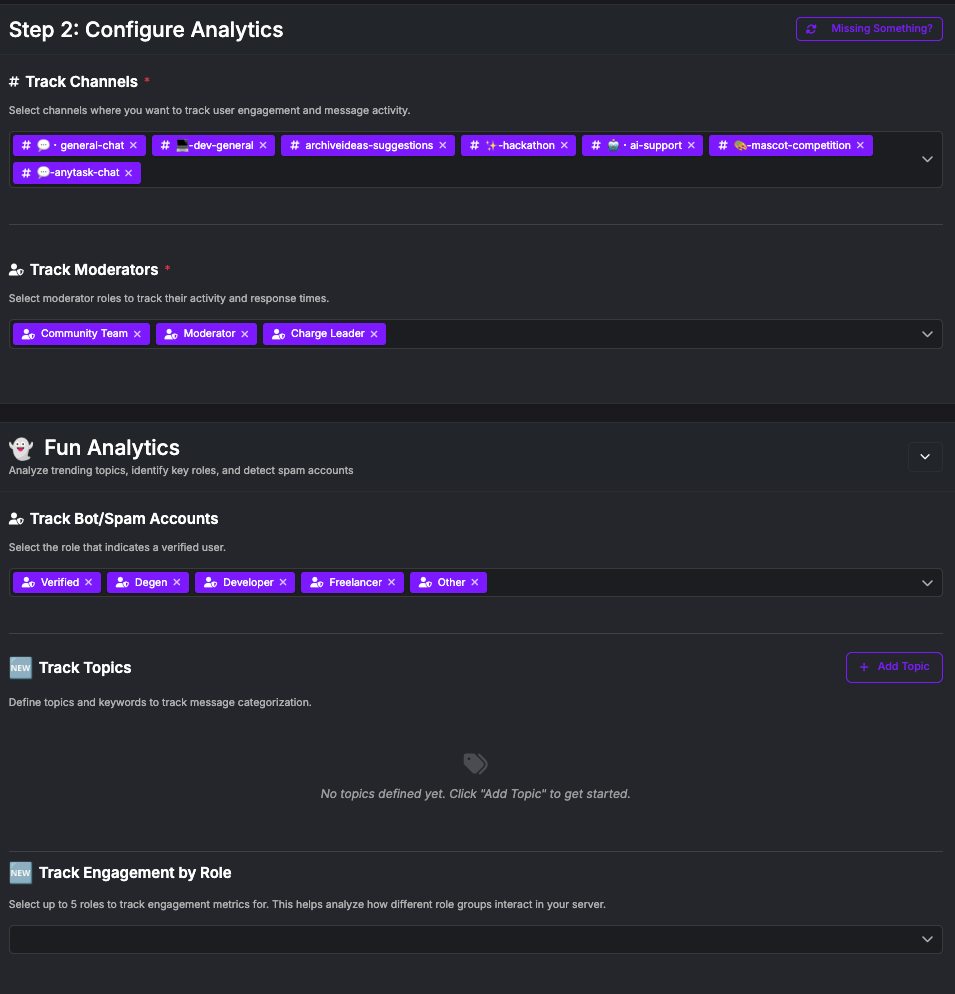
Step 5: Analytics & Insights
- CommunityOne provides built-in analytics dashboards:
- Member retention rate.
- Daily activity trends.
- Which quests drive the most engagement.
- Check weekly reports to see what’s working and adjust quests/Spark accordingly.
Communityone Pricing
The base bot is free. Premium plans start at about US$15 per month, to US$150/month for its supercharged analytics. Note that you can also get a premium through referrals.
Discord Servers Best for CommunityOne
Communities that love data and AI—server owners who want to visualise activity and actively create more engagement.
CommunityOne Limitations
It doesn’t perform moderation; you’ll need another bot (Dyno, MEE6 or YAGPDB) to handle infractions.
MEE6 Overview
MEE6 remains one of the most popular all‑in‑one bots because it bundles moderation, automated messages, role reactions, custom commands and levelling into a single package.
While some seasoned mods consider MEE6 the worst bot due to its constant push for premium features, it is overall a great introductory bot, especially if you want to install one and be done.
The bot can greet newcomers, assign roles based on reactions, notify about YouTube/Twitch uploads, and reward members with XP. A music plugin and a trivia quiz add entertainment, while the automation system enables admins to build custom commands without writing code.
Mee6 is excellent if you start to build your community and don't expect a lot of traffic. The downside to having everything is that MEE6 doesn't excel in any particular area. Once your community gets a lot more traffic, we recommend that you gradually replace major MEE6 features with a bot that specializes in these areas: moderation, role assignment, verification, and AI.
MEE6 Pricing:
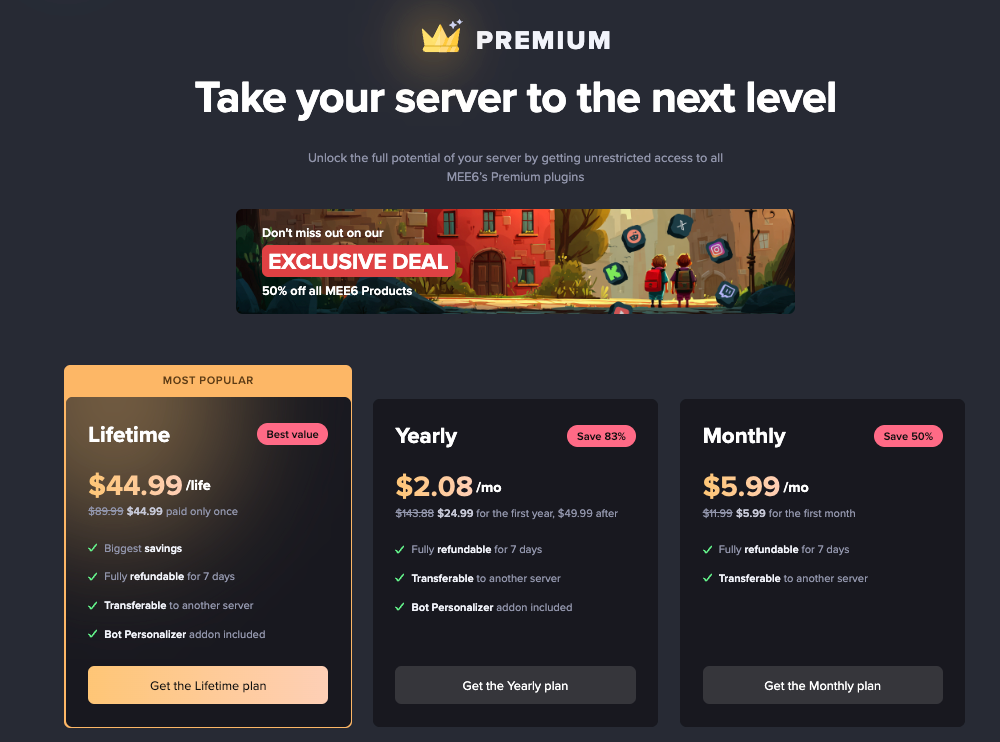
MEE6 offers a free plan with limited functionality. Premium tiers are priced at about US$11.95 per month, or you can opt for a yearly plan (~US$49.99) or lifetime licence (~US$89.99). Paid plans unlock unlimited custom commands, more XP rewards, and additional plugins.
Setting Up MEE6 on Your Discord Server
Step 1: Invite MEE6 to Your Server
- Go to the official MEE6 website.
- Click “Add to Discord”.
- Authorize MEE6 with your Discord account and choose the server you want it in.
- Review the permissions carefully (don’t blindly accept Admin unless you trust it 100%).
Step 2: Configure Core Permissions
- Create a MEE6 role in your server hierarchy.
- Make sure it sits above the roles you want it to manage.
- In Server Settings → Roles, restrict unnecessary permissions.
- Tip: Give MEE6 only what it needs (Manage Roles, Kick/Ban, Manage Messages) instead of full admin.
Step 3: Enable Moderation Tools
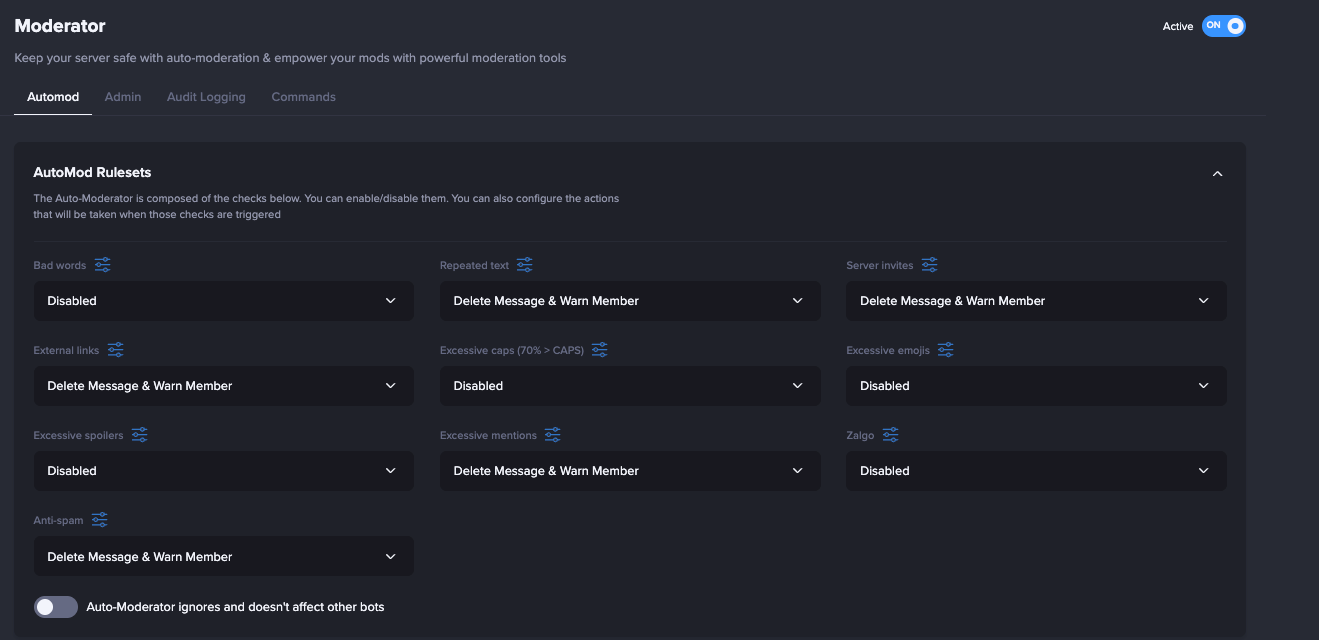
- In the MEE6 dashboard, turn on the Moderator Plugin.
- Configure:
- Bad words filter (customizable list).
- Anti-spam (links, mass mentions, emoji spam).
- Strike system (warn → mute → kick/ban).
- Create a mod-logs channel where MEE6 will post all moderation actions.
Step 4: Set Up Leveling & Engagement
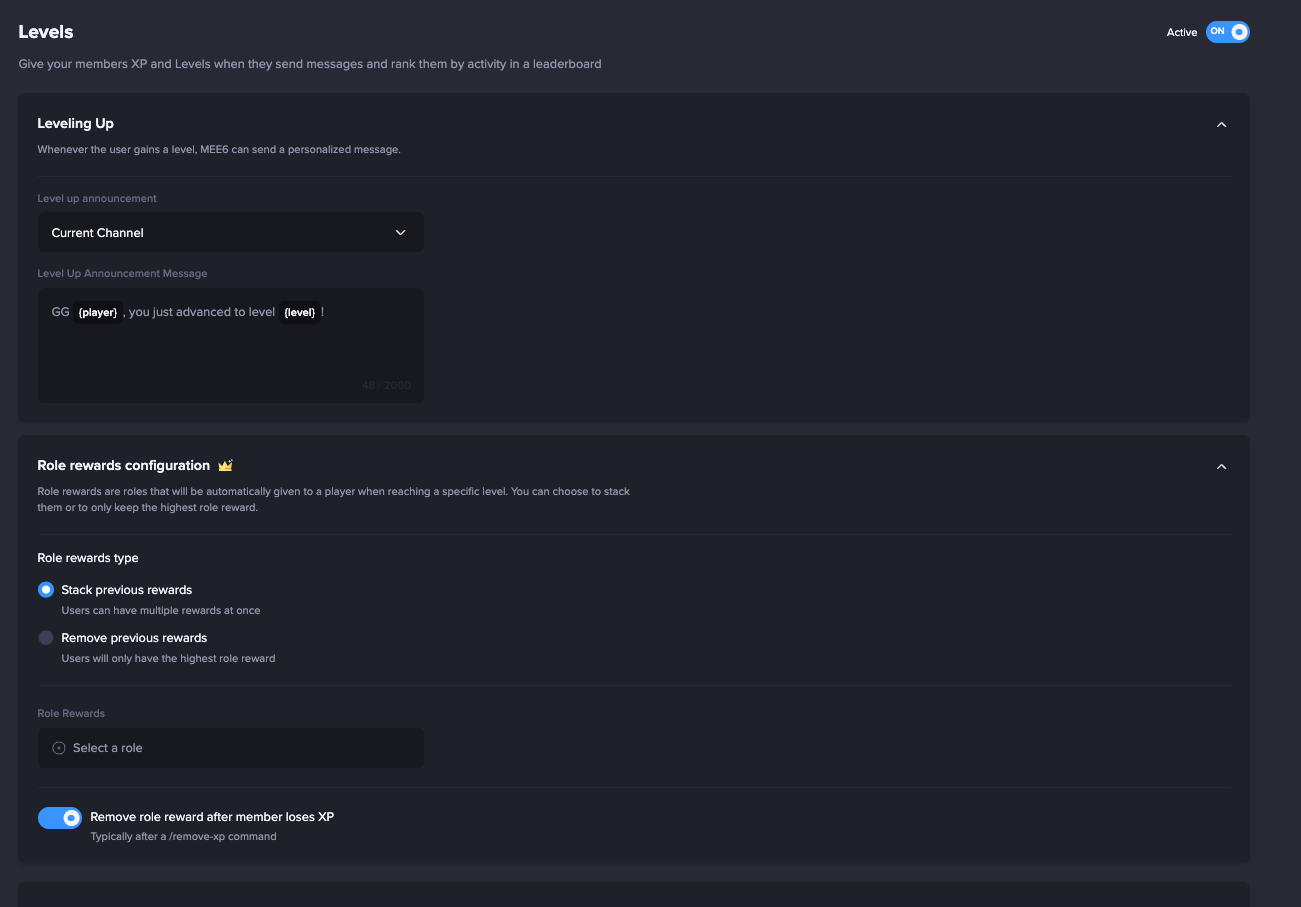
- Enable the Leveling Plugin.
- Decide where XP is earned (all channels or only a few).
- Adjust XP rates to avoid spammy farming.
- Add level-up role rewards (example: Level 5 → “Active Member”).
Step 5: Automate with Custom Commands
- Use Custom Commands to automate FAQs.
Example:- Command:
!faq→ Reply: “Check our FAQ here: <link>”
- Command:
- Set welcome messages in a dedicated channel.
- Configure auto roles for newcomers (e.g., Verified, Newbie).
Discord Servers Best For MEE6
Servers that require a dependable moderator and engagement system without managing multiple specialized bots, for early stage communities.
MEE6 Limitations
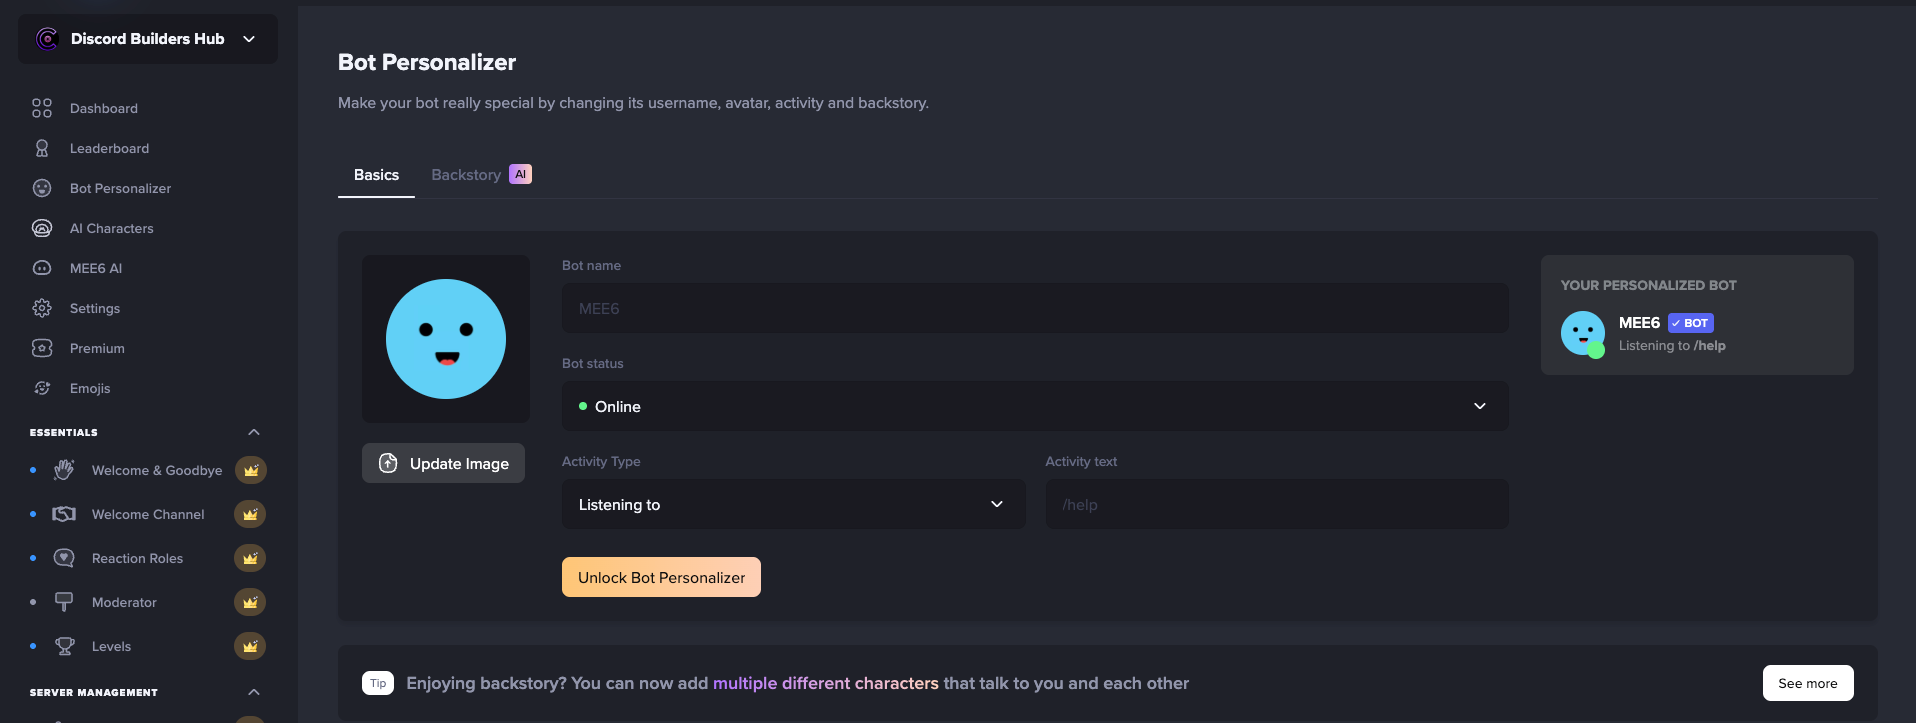
Some advanced features (like custom branding, unlimited reaction roles, and full music playback) require a premium.
Dyno Overview
What makes Dyno stand out is its reputation for being one of the most stable and reliable moderation bots available, trusted by millions of servers over the years. While many bots offer similar moderation commands, Dyno’s strength lies in how comprehensive and customizable those tools are. Features like timed mutes and bans, an integrated warning system with automated punishments, and the ability to fine-tune automod settings across different channels give moderators the flexibility to handle both everyday rule-breaking and more complex scenarios. This combination of power and ease of use makes Dyno a “set it and forget it” option for servers that want peace of mind knowing their moderation tools won’t let them down.
Another defining aspect of Dyno is its logging system, which is widely regarded as one of the best in Discord moderation. The bot can record nearly every action—from message deletions and edits to bans, nickname changes, and role updates—providing a detailed audit trail that helps moderators enforce rules transparently. This is especially valuable during disputes or raids, since you can go back through the logs to see exactly what happened and why. Large communities in particular benefit from Dyno’s reliability and scalability, since it can handle heavy workloads without frequent downtime.
Beyond moderation, Dyno integrates well with other bots by using a unique command prefix and offering optional modules like music or roles that you can enable or disable as needed. This flexibility means it can either be your server’s primary moderation bot or work alongside others without conflict. Whether you’re managing a small community or a large partnered server, Dyno’s mix of powerful moderation tools, robust logging, and proven stability make it a top choice for long-term server management.
Setting Up Dyno on Your Discord Server
Step 1: Invite Dyno
- Go to the official Dyno website.
- Click Add to Server.
- Log in with Discord and select the server you want.
- Review requested permissions — Dyno often asks for broad rights, including admin, but you can adjust them later.
Step 2: Configure Dyno’s Role & Permissions
- Create a dedicated Dyno role and place it above roles Dyno needs to manage.
- Avoid giving full Administrator permission unless necessary. Instead, enable:
- Manage Roles
- Manage Messages
- Kick / Ban Members (if you want moderation).
- Check channel-specific permissions: limit Dyno to only the channels where you want it active.
Step 3: Enable Core Moderation Features
- Turn on the Automod Module.
- Block slurs, spam, repeated characters, and invite links.
- Configure action escalations (warn → mute → kick → ban).
- Set up a mod-logs channel so Dyno posts all moderation actions there.
- Define custom punishments (e.g., 3 warns → mute for 1h).
Step 4: Auto Roles & Verification
- Use the Autorole Module to assign a “New Member” role when users join.
- (Optional) Create a reaction role menu so members can self-assign interests, region, or game roles.
- If you want extra security, pair Dyno with a CAPTCHA or verification process before giving full access.
Step 5: Announcements & Automation
- Enable the Announcements Module to auto-welcome members in a #welcome channel.
- Use the Custom Commands Module to make shortcuts:
- Example:
?rules→ “Check our server rules here: <link>”
- Example:
- Schedule repeating messages (e.g., weekly event reminders).
Step 6: Utility Features
- Music Module (optional, if enabled in your server).
- AFK Module → Members can set
?afkand Dyno shows a status if they’re mentioned. - Timers Module → Automate temporary reminders or events.
Discord Servers Best For Dyno
Communities wanting fine‑grained control over moderation with the option to add simple auto‑responders or announcements.
Dyno Limitations
Some features that are free in other bots (e.g., server backups or auto‑reactions) are locked behind Dyno’s premium tiers.
Carl‑bot Overview
What makes Carl-bot stand out is the way it combines strong moderation tools with features that directly empower members, making it one of the most versatile bots for community management. Its core moderation suite covers all the essentials—ban, kick, mute, purge, and warn—along with temporary punishments like tempmutes or tempbans. Where Carl-bot really shines, however, is its configurable automod system. Server owners can set up precise triggers to filter bad links, keywords, excessive mentions, or even spammy behaviors, with the option to warn or mute offenders automatically. This level of fine-grained control allows moderators to maintain a clean, safe environment without constantly micromanaging.
Beyond moderation, Carl-bot’s reaction role system is its signature feature. It allows members to assign roles to themselves simply by reacting to messages, reducing manual role management for moderators. This not only improves onboarding—by letting new members unlock channels or select interests themselves—but also gives communities a structured way to organize members by region, playstyle, or topic preference. Combined with the ability to restrict access until verification is complete, Carl-bot effectively automates one of the trickiest parts of community moderation: making sure only the right people get access to the right areas. Its suggestion system is another underrated highlight, letting members submit ideas and giving moderators an organized way to respond with yes, no, or maybe—turning feedback into a transparent process.
Carl-bot also benefits from a comprehensive dashboard at carl.gg, which makes setup and customization straightforward. While not as polished as some competitors, its onboarding guides walk you through essential features step by step, and its built-in config change logs help large mod teams stay accountable. With millions of servers already using it, Carl-bot has been tested at scale and proven to work reliably. For communities that want a bot capable of handling moderation, role management, and community engagement in one package, Carl-bot offers an excellent balance of power, flexibility, and practicality.
Setting Up Carl-bot on Your Discord Server
Step 1: Invite Carl-bot
- Go to the official Carl-bot website.
- Click Invite → select your server.
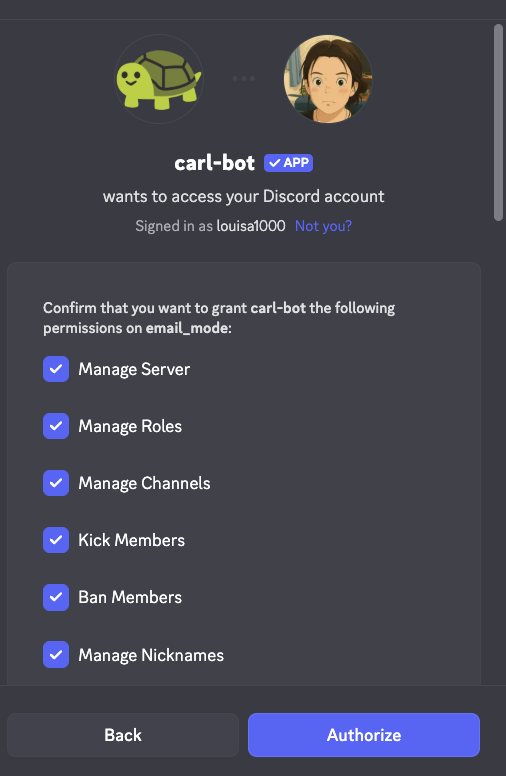
- Authorize with Discord and approve permissions.
Step 2: Configure Carl-bot’s Role & Permissions
- In Server Settings → Roles, place the Carl-bot role above the roles it needs to assign.
- Ensure it has:
- Manage Roles → required for reaction/self-roles.
- Send Messages / Manage Messages → for suggestions and moderation.
- Embed Links → for cleaner suggestion cards.
- Avoid giving Administrator unless absolutely necessary.
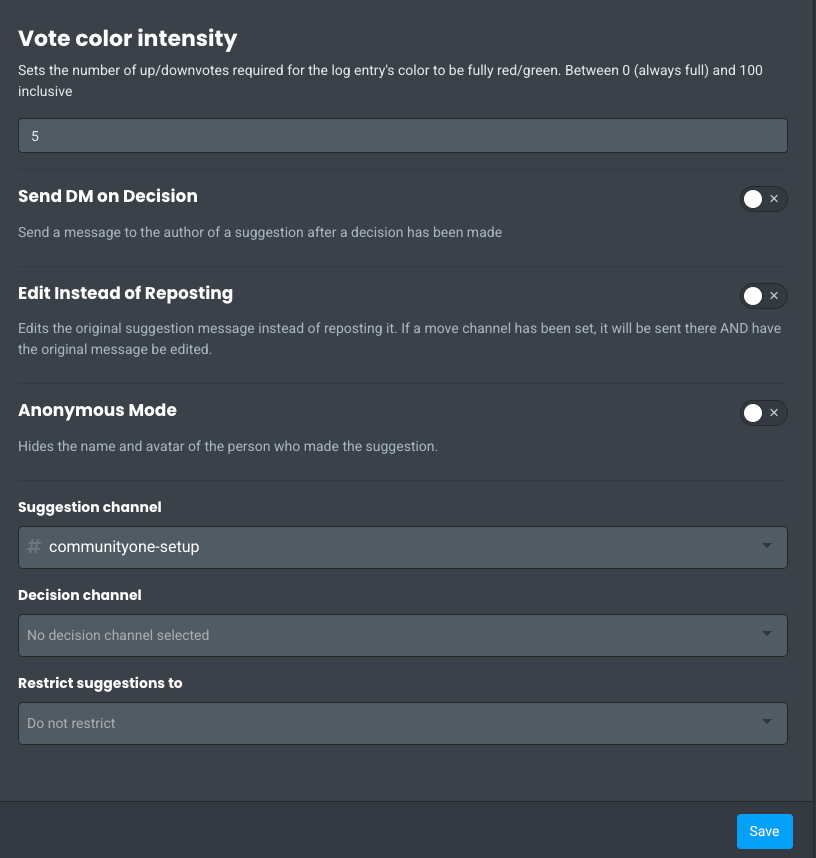
Step 3: Set Up Suggestions System
Carl-bot has a dedicated Suggestions Module.
- Enable the Suggestions Module in the dashboard.
- Create a #suggestions channel in your server.
- In the module settings:
- Select your suggestions channel.
- Choose a log channel (optional, for tracking accepted/denied suggestions).
- Customize the format (embed color, reactions like 👍 / 👎).
- Members can now submit suggestions using:
!suggest <your idea here>
Example:!suggest Add a movie night channel - Carl-bot will automatically post the suggestion in the #suggestions channel with reaction voting enabled.
- Admins/mods can mark suggestions as accepted, denied, or implemented via Carl’s commands.
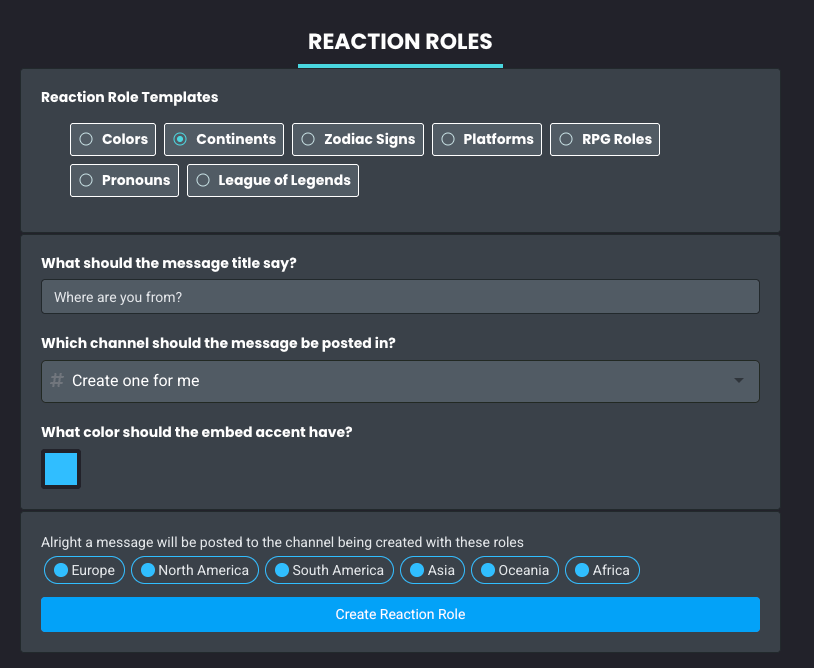
Step 4: Reaction Roles Setup
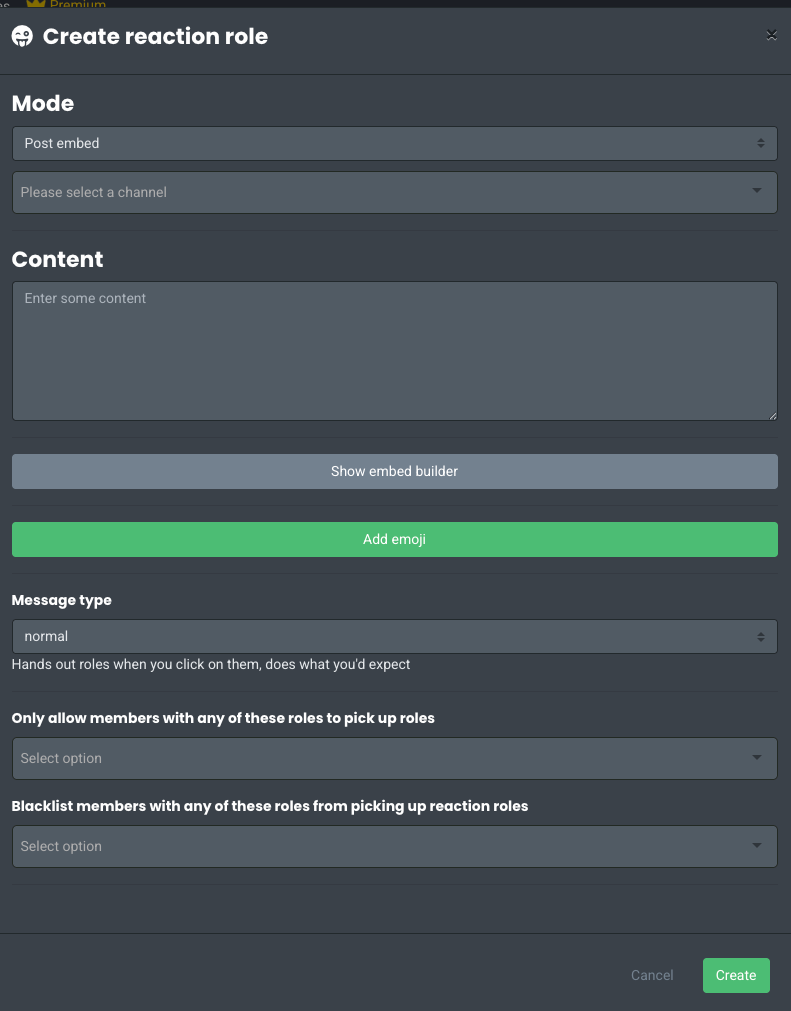
This is one of Carl-bot’s signature features.
- Go to the Reaction Roles Module in the dashboard.
- Choose the channel and message where you want the roles to appear (example: #get-roles).
- Add roles + emojis pairs.
- Example:
- 🎮 → “Gamer”
- 📚 → “Reader”
- 🌍 → “Announcements”
- Example:
- Save and post the reaction role message.
- Members can now react to get or remove roles automatically.
Pro Tips:
- Use category roles (e.g., “Games”) and let members opt into sub-roles.
- Pair with color roles (purely cosmetic, gives users choice over name color).
- For larger servers, organize reaction roles into multiple messages (e.g., “Hobbies”, “Games”, “Regions”).
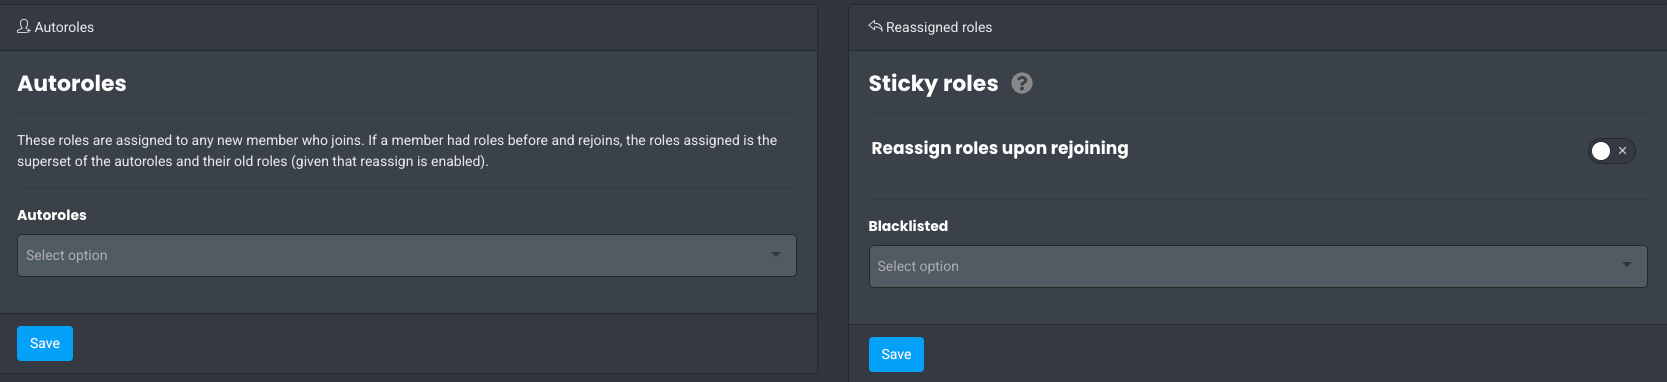
Step 5: (Optional) Advanced Role Automations
- Join Roles: Auto-assign a role when new members join.
- Sticky Roles: If someone leaves and rejoins, Carl-bot remembers their old role.
- Role Logging: Track role changes in a mod-log channel.
Carl-bot Pricing
The bot is free for basic use. Premium subscription (via Patreon or Discord) starts around US$7.99 per month for one server; plans for three or five servers cost about US$16.99 and US$25 respectively. Paid tiers unlock leveling, higher weblog limits and other advanced features.
Discord Servers Best for Carl-bot
Servers that utilize reaction roles extensively or require highly detailed logging and purge commands.
Carl-bot Limitations
As with Dyno, premium features (notably leveling) require a paid subscription. Use Arcane for free levelling!
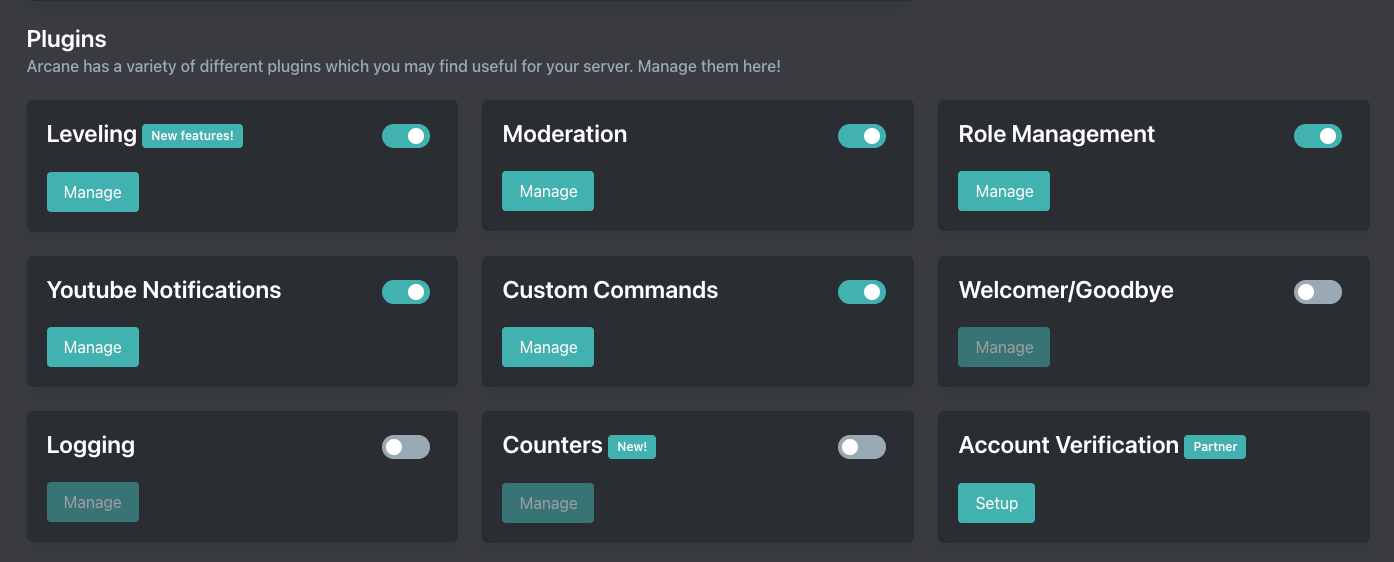
Arcane Overview
Arcane has built its reputation as one of the most reliable leveling bots on Discord, giving communities a smooth and customizable experience out of the box. Members earn XP through messages and voice activity, climb levels, and unlock rewards like roles or badges, all of which can be tailored by server admins. Leaderboards and prestige systems create friendly competition, while the ability to grant roles automatically at certain levels keeps members motivated and active. For many servers, Arcane is a simple but powerful way to gamify participation and strengthen community engagement.
When it comes to Discord leveling bot specifically, Arcane is often preferred over MEE6 because it offers more functionality for free. With Arcane, features like auto-role rewards, voice XP, and configurable level systems are available without paying, whereas MEE6 locks most of these core mechanics behind its premium plan. While MEE6 has more extras outside of leveling, its paywall has led many communities to move toward Arcane as a fairer, more transparent choice. In short, if your focus is on leveling and rewarding engagement, Arcane provides a richer, less restrictive system compared to MEE6.

Setting Up Arcane on Your Discord Server
Step 1: Invite Arcane
- Go to the Arcane website or the Discord App Directory.
- Click Invite and select your server.
- Authorize Arcane with the necessary permissions. You don't need to give the bot admin rights even though it is asking for it.
- Place Arcane’s role above the roles it needs to manage in Server Settings → Roles.
Step 2: Configure Core Permissions
- Required: Manage Roles, Send Messages, Manage Messages, Kick/Ban Members (for moderation).
- Avoid giving full Administrator unless you trust the bot fully.
- Ensure Arcane can access channels where it needs to track messages for XP or run moderation commands.
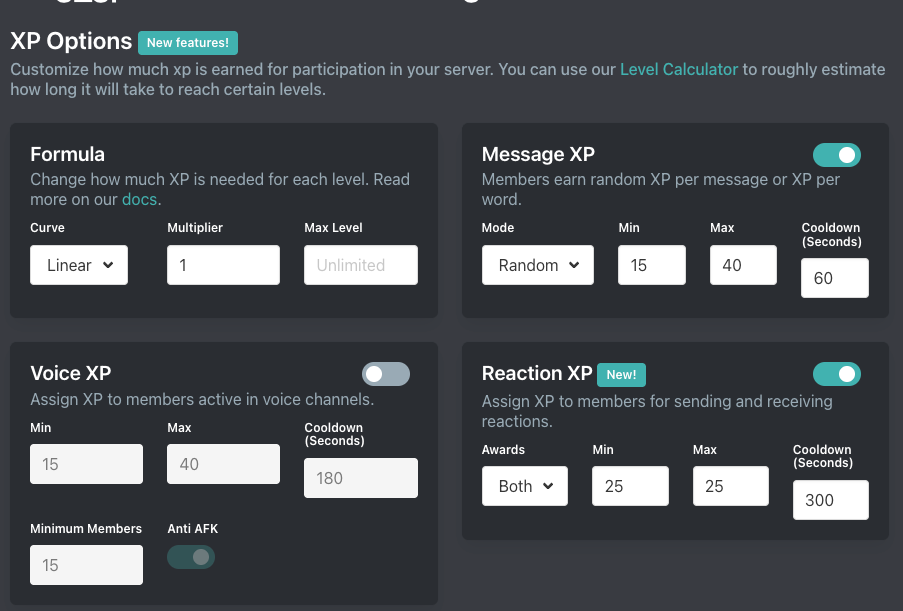
Step 3: Enable XP & Leveling
- In the Arcane dashboard, enable the Leveling module.
- Configure:
- XP Options rules (per message, per minute, or limited by channel).
- Channel exclusions (e.g., no XP farming in #spam).
- Cooldowns to prevent spam leveling.
- Create level-up messages (embed style, DM or channel post).
- Example: “🎉 Congrats {user}, you reached Level {level}!”
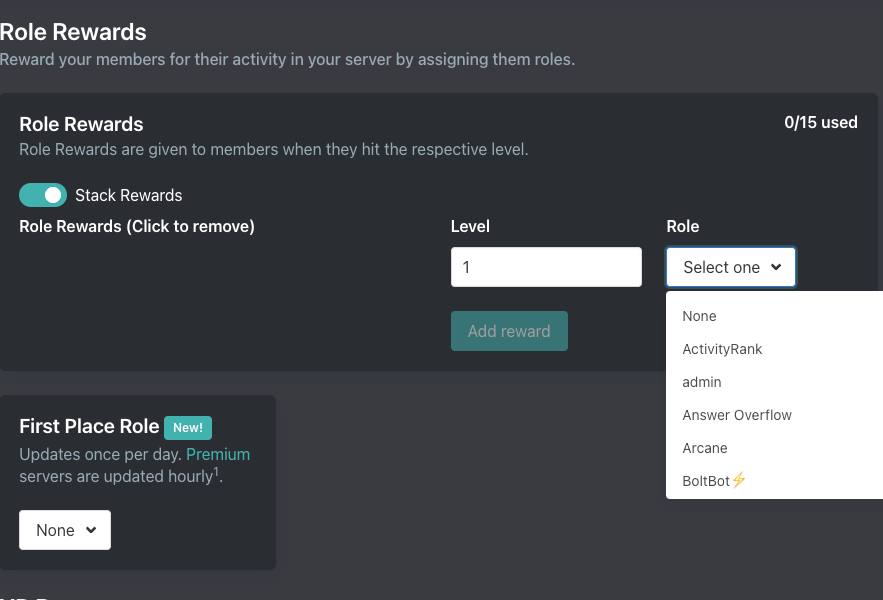
Step 4: Role Rewards
- Go to the Leveling → Role Rewards section.
- Add rules like:
- Level 5 → “Active Member”
- Level 10 → “Veteran”
- Level 20 → “Elite”
- Choose whether old roles stack or are replaced when users level up.
- Example: Active → Veteran → Elite (replacing old roles).
Arcane Pricing
Most features are free. Premium (≈ US$7 per month) unlocks higher limits and allows the bot to serve multiple servers.
Discord Servers Best for Arcane
Servers that want to gamify participation with levels, leaderboards and role rewards. If you want to reward users strictly based on chat messages (or voice, which is a brand new feature), you can do this with the free version of Arcane.
Arcane Limitations
Building a community is more than just chatting. Be careful what you ask members to do. Measuring members' chat messages can unintentionally cause massive spam on the server. Use it carefully.
Invite Tracker Overview
Invite Tracker specializes in a very specific and important aspect of community management: tracking how people join your server. It logs who invited whom, counts the number of joins each member has generated, and can even monitor message activity – all useful metrics for growing communities. Beyond tracking invites, it packs in bonus features like an advanced verification system (to keep out bots or alt accounts via captcha or button clicks) and a giveaway system to reward your most active inviters.
For servers that run invite-based contests or referral programs, Invite Tracker is a must-have. It maintains leaderboards of top inviters and top message senders (premium feature), turning growth into a friendly competition. Moderators can quickly see if a sudden influx of new members came from one suspicious inviter (which might indicate fake or bot accounts) – a big help for raid defense. The bot can also announce join and leave messages, giving a transparent view to everyone of who’s coming and going.
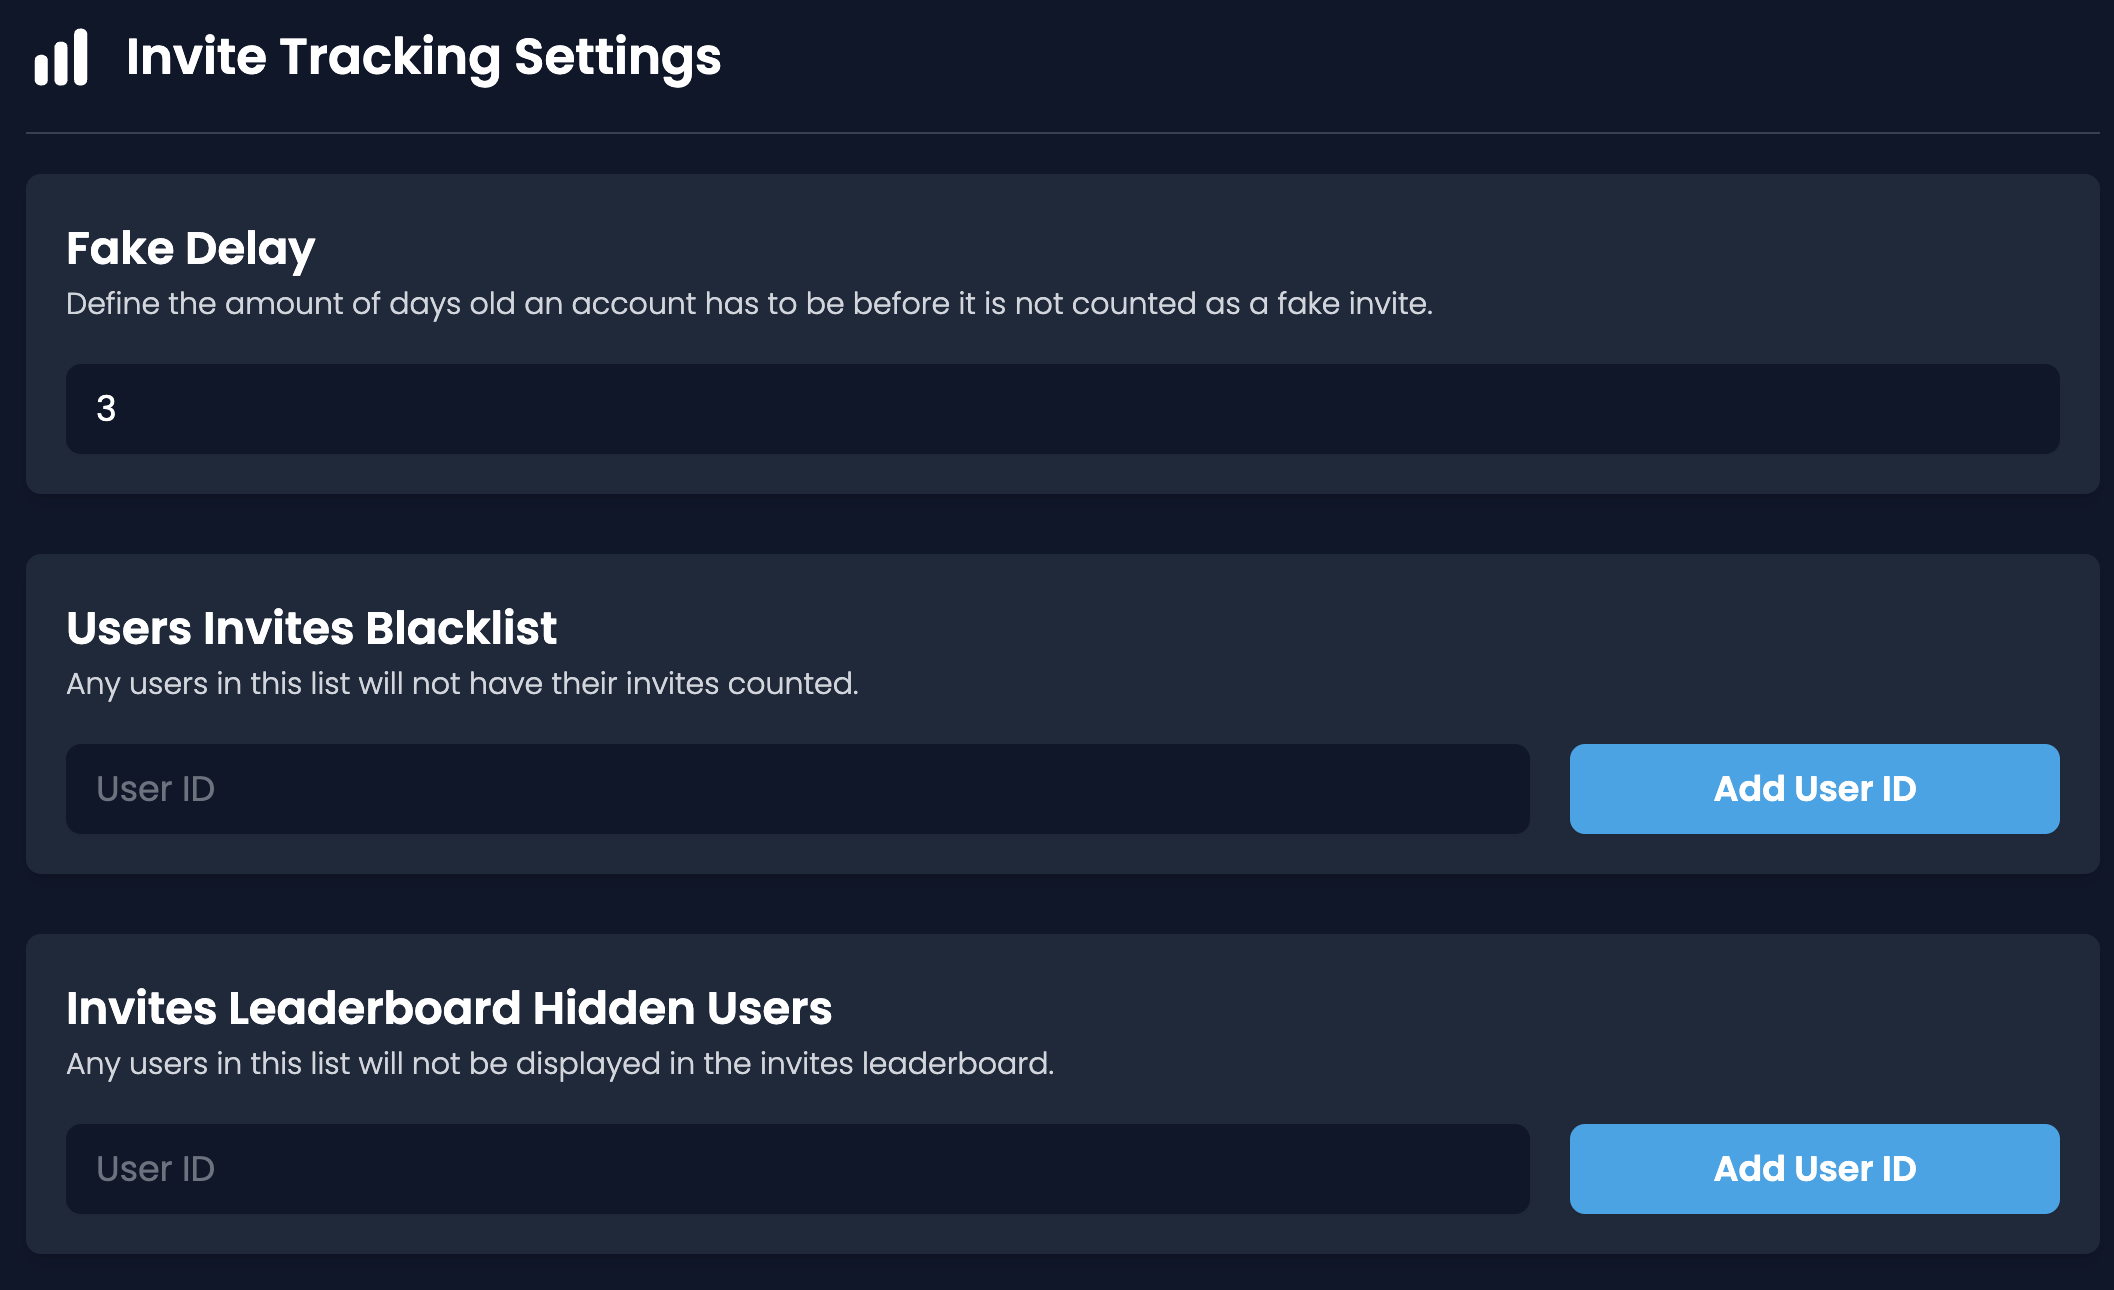
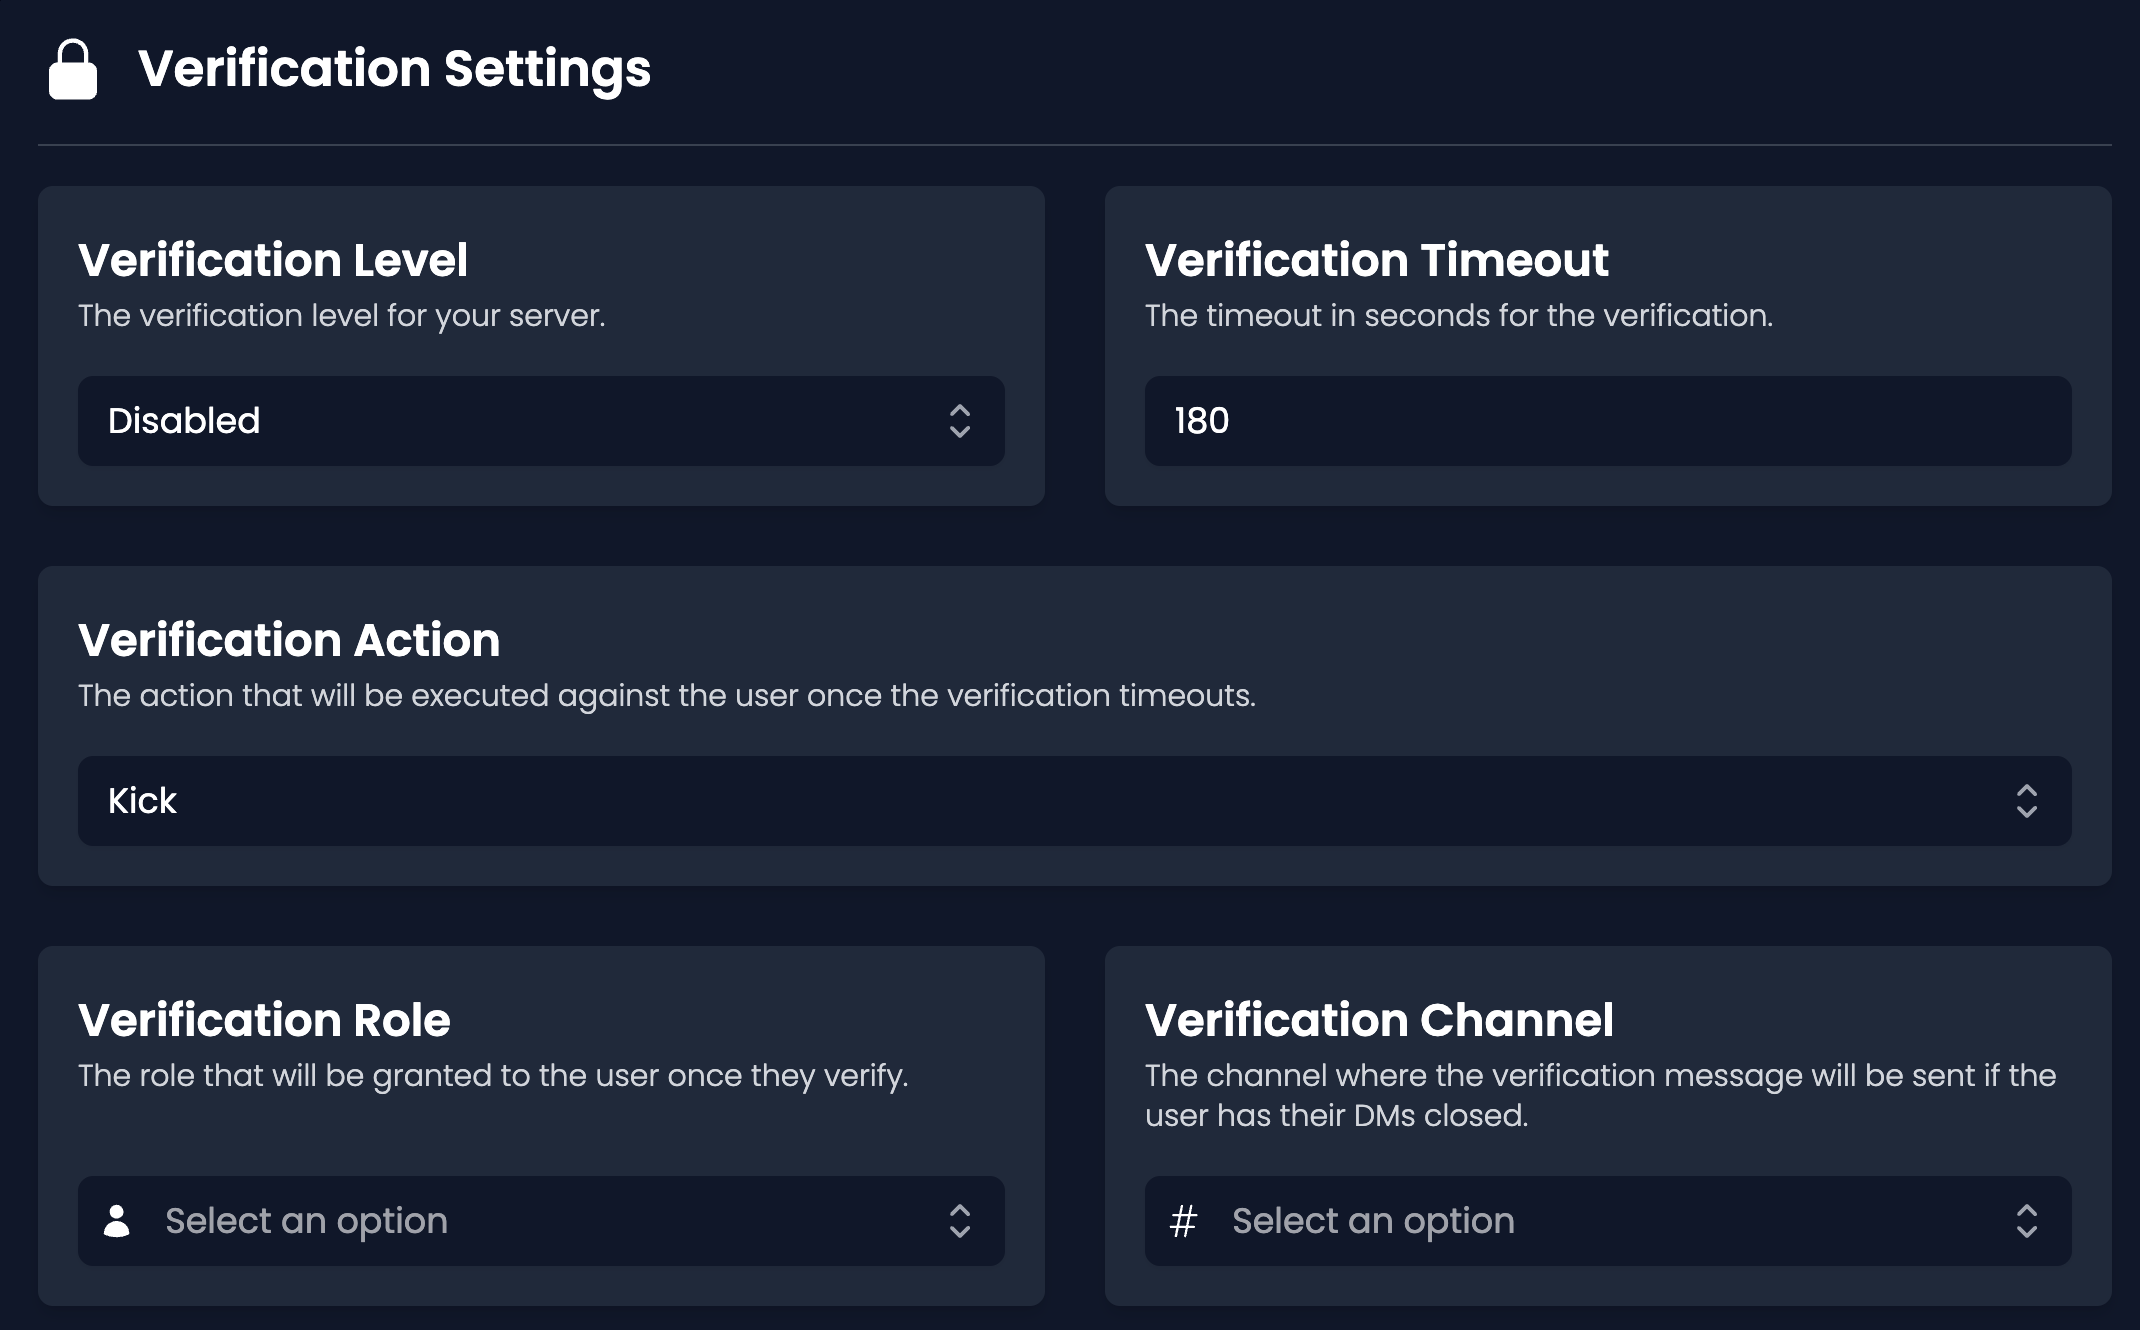
One standout feature is Invite Tracker’s verification options. You can set up rules so that when new members join, they must complete a captcha, click a button, or visit a web verification page to gain access. This dramatically reduces bot attacks and ensures users prove they’re human. It’s more advanced than the basic Discord community verification level because it’s fully customizable (you can design the verification prompt and choose which roles to give on success).
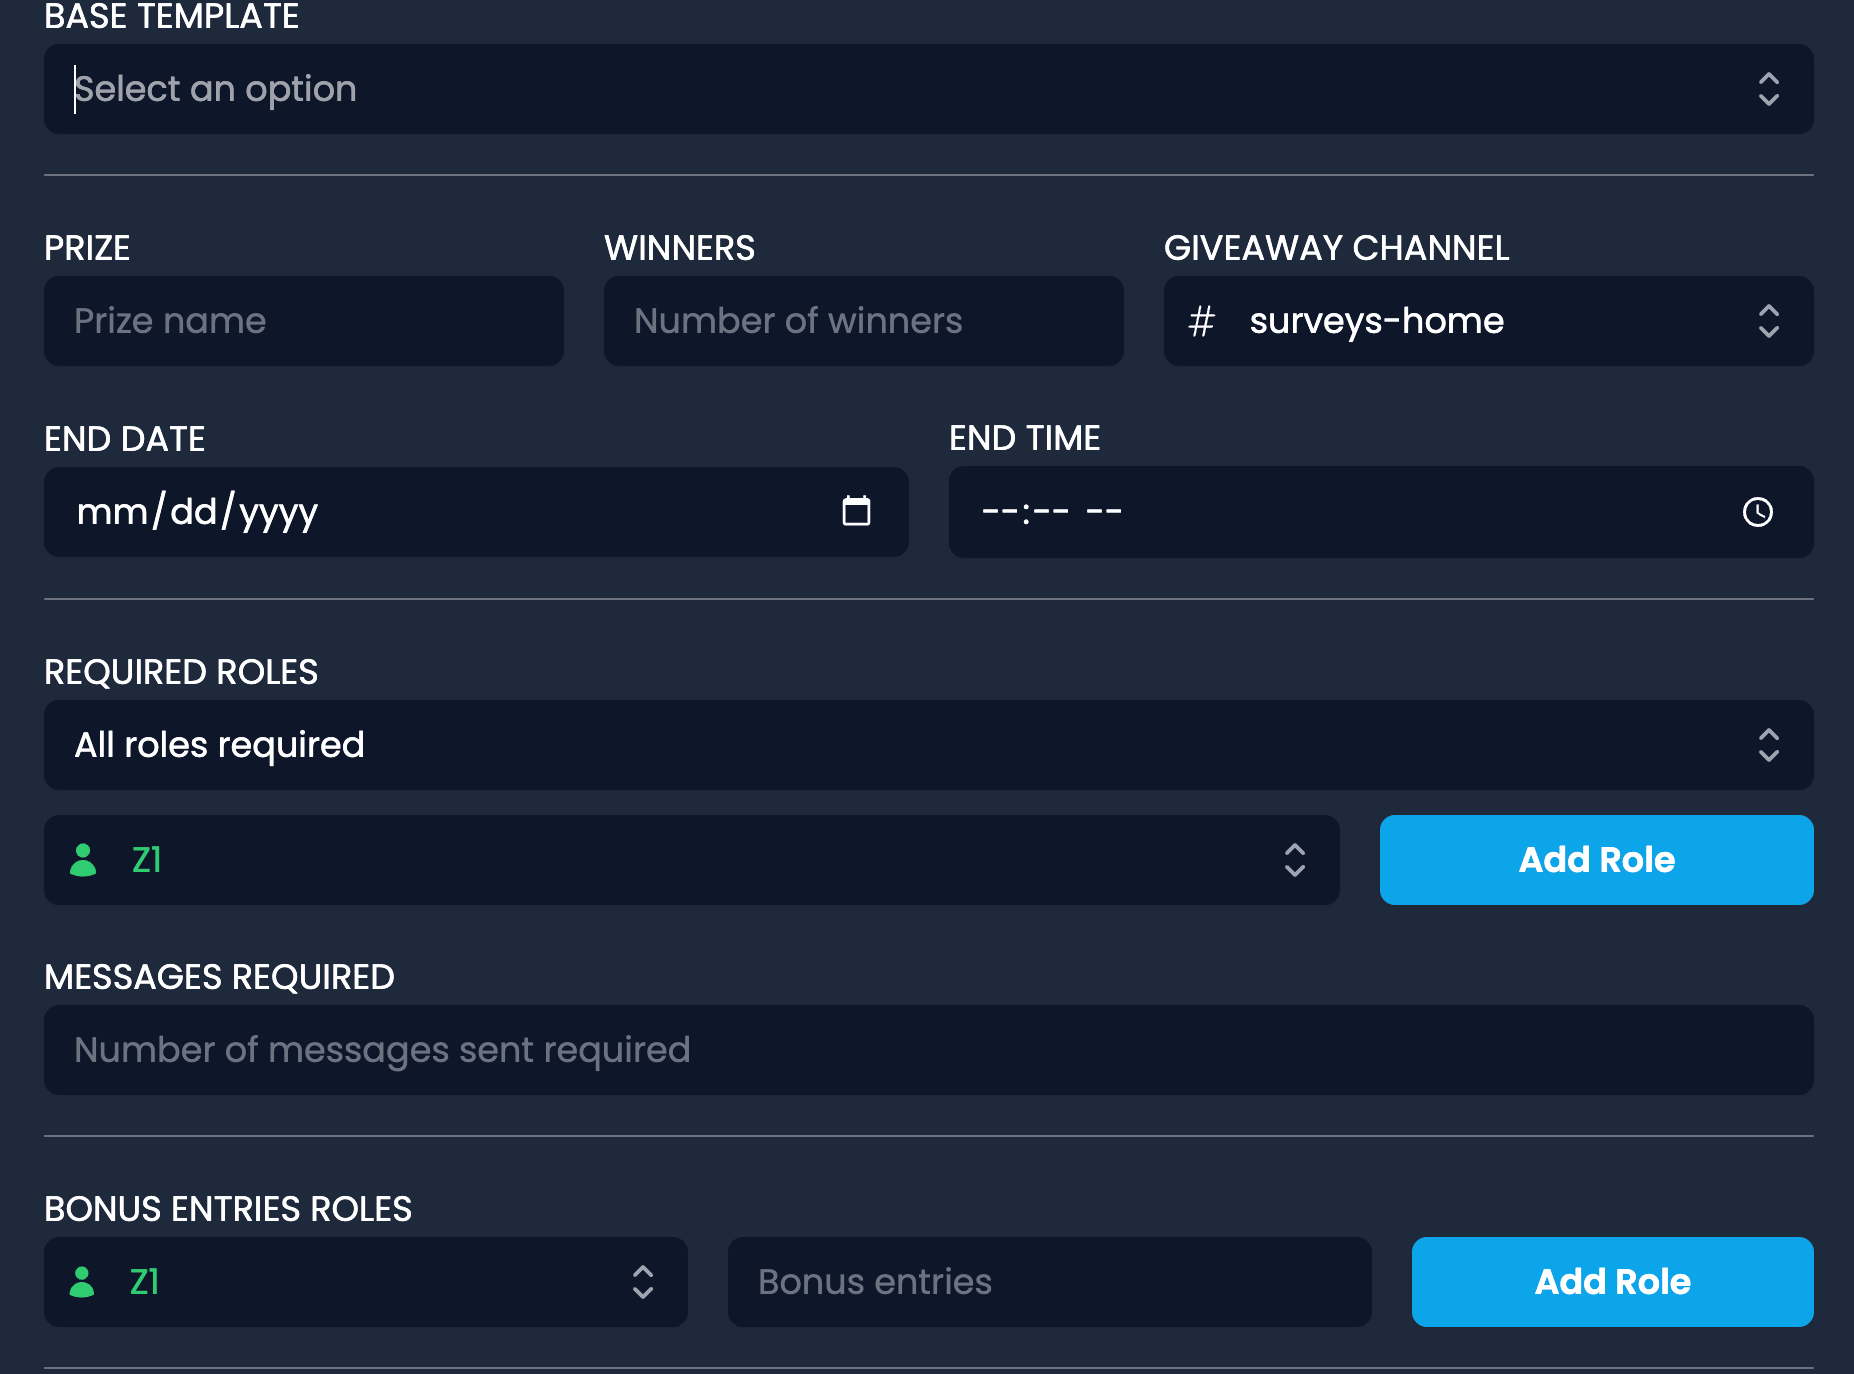
Invite Tracker’s giveaway tool is handy too. You can start a giveaway that only users with a certain number of invites (or messages) can enter, or make entering a giveaway itself require inviting X friends. This can incentivize your community to spread the word about your server.
Using Invite Tracker is straightforward: once invited, it immediately starts counting invites. You can customize its settings on their web dashboard or via commands. For example, !invites might show how many people you’ve invited, and admins can reset counts or adjust for members who left (to prevent “cheating” where someone invites 10 people who immediately leave).
Setting Up Invite Tracker on Your Discord Server
Step 1: Invite the Bot
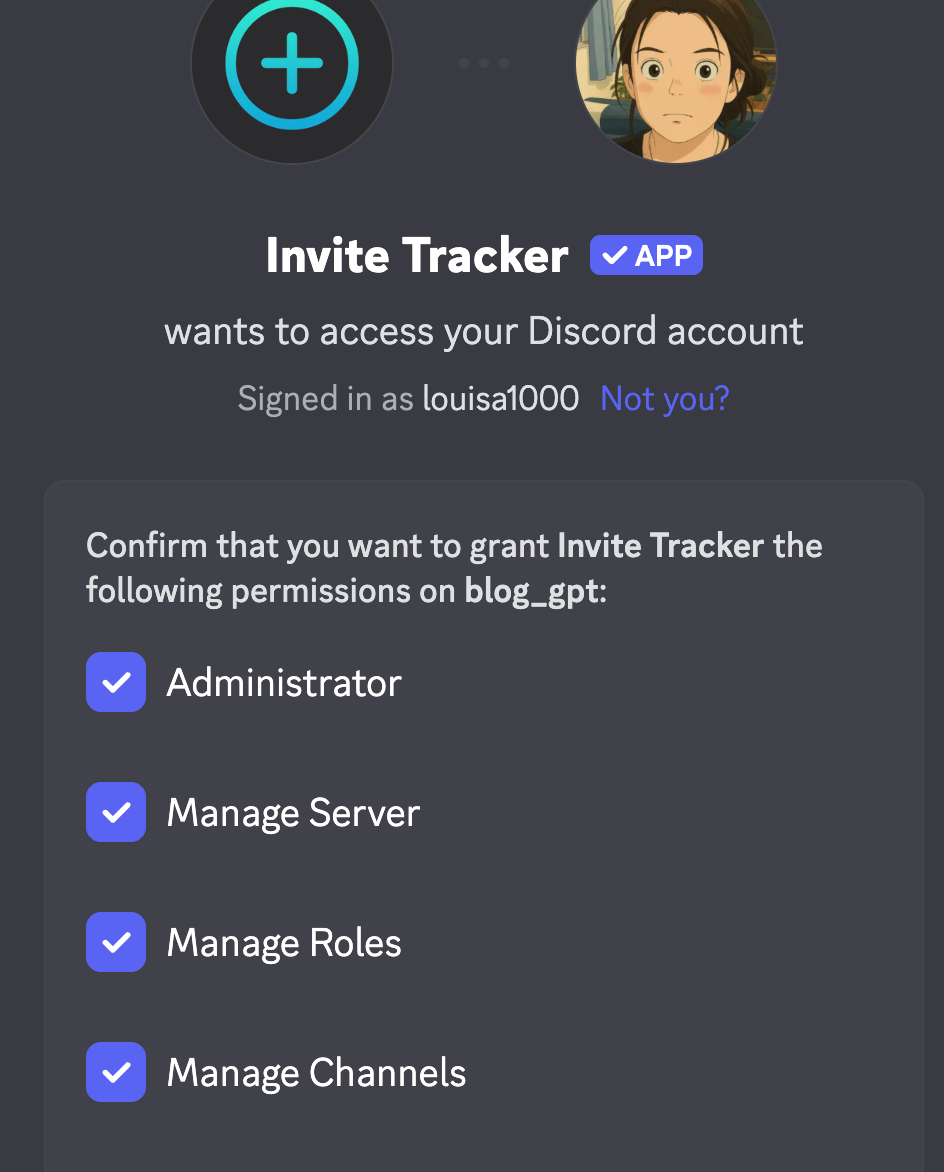
- Add Invite Tracker via its official invite link.
- Grant it the suggested permissions (at minimum, it needs to read messages, send messages, and manage roles if you use verification).
- Typically, no extra setup is required for basic invite tracking – it starts logging new joins right away.
Step 2: Configure Invite & Join Messages
- Create a channel, such as #welcome, where you want join/leave messages.
- Use commands or the dashboard to enable join messages: for example, set a custom welcome like “Welcome {user}, invited by {inviter}! You are the {count}th member.” The bot will replace placeholders with real data.
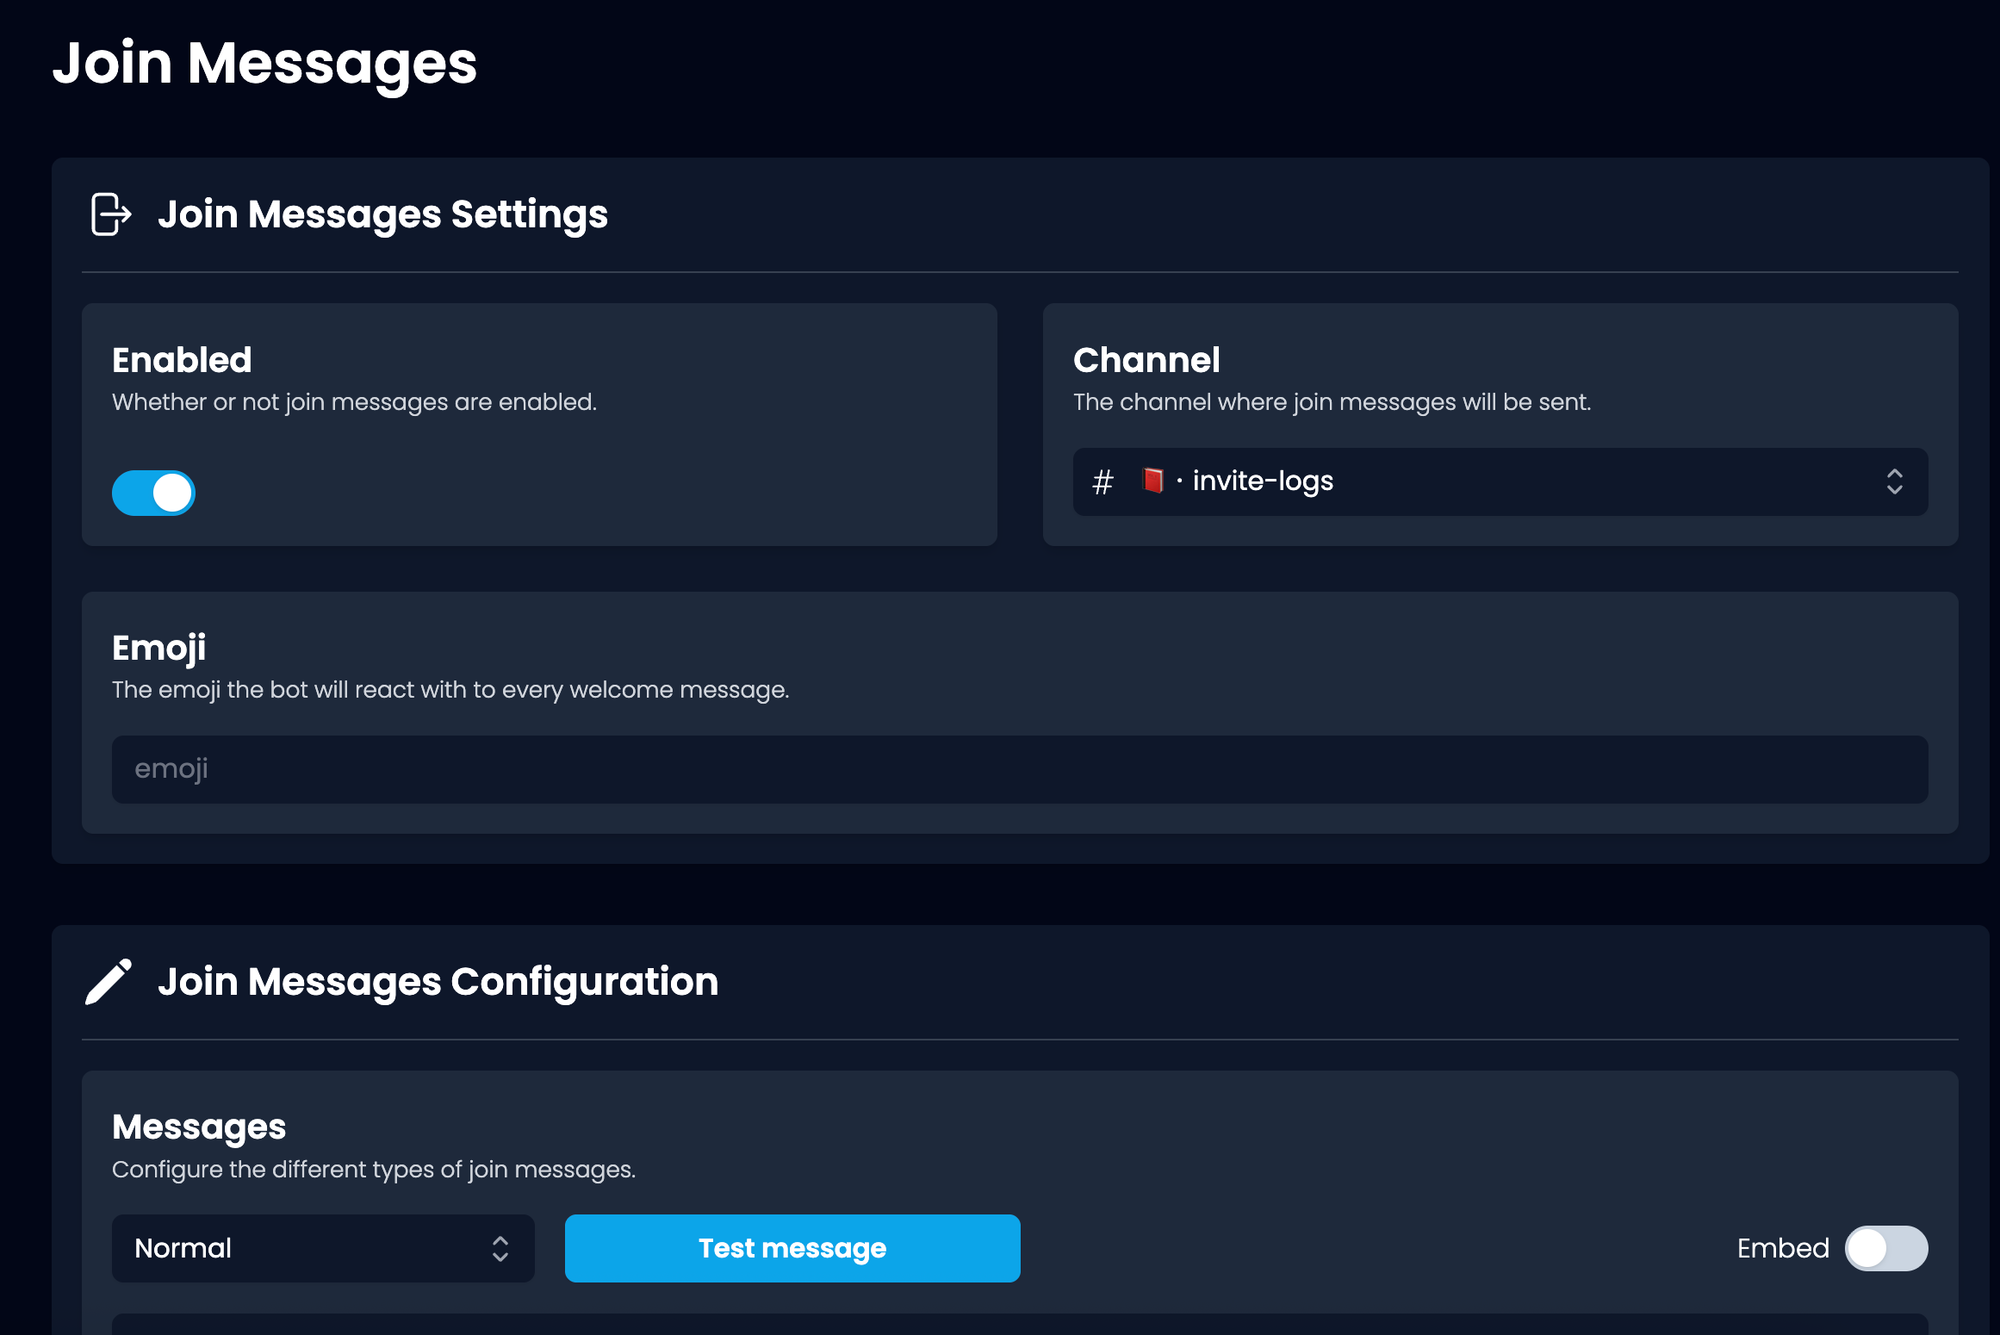
- Likewise, enable leave messages if desired, so you see who leaves and possibly who invited them (to subtract from their count).
Step 3: Set Up Verification (Optional)
- On the Invite Tracker dashboard (or via
!setupcommands), turn on the Verification feature. Choose the mode: button verification (user clicks a button to verify), captcha (user must pass a captcha test), or website verification for a more robust check. - The bot will typically create a verification channel or message. New users will have a temporary role or no roles until verified; once they verify, Invite Tracker assigns them the member role you specify.
- Test the verification flow with a dummy account to ensure it’s working as you intend.
Step 4: Use Giveaway & Leaderboards
- Try the giveaway command, e.g.,
!gstart 1h 1w Awesome Prize(this would start a giveaway lasting 1 hour, with 1 winner, for "Awesome Prize"). You can add requirements like!gstart 1d 1w Prize | invites>=5to require at least 5 invites to enter. - Enable the
!leaderboardcommand or view it on the dashboard to see top inviters. Share this occasionally to motivate members, or maybe grant special roles to your “invite champions.”
Step 5: Monitor and Moderate
- Keep an eye on the invite logs. If someone’s invite count jumps suspiciously overnight, check if those new members are real or left immediately – the bot can differentiate “fake” invites (when users leave quickly) if configured to deduct them.
- Use
!invites @Userto see how many people a specific member invited (and who they are). This is useful if you suspect someone of bringing in spammers.
Invite Tracker Pricing
Invite Tracker’s core features are free and sufficient for most servers. There is a Premium offering (~9.99€ per month, roughly $10-12) that unlocks unlimited customization and lifts certain limits.
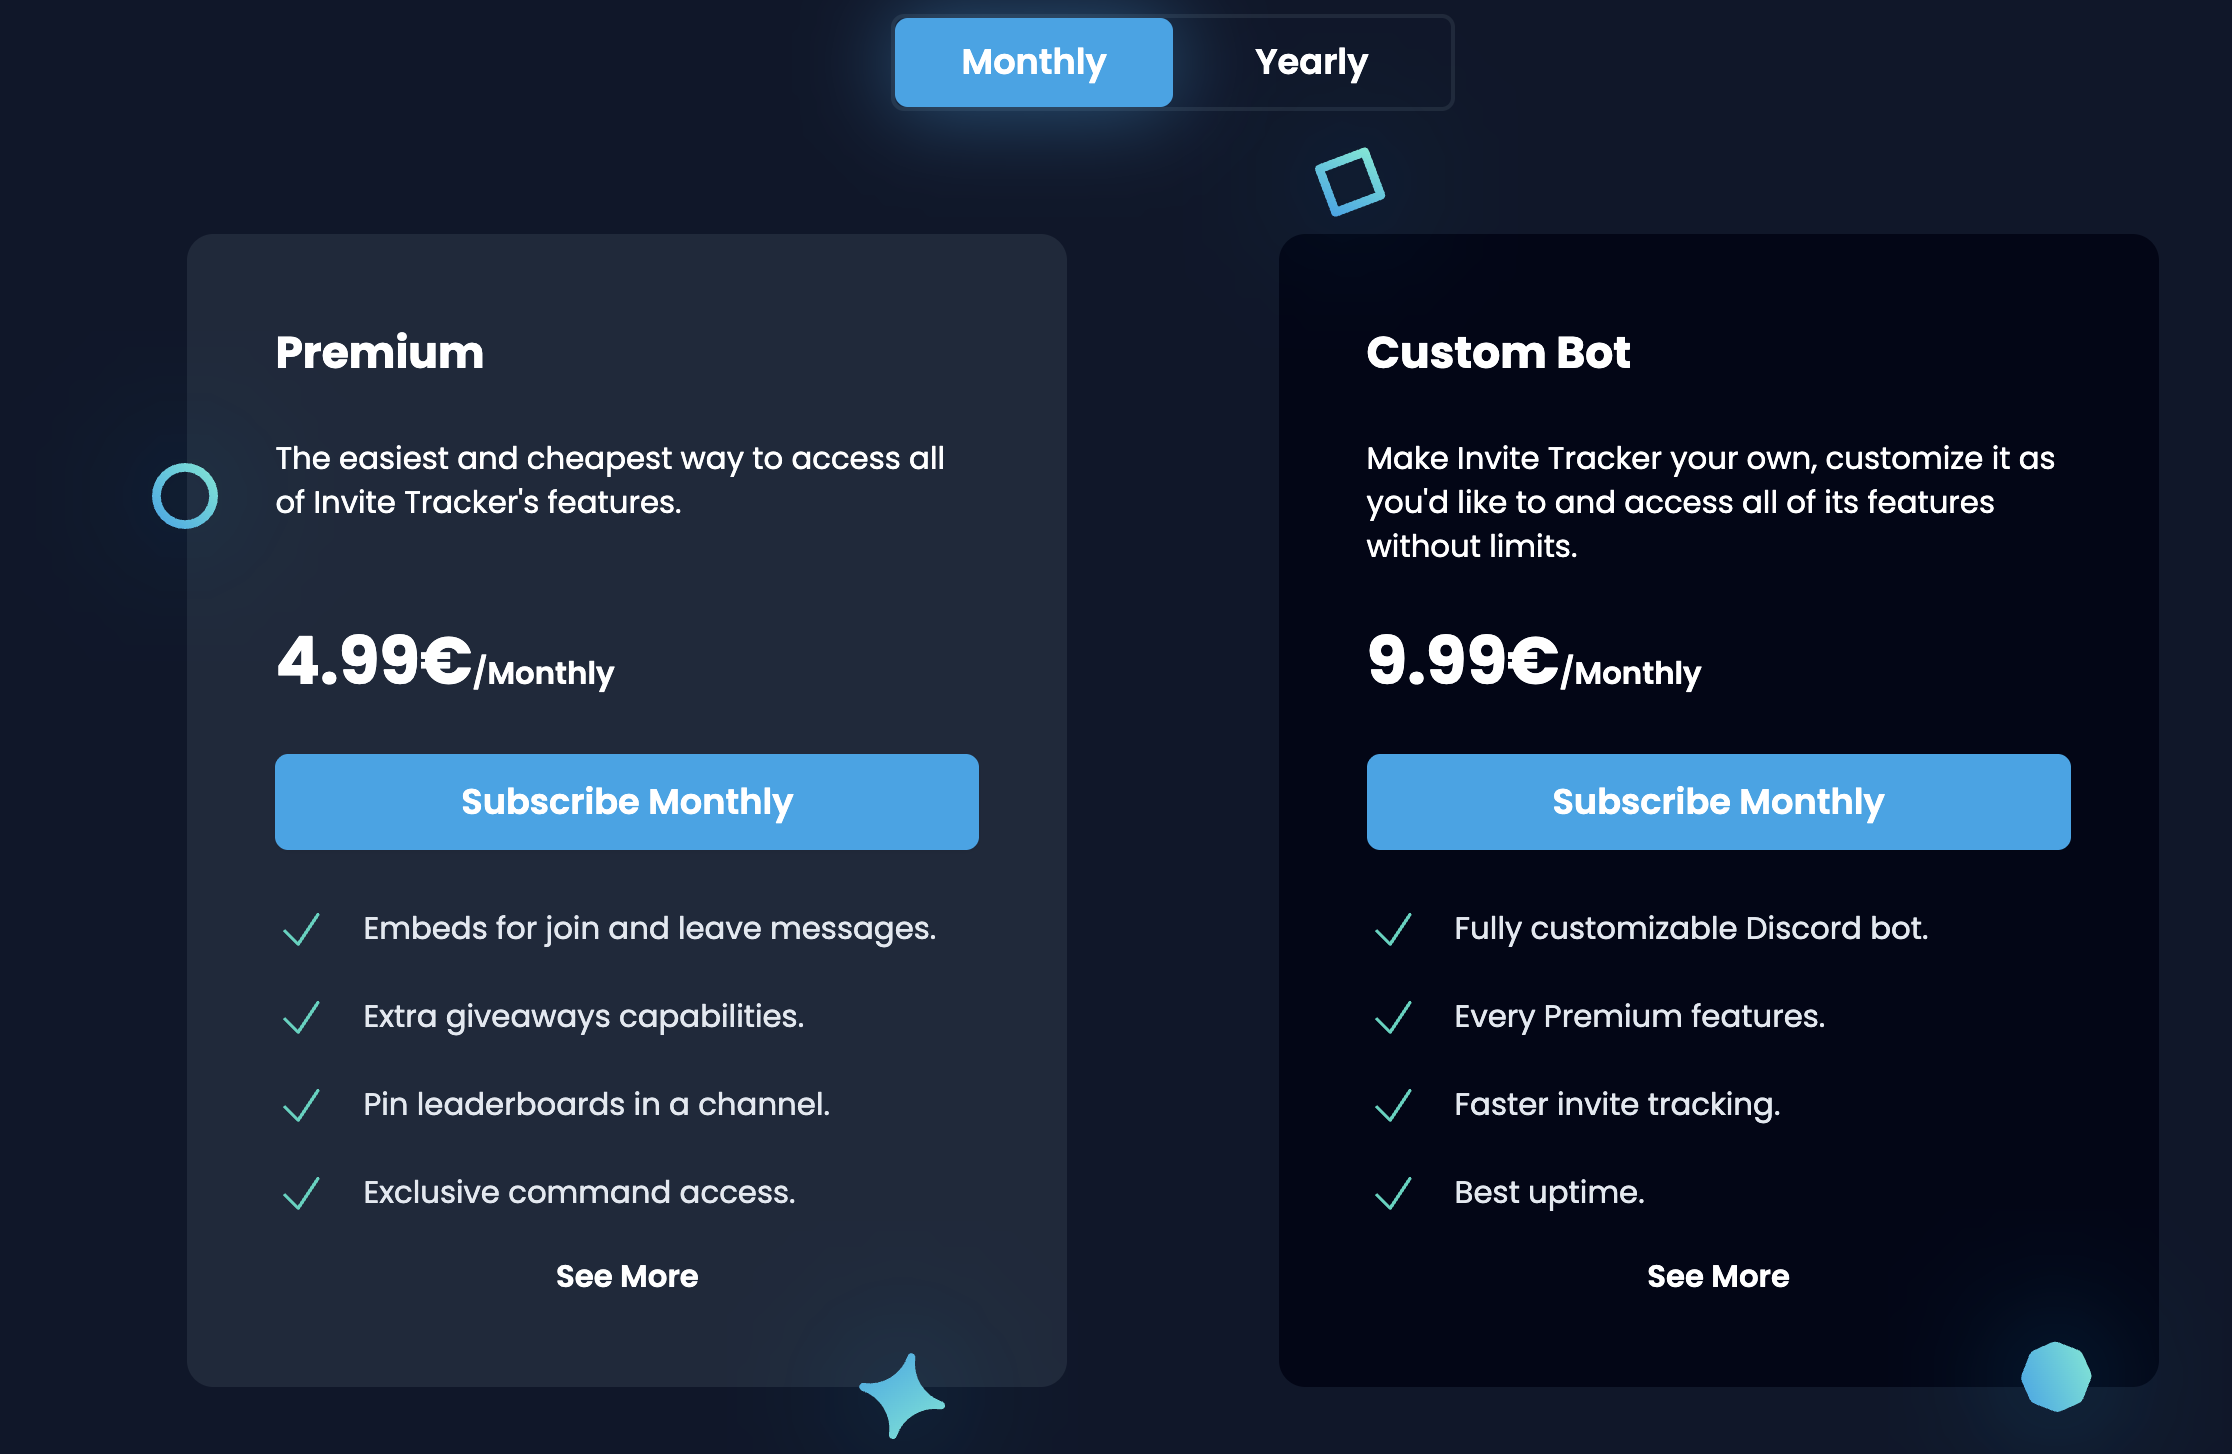
Premium allows you to fully white-label the bot (custom name/avatar), use more advanced giveaway requirements, and get priority support. For the average server owner, the free version, which is 24/7 online, is usually enough until you need very specific extras.
Discord Servers Best For Invite Tracker
Growing communities that rely on invites to expand – for example, fan servers that encourage members to invite friends, or NFT/GameFi projects doing invite contests. Essentially, if you care who invited a member and want to reward or track that, this bot is the go-to choice.
Invite Tracker Limitations
Invite Tracker does have scaling issues, typically it only records about 70% of your invite events. In addition, while invite tracker allows you to define your "own bot" count, it doesn't have a native solution. As a result, in a typical web3 server, many people invites sophiscated bot accounts while none of their invitees are counted as bot. If filtering out bots is important for you, for example, so that you can determine which users to reward real money to, use Communityone analytics as a backend analytics where we list all the suspicious bot accounts using the best algorithem.
In addition, invite tracker is a specialized tool – it doesn’t do moderation (aside from verification) or entertainment. You’ll still need a mod bot and perhaps other engagement bots. Sometimes, Discord’s own invite system can be fiddled with (like users using vanity URLs); while Invite Tracker handles normal invite links well, it may not catch every edge case of how someone joined if not via an invite link. Lastly, the data is only as good as the Discord API provides – occasionally, the invite counts might be off by one if an invite link expires or is deleted, but those cases are rare and can be corrected via manual adjustment commands.
Best Discord bots for moderation
While the “overall” bots above include moderation, the bots in this section specialise in Discord moderation and automation.
YAGPDB (Yet Another General Purpose Discord Bot) Overview
What makes YAGPDB stand out is its unmatched flexibility and precision in automoderation. Unlike many bots that give you a handful of preset filters, YAGPDB lets you build complex rules that behave almost like custom moderation scripts. You can chain together conditions—such as account age, message frequency, or regex-based content detection—and define exactly what the bot should do in response. This level of fine-grained control allows server owners to craft moderation tailored to their exact needs, whether it’s banning spammy new accounts, muting mention raids, or deleting disruptive ASCII art. In practice, this makes YAGPDB one of the most powerful defenses against targeted attacks or highly specific abuse scenarios.
Another reason YAGPDB is valued by experienced admins is its efficiency in day-to-day moderation. Alongside the advanced automod, it includes all the expected manual commands like ban, mute, and kick, plus mod-logs and customizable strike systems. Its custom command functionality goes further, letting moderators automate responses such as posting rule reminders with a single trigger word. While not as flashy as bots like MEE6 or Carl-bot, YAGPDB balances utility with thoughtful extras—like lighthearted fun commands—that give moderators tools for both enforcement and engagement.
The trade-off with YAGPDB is that its power comes with a learning curve. Its dashboard is practical rather than polished, and advanced setups may require some trial and error. But once configured, it’s a highly dependable “robot moderator” that can run indefinitely, catching rule-breaking behaviors even when no human mods are online. This makes it particularly appealing for large servers or communities with limited staff coverage. If you’re willing to put in the effort upfront, YAGPDB rewards you with one of the most customizable and effective moderation systems on Discord.
Setting Up YAGPDB on Your Discord Server
Step 1: Invite YAGPDB
- Go to the YAGPDB website.
- Click Add to Server.
- Authorize the bot and select your server.
- In Server Settings → Roles, move YAGPDB’s role above the roles it will assign.
Step 2: Configure Permissions
- Must have: Manage Roles, Manage Messages, Kick/Ban Members (for moderation), Read/Send Messages, Add Reactions.
- Avoid giving Administrator unless necessary, although if you are using the bot for moderation purpose, it might make your life easier by granting it admin permissions.
- Restrict YAGPDB’s access to only the channels where it’s needed (e.g., #roles, #logs, #suggestions).
Step 3: Auto-Moderation & Logs
- In the dashboard, enable Automod Module.
- Configure filters for:
- Spam (message floods, repeated text).
- Mass mentions.
- Links/invites.
- Profanity or custom banned words.
- Set punishment rules (warn, mute, kick, ban).
- Enable a log channel (#mod-logs) to capture all moderation actions.
Step 4: Custom Commands & Automations
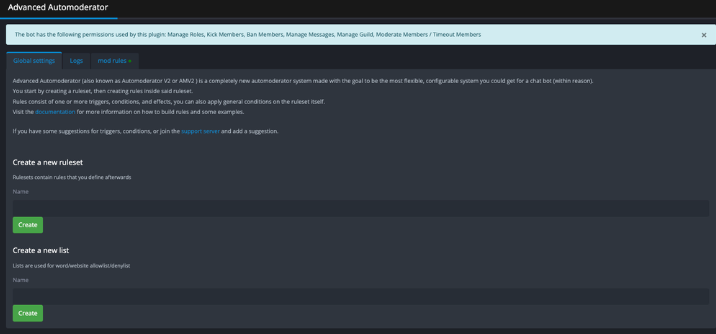
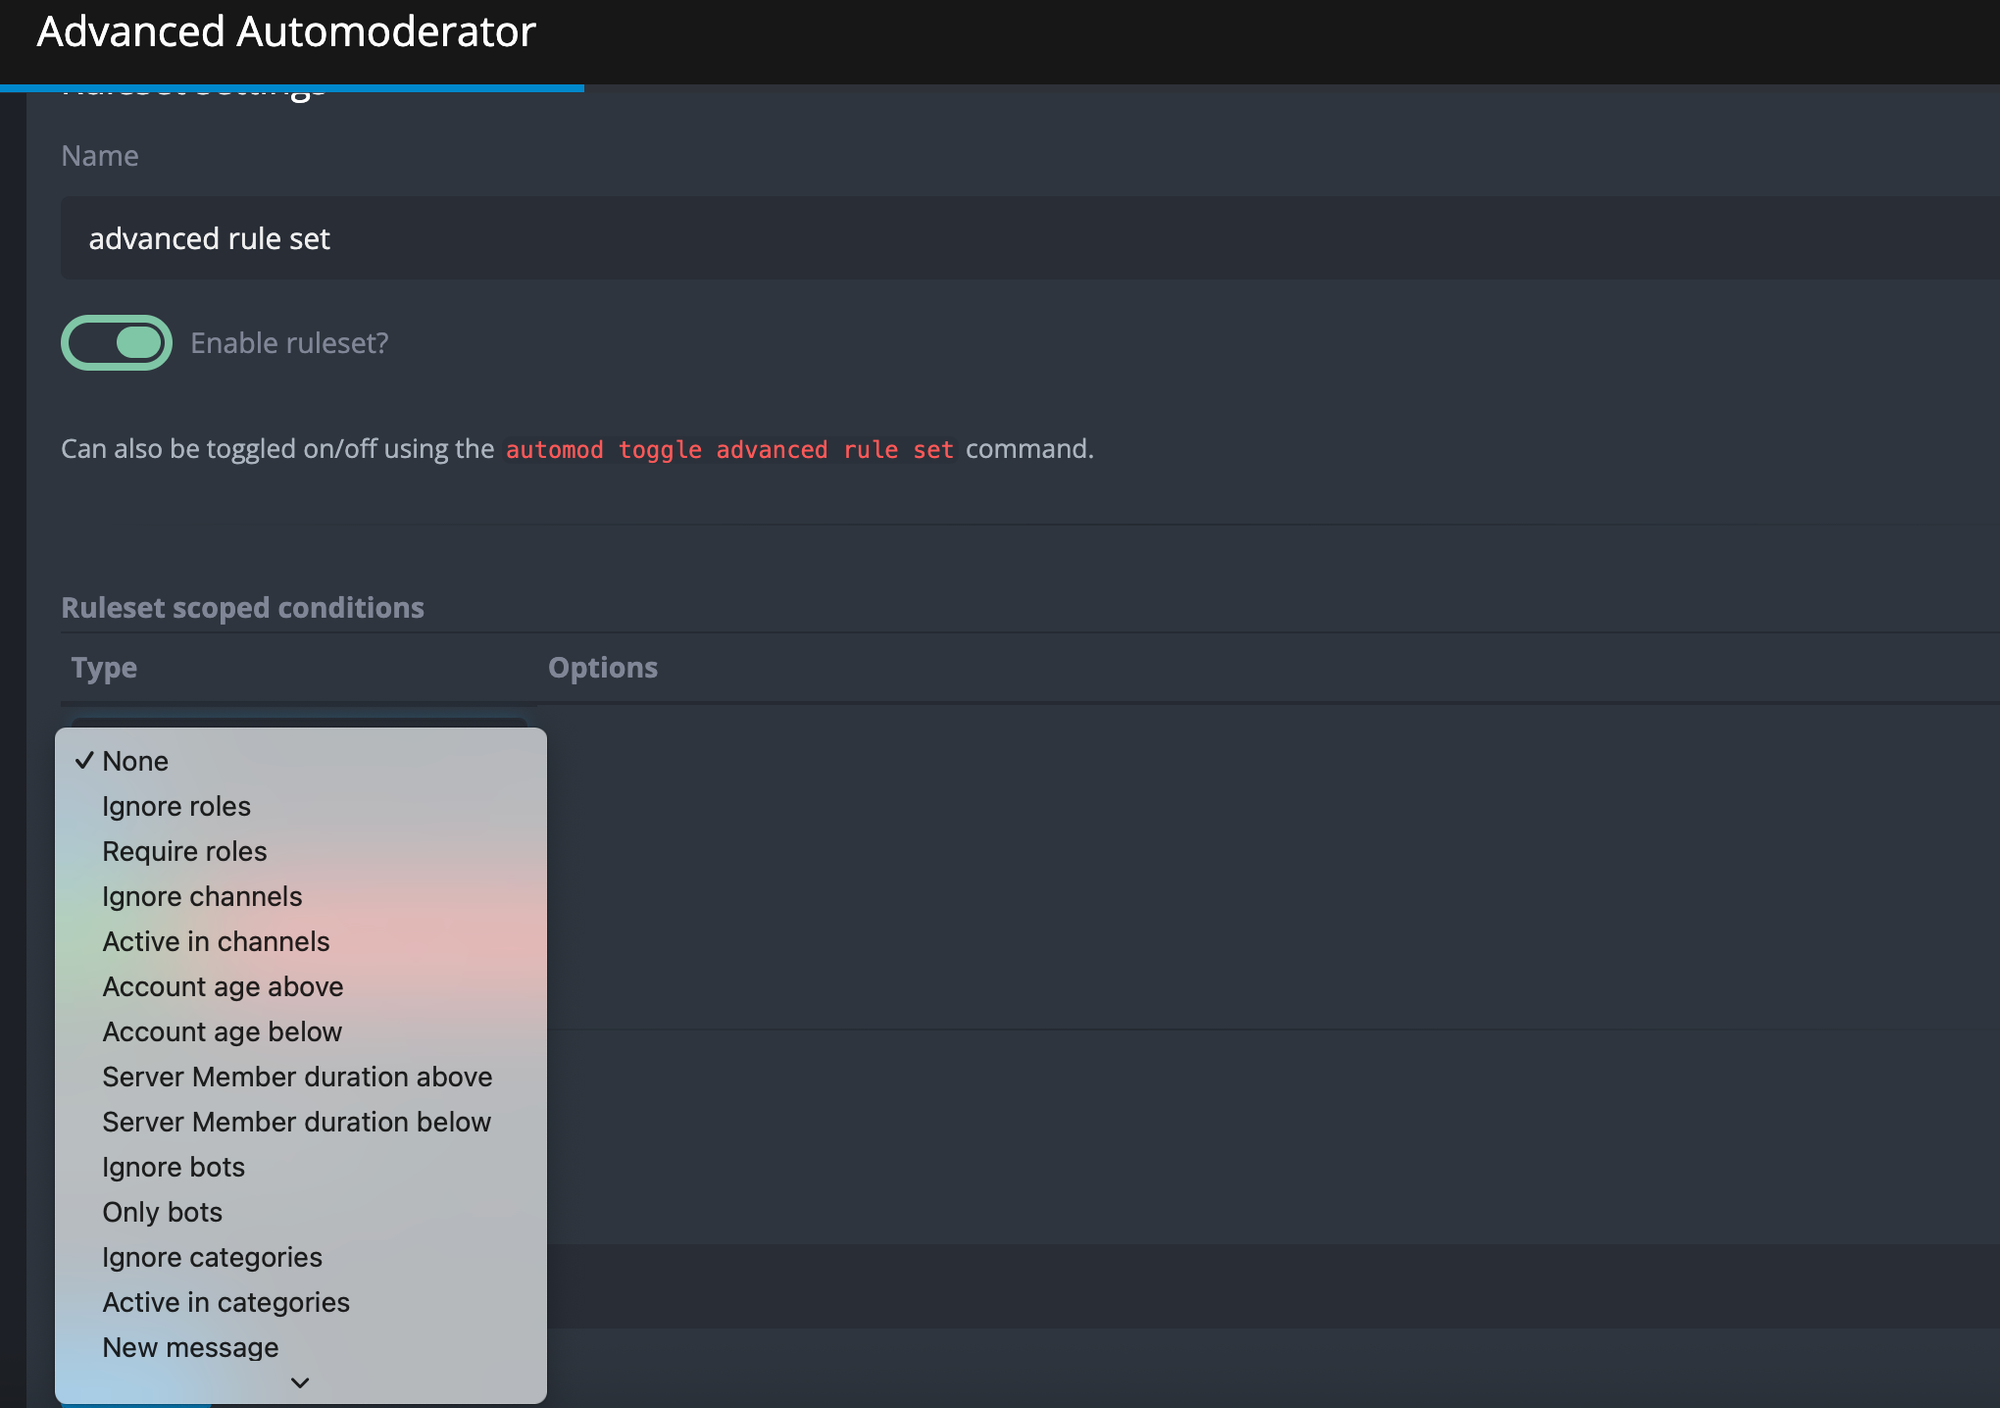
- YAGPDB allows very advanced custom automoderator rules (with conditions, variables, and logic).
- First, go to global settings and create a new ruleset
- You should see a new tab with your ruleset name, click on it to setup more specific rules.
YAGPDB Pricing
The core bot is free. A premium option costs about US$5 per server per month and unlocks higher limits on custom commands and feeds.
Discord Servers Best for YAGPDB
Server owners who want granular control over automod rules and role menus without paying much.
YAGPDB Limitations
The configuration interface can be overwhelming for beginners. Some features require basic knowledge of Discord’s permission system.
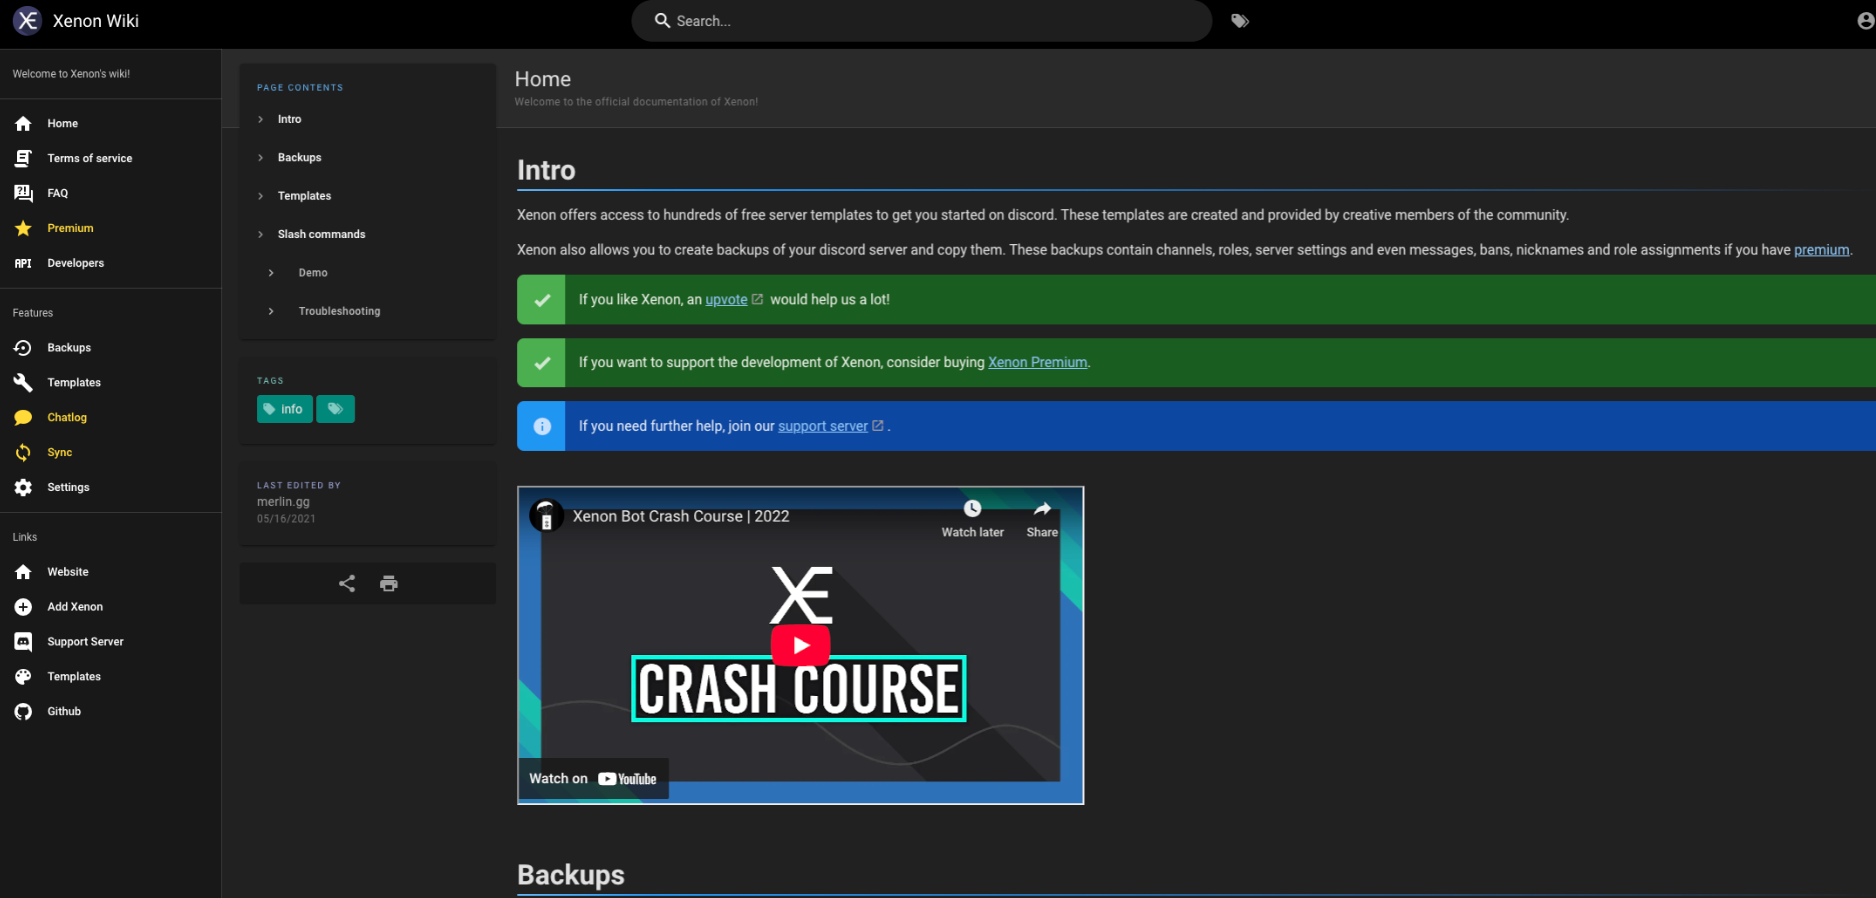
Xenon Overview
What makes Xenon stand out is that it redefines moderation as more than just dealing with user behavior—it protects the backbone of a community. Most bots focus on filters, bans, or engagement, but Xenon provides something moderators rarely think about until disaster strikes: the ability to restore order after chaos. By letting you back up your server’s channels, roles, and permissions—and even automate those backups—it gives moderators a powerful “undo” button in the face of account compromises, rogue staff, or platform glitches. This transforms Xenon into a critical safeguard, ensuring a server’s structure, identity, and continuity can survive even the worst-case scenarios with minimal downtime.
At the same time, Xenon offers unique flexibility that elevates it beyond a pure backup tool. Its server template system allows communities to clone layouts, test new configurations safely, and quickly spin up professional-looking setups. For moderators and admins, this means experimenting without risk, planning improvements with confidence, and even locking down a server during an attack while knowing they can roll back once the threat is gone. By combining disaster recovery with creative freedom, Xenon empowers moderation teams to be both protectors and builders—something few other bots can claim.
Setting Up Xenon on Your Discord Server
Step 1: Invite Xenon
- Go to the Xenon website or the Discord App Directory.
- Click Invite → select your server.
- Authorize with Discord and approve permissions.
- In Server Settings → Roles, move Xenon’s role above the roles it needs to manage.
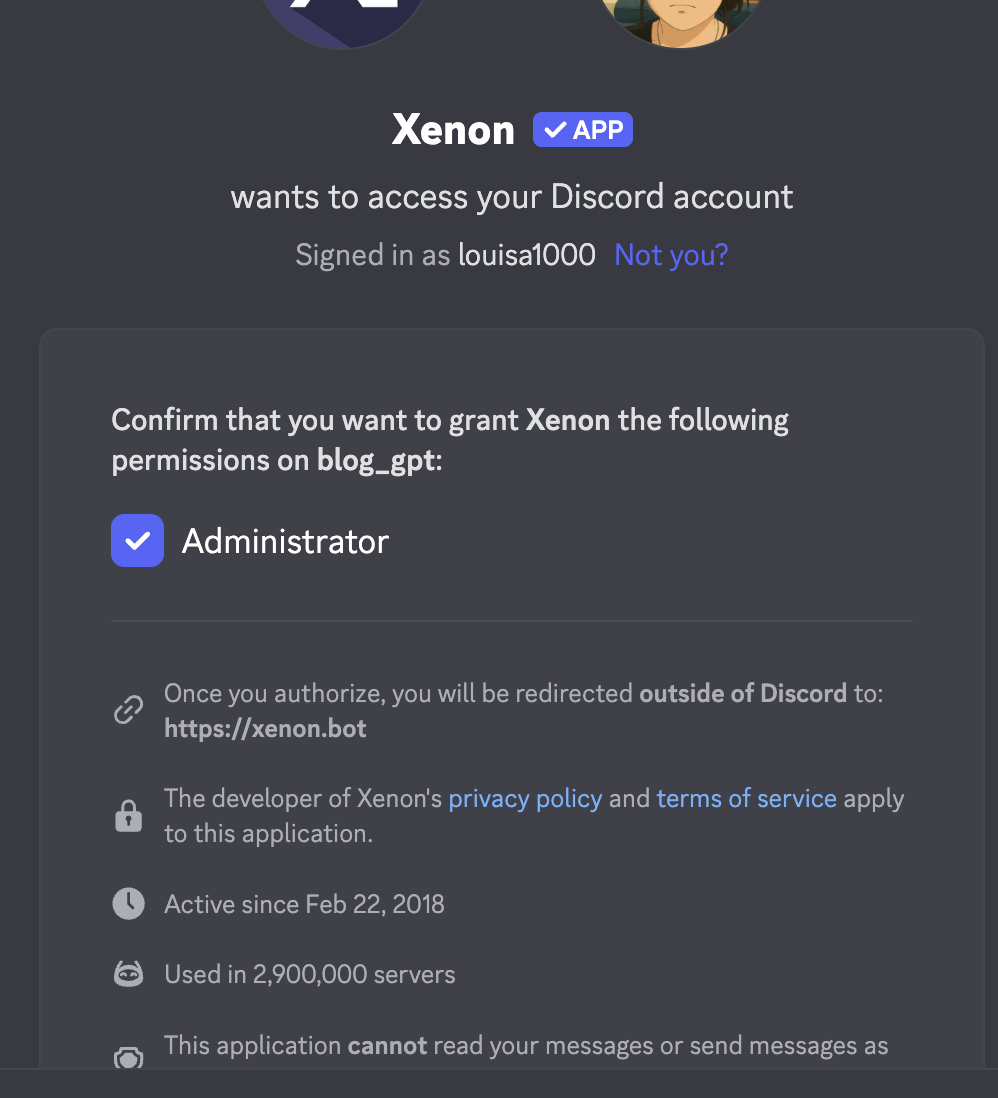
Step 2: Configure Permissions
- Required: Xenon asks you for admin rights, even though it probably only needs the below permissions: Manage Server, Manage Roles, Manage Channels, Manage Messages.
- If you don't want to counter any permission issues, you can grant Xenon Administrator.
- Ensure Xenon has access to your management channels (e.g., #admin-tools or #logs).
Step 3: Create Your First Backup
Xenon’s core feature is backups.
- In Discord, type:/backup create
- Xenon will save a snapshot of:
- Roles and permissions
- Channels and categories
- Server settings (like AFK channel, verification level)
- Optionally: messages (premium only)
- Note the backup ID Xenon gives you (you’ll need this to restore).

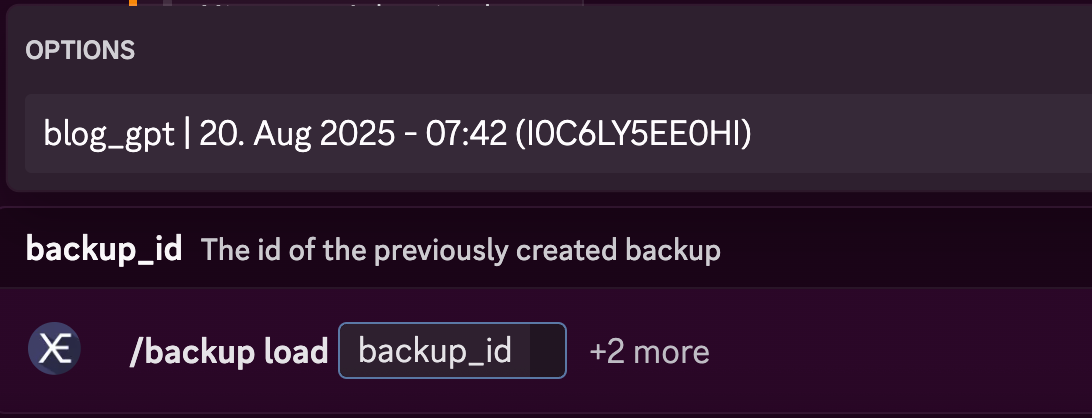
Step 4: Restore from a Backup
If you want to rebuild your server (after a raid, test, or migration):
- Use:/backup load <backup_id>
- Confirm the restore — Xenon will rebuild your roles, channels, and settings.
⚠️ Warning: This will overwrite current server structure. Always confirm you’re restoring in the correct place.
Step 5: Schedule Automatic Backups (Optional)
- With premium, you can set up auto-backups (daily/weekly).
- Use:/backup schedule create
- Choose frequency and retention rules.
Step 6: Use Server Templates
Xenon lets you share and apply server templates:
- To generate a template link:
/template create
Xenon gives you a link likexenon.bot/templates/1234. - To load a public template into your server:
/template load<template_code>
Great for quickly setting up gaming, study, or community servers.
Xenon Pricing
The basic version is free. Premium costs about US$110 per month and raises limits on messages and channels.
Discord Servers Best For Xenon
Large servers that want to back up their data, or small servers that are looking for good design templates
Xenon Limitations
It lacks broader moderation or logging features; pair it with another bot for full coverage.
Ticket King Overview
While there are a lot of great bots for Discord tickets, what makes Ticket King stand out is its ability to transform moderation into a structured, service-like experience for users. Unlike most moderation bots that focus on punishing bad behavior, Ticket King focuses on support and communication—two areas that are often overlooked but vital to a healthy community. By offering customizable ticket panels, it creates a dedicated, private space for members to raise issues, report rule-breakers, or appeal punishments. This removes the messiness of public complaints or scattered DMs and replaces it with a streamlined process where moderators can respond quickly and transparently. For users, the experience is simple: click “Open Ticket” and get a secure, private channel where staff will listen and help.
Another reason Ticket King shines is its custom forms and logging features. With structured forms, moderators can gather all the necessary details upfront—whether it’s evidence for a report, context for a ban appeal, or information about a partnership request. This reduces back-and-forth and saves time for both users and staff. Meanwhile, Ticket King’s transcripts and analytics bring accountability to the table. Every interaction is logged, so staff actions can be reviewed if needed, and server owners can track response times, number of tickets, and resolution patterns. This gives moderation teams data to improve their processes, while also protecting them from accusations of unfairness.
Finally, Ticket King sets itself apart by being both accessible and reliable. It allows multiple panels even in the free plan, supports multiple languages for global servers, and integrates smoothly with other moderation bots like Dyno or MEE6. Premium features—like advanced forms—are priced affordably, making it easy for even small communities to upgrade. For larger servers, its ability to scale without losing reliability makes it indispensable. In essence, Ticket King doesn’t just add a ticket system—it raises the professionalism of your moderation team, turning them into an approachable, organized, and accountable support desk for your community.
Setting Up Ticket King on Your Discord Server
Step 1: Invite Ticket King
- Go to the Ticket King website or the Discord App Directory.
- Click Invite Bot → select your server.
- Authorize with Discord and approve permissions.
- In Server Settings → Roles, move Ticket King’s role above roles it needs to assign/manage.
Step 2: Configure Permissions
- Ensure Ticket King has:
- Manage Channels → for creating ticket channels.
- Manage Roles → for staff access.
- Read/Send Messages → for ticket interactions.
- Attach Files & Embed Links → for ticket logs.
- Do not give full Administrator unless required.
Step 3: Create Ticket Categories & Channels
- Make a Ticket Category in your server (e.g., “🎫 Tickets”).
- Create a Ticket Panel Channel (e.g., #support, #helpdesk, or #orders).
- Restrict permissions:
- Everyone → view only the panel message.
- Staff → full access to handle tickets.
Step 4: Set Up a Ticket Panel
- Go to Panels tab on the dashboard
- Click on Add New Panel and below is a list of configurations
- Embed message content
- Channel where the panel appears (e.g., #support).
- Button/emoji labels (e.g., 🎟 “Open Ticket”).
- Ticket category (where new ticket channels are created).
- Save and deploy — Ticket King will post a panel with buttons for users to click.
Step 6: Commands for Staff
/close→ Close a ticket./add @user→ Add a user to the ticket./remove @user→ Remove a user from the ticket./transcript→ Save and send a ticket transcript (premium feature on some plans).
Ticket King Pricing
There’s a free plan with unlimited tickets but limited features. Premium plans start at US$2.49 per month
Discord Servers Best for Ticket King
Community‑based products or game servers that need a built‑in help‑desk to handle user requests.
Ticket King Limitations
Does not provide general moderation functions. It also lacks features to automatically remind members to close the tickets. If you are looking for a more robust options, check out our blogs on the best Discord ticket bots here.
Best Discord music bots
Streaming music through Discord voice channels remains one of the most requested features. The following bots specialise in music playback. You can check out a more detailed list of the best Discord music bots here.
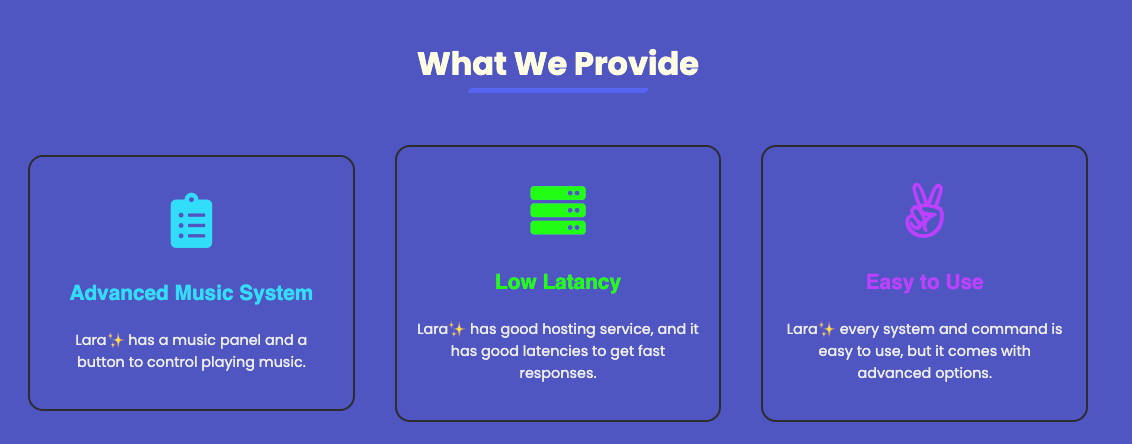
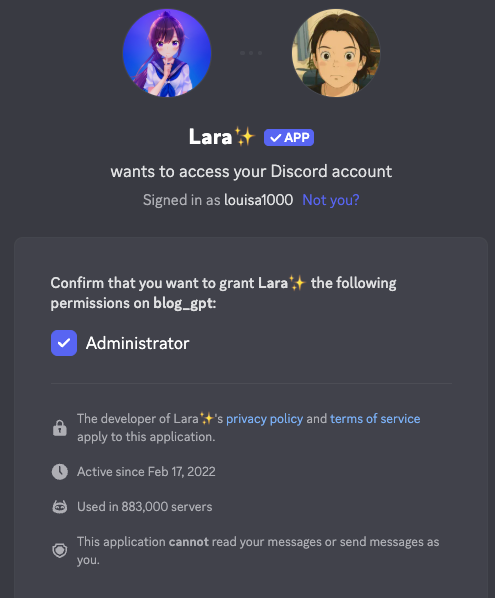
Lara Music Overview
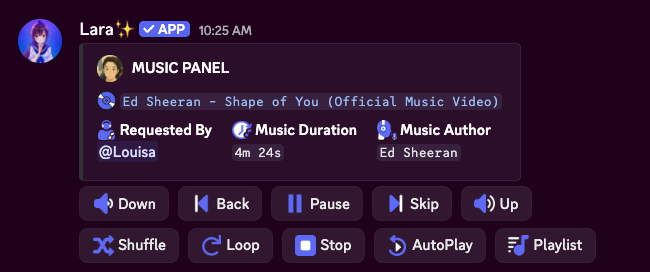
Lara stands out among Discord music bots because it combines always‑on reliability with an intuitive, user‑friendly design. It is a dedicated 24/7 music bot, designed to keep music playing “around the clock” without disconnects or the need for manual restarts. Unlike many bots that require slash commands, Lara offers a button‑ and menu‑based interface so members can control playback, skip tracks or adjust volume with simple clicks. The bot supports multiple platforms, including Spotify and SoundCloud, and offers customizable settings such as volume adjustment and a low‑latency connection to ensure quick, seamless response times.
Setting Up Lara Music Bot on Your Discord Server
Step 1: Invite Lara
- Go to the Lara Music website or search for it in the Discord App Directory.
- Click Invite → select your server.
- Authorize with Discord and approve permissions.
- Place Lara’s role high enough in the role hierarchy so it can connect to voice channels and send messages.
Step 2: Permissions Setup
- Must have:
- Connect & Speak (for voice channels).
- Read/Send Messages (to receive/play commands).
- Embed Links (for music queue displays).
- Optional: Manage Messages (to clean up bot commands in chat).
Step 3: Join a Voice Channel
- Lara only plays music when it’s in a voice channel.
- Have users (or you) join a VC, then summon Lara with a command like:
/play <song name or link>
Step 4: Music Playback Commands
/play <query>→ Play a song by name or link (YouTube, Spotify, SoundCloud, etc.)./skip→ Skip the current track./stop→ Stop music & clear queue./queue→ View the current queue.
Discord Servers Best for Lara
Servers that want continuous, high‑quality background music without fuss. Its always‑on playback and support for platforms like Spotify and SoundCloud make it ideal for gaming communities or social servers that enjoy a café‑like atmosphere. The button‑based controls and built‑in music panel are also great for less tech‑savvy users.
Lara Limitations
Lara is a dedicated music bot, so it doesn’t offer moderation, ticketing or other utility features. If you need reaction roles, leveling or analytics, you’ll need to pair it with additional bots.
RythmCore Overview
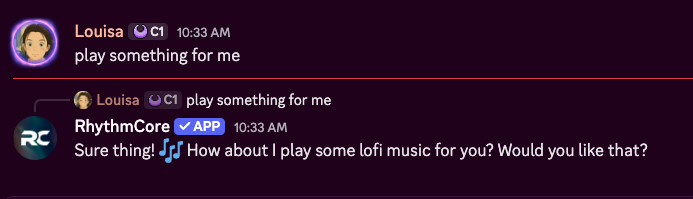
What makes RhythmCore stand out is how it blends the fun of music with the power of AI to create a smoother, more engaging experience for communities. Instead of relying on clunky commands like !play, members can simply type natural language requests such as “Play upbeat 90s rock” or “Queue some chill LoFi,” and RhythmCore instantly delivers high-quality tracks from sources like YouTube, Spotify, or even radio stations. This conversational AI interface makes music playback feel effortless and more inclusive, especially for new users who don’t want to memorize commands. At its core, RhythmCore remains a top-tier music bot, offering crystal-clear audio that helps bring members together through shared playlists, mood-based recommendations, and interactive requests.
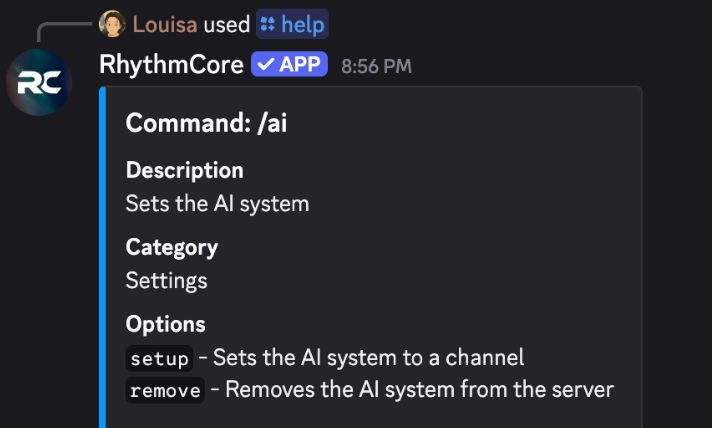
Beyond just great sound, RhythmCore is also designed to be practical and accessible. Its free tier covers most casual needs, but at just $5/month, servers can unlock 24/7 uptime, premium audio quality, and faster queues—making it ideal for gaming communities, study lounges, or any server that thrives with continuous background music. Setup is straightforward, requiring only basic voice permissions and a quick /ai setup to get an AI music channel running. While it does depend on Discord’s voice infrastructure (and, like all music bots, faces occasional licensing uncertainties), RhythmCore’s unique mix of AI-driven interaction, high-quality playback, and ease of use makes it one of the most enjoyable and community-friendly music bots available today.
Setting Up RythmCore on Your Discord Server
Step 1: Invite RhythmCore to Your Server
- Visit the RhythmCore website.
- Click “Invite now”
- Authorize the bot, selecting your server and granting the necessary permissions.
- In your Discord server settings → Roles, ensure the RhythmCore role is high enough (above roles it needs to manage) so it can assign roles, join voice, etc.
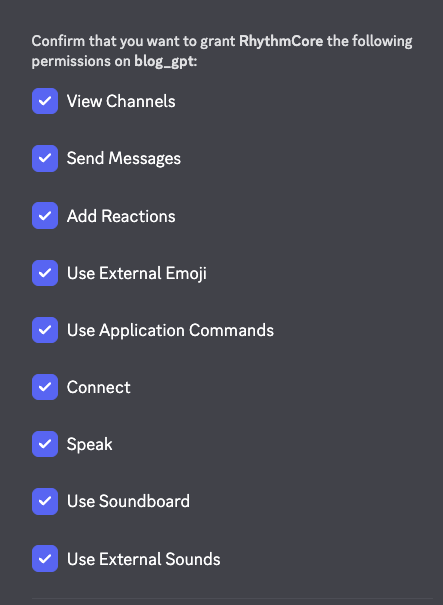
Step 2: Permissions & Role Setup
To function properly, RhythmCore needs access to:
- Connect / Speak in voice channels
- Read / Send Messages in relevant text channels
- Embed Links (for clean song embeds)
- Manage Roles (if it uses roles for premium or special features)
Double-check channel-level overrides (if a channel blocks bots, the music bot might not respond there).
Step 3: Join a Voice Channel & Play Music
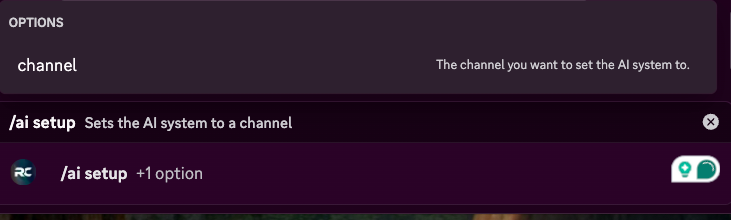
- Make a channel for users to chat with RhythmCore
- Run /ai setup with the new channel name as the hub where members can interact with the AI DJ.
Step 4: Use Core Music Commands
Once you have a channel that allows RythmCore to chat like a regular AI bot, you can use natural language to ask it to play anything. No need to remember any command.
RhythmCore Pricing
The base bot is free for almost all the features as long as you vote on top.gg. If you like to pay for the server, it is only $4.99/month
Discord Servers Best for RhythmCore
If your server is small to medium-sized, with a lot of casual music lovers.
RhythmCore Limitations
The bot asks members to vote on top.gg before playing music.
Rythm Overivew
Rythm’s return marks a major shift in the world of Discord music bots, offering a completely legal and officially licensed platform that ensures stability and long-term reliability. Once the most popular music bot before takedowns hit the scene, Rythm is now rebuilt from the ground up to provide high-quality audio and a sleek, modern interface. Its standout feature is the ability for a premium user to host group listening sessions with up to 20 friends, recreating the communal vibe that made Rythm so beloved in the first place. With powerful search capabilities and a smooth design, it delivers a premium music experience that’s easy to use and trusted by the music industry.
That said, Rythm’s new model does come with some trade-offs. To fully enjoy the bot, especially group sessions, a premium subscription is required, and users must launch it as a Discord activity—which can feel intimidating for casual members unfamiliar with the process. While it may lack the niche customizations of older bots, Rythm stands out for what it guarantees: legality, audio quality, and reliability. It’s best suited for larger or more professional communities that want a stable, high-quality, and compliant music solution, giving server owners peace of mind that their music bot won’t suddenly disappear.
Best for: Those who prefer a straightforward, high-quality music bot with Youtube and playlist support.
Limitations: Responses can sometimes be delayed and advanced features like filters are locked behind premium.
Best Discord Fun bots
Dank Memer Overview
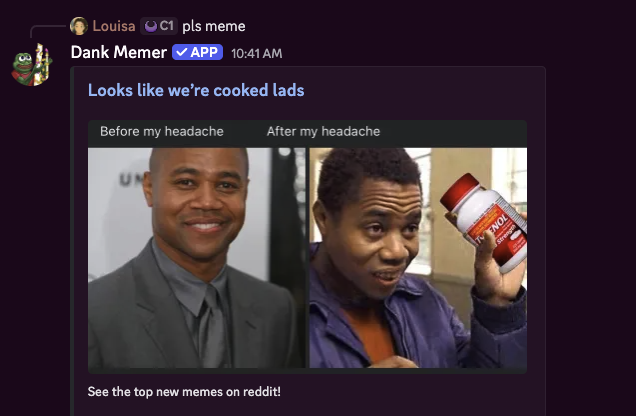
Dank Memer stands out because it transforms the idea of a Discord bot from a passive tool into an interactive, gamified economy that injects regular activity and social dynamics into servers. Rather than simply moderating or automating tasks, it gives users a compelling reason to stay: earning virtual currency, collecting rare items, engaging in “robbery” or “crime” commands, and trading or gifting with others. This blend of chance, progression, competition, and humor means people open the bot repeatedly, talk about their loot, compare stats, and build narratives with each other. The fact that Dank Memer also has meme/image features adds a layer of “fun first” appeal that keeps it culturally relevant. According to its own site, it’s an economy + meme bot used by millions across many servers.
On the community side, Dank Memer has become a glue that helps servers thrive by creating shared goals, banter, and inside references. Servers hosting Dank Memer often hold events, giveaways, leaderboard races, or themed challenges, which encourage members to stay active and collaborate or compete. Many servers even partner or tag themselves as “Dank Memer communities,” centering around the bot’s ecosystem. On forums like Reddit, players often discuss strategies, showcase rare items, or ask for help (“How to get rich in Dank Memer”), which further strengthens the sense of belonging and shared experience. In effect, Dank Memer doesn’t just add a game to a server—it helps define the culture of that server, providing regular hooks for conversation and community identity.
Setting Up Dank Memer on Your Discord Server
Step 1: Invite Dank Memer
- Go to the official Dank Memer website or find it in the Discord App Directory.
- Click Invite → pick your server.
- Authorize the bot with Discord.
- In Server Settings → Roles, move the Dank Memer role above the roles it needs to manage.
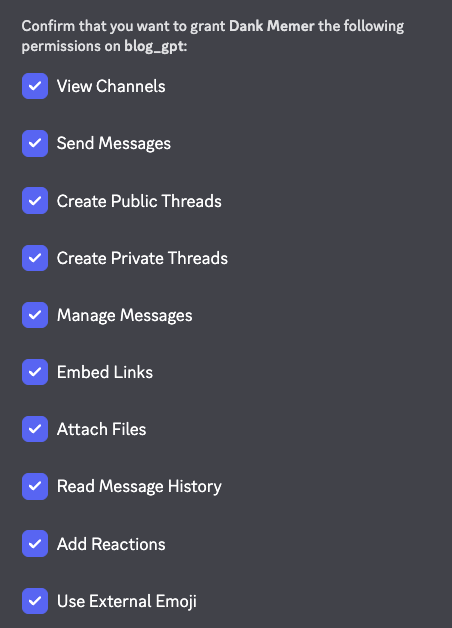
Step 2: Configure Permissions
Required:
- Read/Send Messages
- Embed Links (for meme/economy embeds)
- Attach Files (for meme images)
- Add Reactions
- Optional: Manage Messages (for auto-cleaning commands).
- Restrict the bot to fun/game channels (so it doesn’t spam serious areas like #announcements).
Step 3: Setup Meme Commands
- Users can post memes with
pls meme - You can enable restricted meme categories in the dashboard (safe vs NSFW).
- Encourage a “meme channel” (e.g., #memes) where members use Dank Memer freely.
Step 4: Economy System & List of Commands
Dank Memer’s economy is its most loved feature.
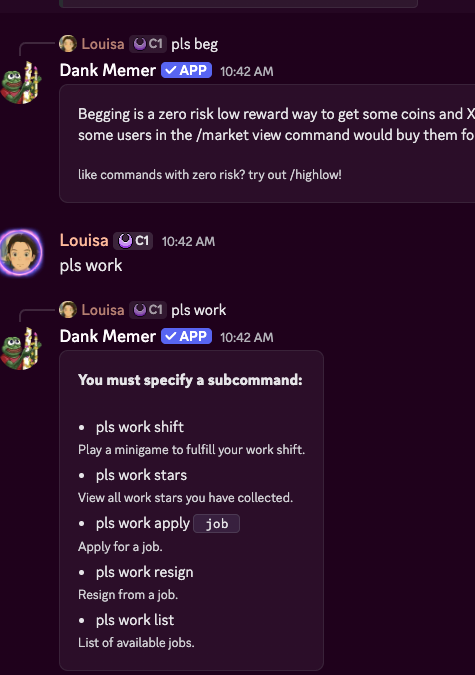
- Start earning coins:
pls beg
pls work
pls hunt
pls fish
pls dig
- Banking system:
pls deposit <amount>→ Store coins safely.pls withdraw <amount>→ Take coins out.
- Gambling/games:
pls slots→ slot machinepls gamble 500→ bet coinspls trivia→ earn through quizzes
- Trading/market:
pls shop→ view purchasable itemspls buy <item>→ purchasepls trade @user <item>→ trade with others
Dank Memer Pricing
Five tiers raning from $4/month to $50/month. Each tier unlocks more currency multipliers, steal‑shields and donor perks.
Discord Servers Best for Dank Memer
Servers that want to entertain members with memes and a shared economy system.
Dank Memer Limitations
Gambling and stealing mechanics can cause drama; admins should clearly communicate rules.
UnbelievaBoat Overview
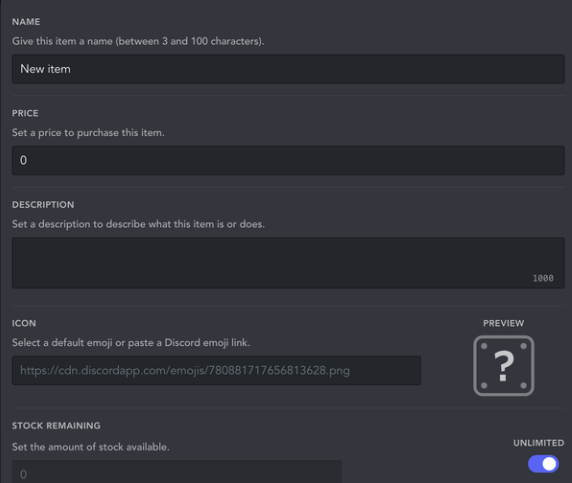
UnbelievaBoat is one of Discord’s most complete economy bots—powerful, customizable, and flexible enough to fit any kind of community. It transforms a simple server into a small, gamified world where members can earn, spend, compete, and build an identity within your economy. Rather than being purely a “fun bot,” UnbelievaBoat gives admins tools to design an entire currency system: you choose the name, symbol, earning methods, shop items, jobs, and even whether people can gamble or trade. With millions of servers using it, it’s a proven favorite for anyone who wants more depth than a levelling bot but less chaos than a meme bot like Dank Memer.
On the community side, UnbelievaBoat helps servers foster activity loops—people come back to collect paychecks, check leaderboards, buy shop items, or challenge friends in casino games. Unlike some economy bots that encourage stealing, UnbelievaBoat’s balanced defaults make it “peaceful by design,” meaning your economy won’t turn toxic. Many roleplay, hobby, or productivity servers use it as their main engagement system because it blends entertainment with structure.
Setting Up UnbelievaBoat on Your Discord Server
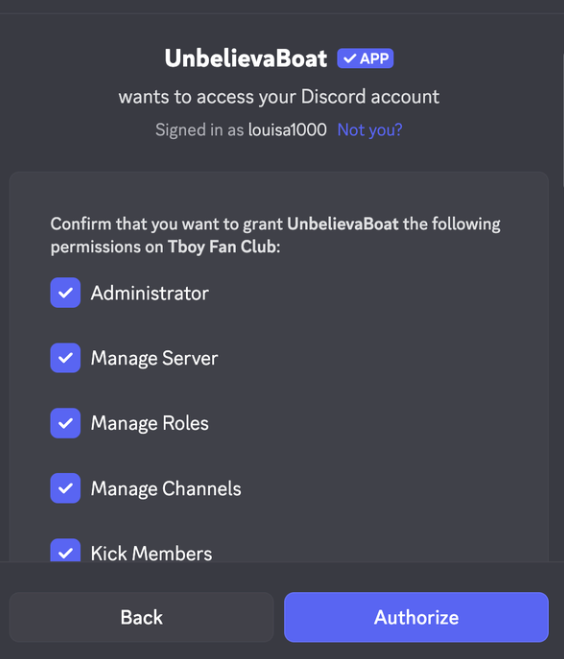
Step 1: Invite UnbelievaBoat
Visit unbelievaboat.com, find the bot
Click Invite → select your server → Authorize the permissions.
It will ask for common permissions like sending messages, embeds, and managing messages. If you plan to use its mod features, also grant kick/ban/manage roles.
Step 2: Test the Default Economy
Once the bot joins, you can immediately use commands such as:
!balanceor!bal– check your wallet and bank!work– earn currency from a random “job”!deposit/!withdraw– move money in/out of bank!shop,!buy,!inventory– manage the server’s store and your items
This is the out-of-the-box system—great for quick testing before deep customization.
Step 3: Customize via Dashboard
Go to and log in with Discord. Here you can:
- Rename your currency (e.g., “Coins,” “Credits,” “Cookies”) and pick a symbol.
- Adjust job payouts, cooldowns, or create custom income sources.
- Build a virtual store with items that can trigger actions or assign roles.
- Enable or disable gambling commands like
!blackjackor!slot-machine. - Configure welcome messages and moderation tools if desired.
The dashboard interface is intuitive and lets you experiment safely—changes apply instantly.
Step 4: Channel & Community Setup
Create a #bot-commands or #economy channel to keep gameplay contained.
Announce your new system to members—explain how they can earn and spend.
UnbelievaBoat Pricing
Free tier includes full access to the core economy and commands. Premium plans (around $6/month) add perks like interest on bank balances, multiple currencies, role-assignment items, and extended automation. For most communities, the free version is already feature-rich.
Discord Servers Best for UnbelievaBoat
Perfect for roleplay, hobby, or semi-professional servers that want structured engagement without chaos. It fits well in:
- Community hubs – Reward active chatters with currency and roles.
- Roleplay servers – Turn jobs, shops, and currency into in-world mechanics.
- Club or guild servers – Use leaderboards to motivate participation.
- Small teams – Gamify productivity tasks (“earn 💰 for completed goals”).
UnbelievaBoat Limitations
Its deep customization can feel overwhelming at first—there’s a lot to configure if you want a full economy. Without regular updates or events, the currency may stagnate, so admins should plan ongoing uses (like shop refreshes or contests). It’s less social than meme or RPG bots; users mostly interact through the bot rather than together. Finally, heavy command use can clutter chat if you don’t confine it to a dedicated channel. Still, once tuned, UnbelievaBoat becomes one of the most reliable and admin-friendly economy engines on Discord—flexible, safe, and endlessly tweakable.
Pokétwo Overview
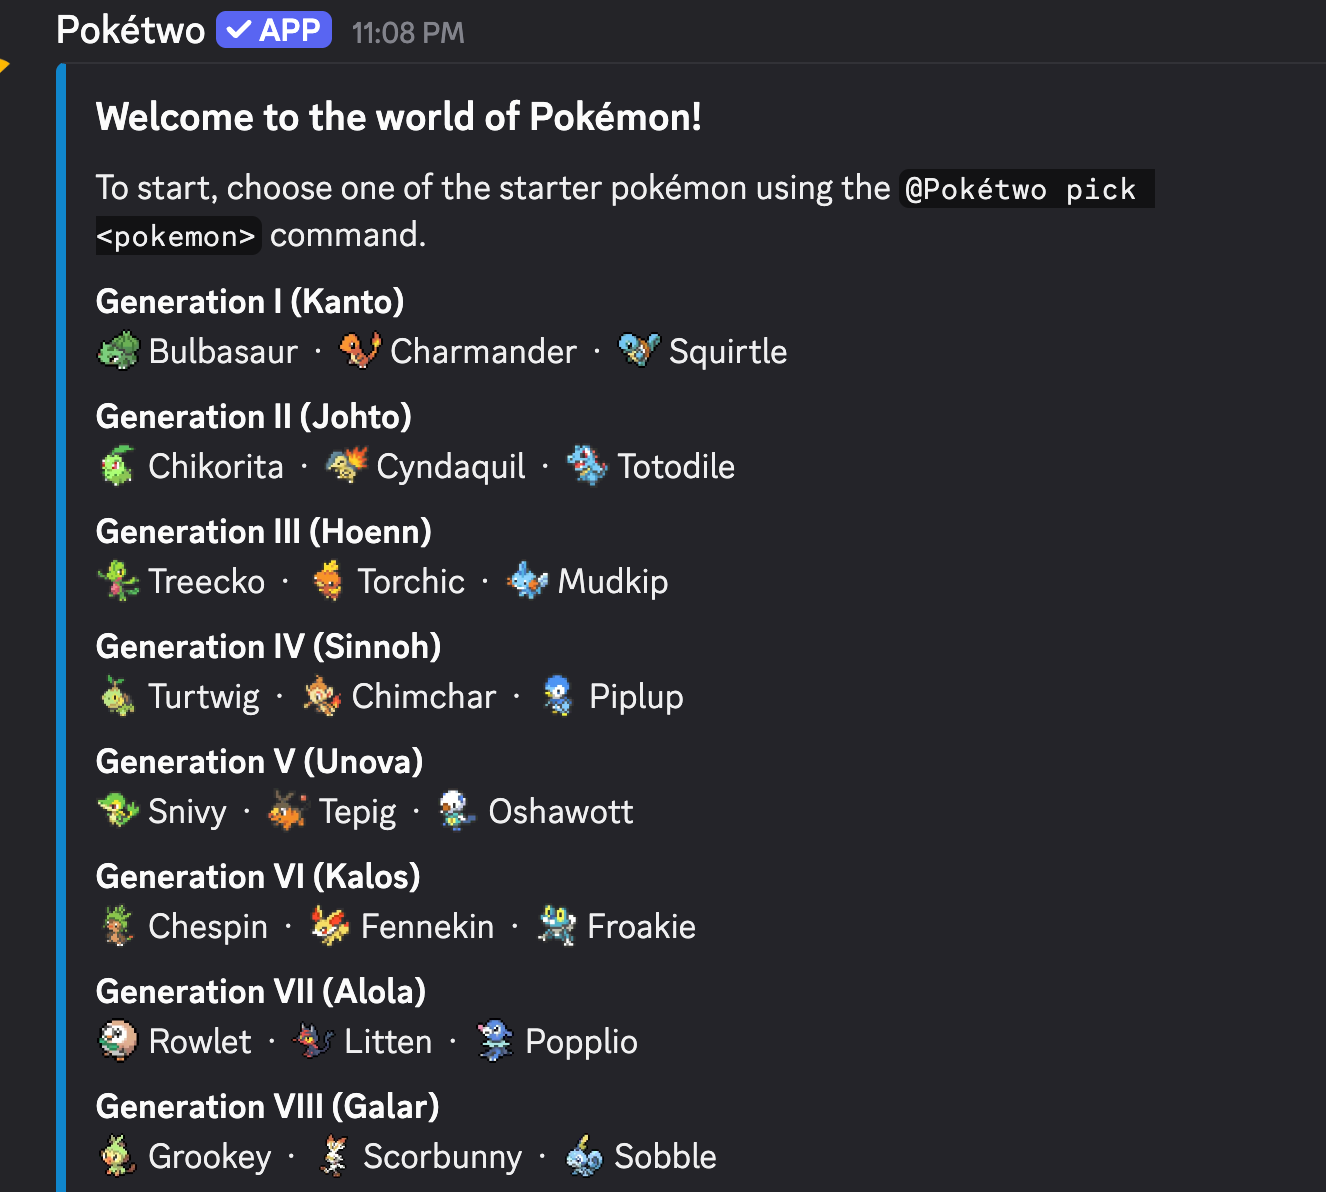
Pokétwo brings the Pokémon experience to Discord in a way that can turn a chat into an addictive game. Inspired by the retired Pokécord bot, Pokétwo allows Pokémon to appear randomly as you and your members chat. When a wild Pokémon spawns (the bot will post a silhouette or hint), the first member to correctly catch it (by typing the Pokémon’s name) adds it to their collection. This simple premise – “chat more to encounter Pokémon” – encourages activity and surprise moments of excitement when a rare one shows up.
What makes Pokétwo especially engaging is the depth beyond catching. Users can train and level up their Pokémon, battle each other in 3v3 turn-based fights, trade Pokémon to complete their Pokédex, and even buy/sell on a global marketplace. The bot essentially turns your Discord server into a mini Pokémon world: you’ll find people proudly showing off their latest catch or their high-IV shiny they were lucky to find.
Setting up Pokétwo is easy – just invite it, and it starts working. By default, Pokémon can spawn in any channel where the bot has read access and that has chat activity. Many servers dedicate a channel like #pokémon-game to it, so that the gameplay doesn’t disrupt other conversations. In that channel, users might even engage in pseudo-“roleplay” as Pokémon trainers, which adds to the community bonding.

The bot’s command set is rich: @Pokétwo start to choose a starter, @Pokétwo catch <name> to catch a Pokémon, @Pokétwo info to get details on a Pokémon, @Pokétwo battle to challenge someone, etc. It also has some quality-of-life features like incense (an item to increase spawn rates for yourself) and loot boxes for items, which keep the progression feeling fresh.
One of the delightful aspects is how it taps into nostalgia – members who grew up with Pokémon love seeing their favorites and working together/trading to get evolutions. It can truly spark a lot of chatter (“A wild Pikachu appeared!” – “OMG where?!” – “In #pokemon-chat, quick!”).
Setting Up Pokétwo on Your Discord Server
Step 1: Invite Pokétwo
- Use the official invite link from the Pokétwo website or a bot list.
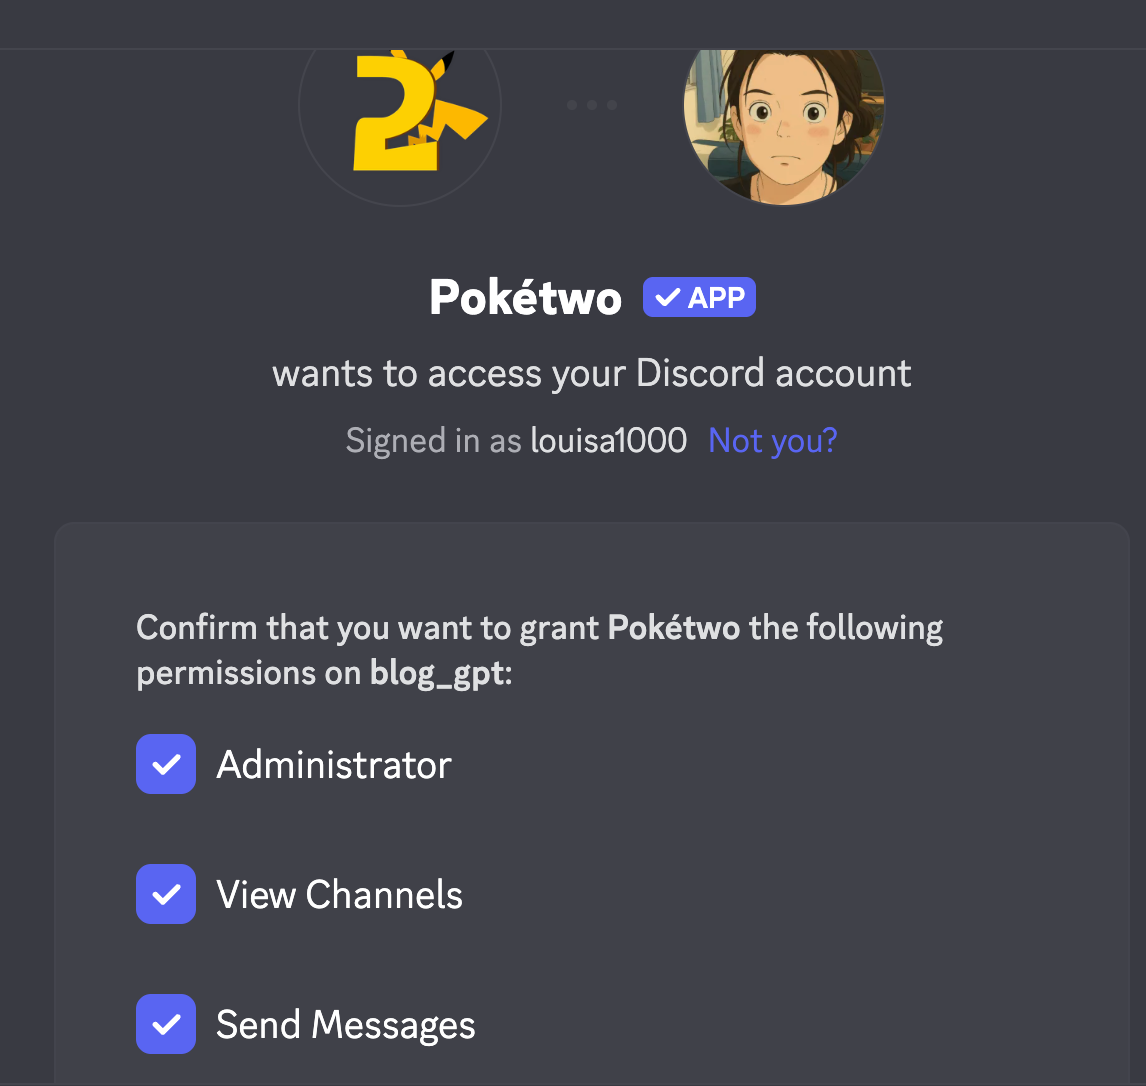
- Grant it permission to read and send messages in the channels you want it to operate (no special admin perms needed even it asks for it; it just needs to see messages to know when to spawn Pokémon).
Step 2: Choose a Channel for Spawns (Optional but recommended)
- Decide if you want Pokémon spawns everywhere or in a specific channel. Pokétwo will only spawn Pokémon when people chat. You can limit spawns to one channel by removing its read permission in others or by configuring the spawn channels with a command (some bot versions allow specifying channels).
- Many communities create a #poke-game text channel and direct all Pokétwo commands there for organization.
Step 3: Start the Game
- Instruct your members to type @poketwo
startto begin their journey and pick a starter Pokémon. The bot will DM or prompt them to choose from classic starters. - After that, as people chat in the spawn-enabled channels, Pokémon will randomly appear. The bot usually shows a silhouette and a message like “A wild Pokémon has appeared!” Users must guess the name: e.g., type “Pikachu” to catch a Pikachu.
Step 4: Encourage Engagement
- The more people chat, the more spawns. So, you might find people engaging in small talk just to get spawns – which is a side benefit for community engagement!
- You can use
hintif a Pokémon isn’t caught to give a hint about its name. This keeps things moving if an obscure one pops up and nobody can guess.
Step 5: Use Advanced Features
- Remind players they can battle each other once they have trained Pokémon. Use
@poketwo battle @Userto initiate a duel. Battles are turn-based and use the actual Pokémon moves; it’s quite fun for those who want a bit more than catching. - They can also
@poketwo trade @User <Pokemon>to exchange monsters, and@poketwomarket search <name>to see if a Pokémon is for sale on the global market. There’s an entire economy for buying and selling Pokémon within the bot. - Regularly, users should do
@poketwodailyto get daily rewards (like coins or items). Coins can be used to buy evolution items or incense.
Pokétwo Pricing
Pokétwo is completely free to play and open source. There are no premium paywalls – all features and content are available to everyone. The bot developers sustain it through donations (for hosting) and the goodwill of the community. This is great because it means everyone in your server has equal footing (no pay-to-win). Just be aware that because it’s free and popular, sometimes it may lag during peak hours (rare, but can happen).
Discord Servers Best For Pokétwo
Any community with a lot of Pokémon fans or gamers. It’s perfect for anime/manga servers, gaming clans, or general hangout servers where a shared game can bring people together. Even if your server’s theme isn’t explicitly Pokémon, Pokétwo can serve as a fun side activity that keeps people around. For example, a tech forum Discord might still enjoy catching Pokémon during lulls in tech discussion.
Pokétwo Limitations
Pokétwo can flood chat if not corralled appropriately. If spawns are enabled server-wide, it might distract from normal conversations – hence the suggestion to isolate it to a game channel. Also, some users might focus on the bot game to the exclusion of talking about anything else, which could affect your community’s culture. As an admin, you may need to gently remind folks to not let the bot take over every channel.
Another limitation: the game is text-based and can feel grindy after the initial excitement (you have to type a lot to get spawns, and catching rarer Pokémon can be a long-term effort). But that’s part of the appeal for enthusiasts. Lastly, moderation-wise, ensure that bot spam (like repetitive guessing of names) doesn’t break your rules – you might set a slowmode on the Pokémon channel to mitigate spammy behavior.
Mudae Overview
Mudae has become one of the most influential Discord games by blending simplicity, competition, and community-driven engagement into a single experience. At its heart, the bot revolves around rolling and collecting characters, yet this straightforward mechanic has captivated millions of players worldwide. Its design cleverly encourages repeated engagement through timed rolls, scarcity (only one claim per character per server), and inclusive competitiveness where anyone can grab a rolled character within a short window. This creates anticipation, competition, and fairness all at once, ensuring users keep coming back while bonding with others in their community. For creators and marketers, Mudae’s rise demonstrates how simple mechanics paired with social interaction can spark massive user retention and loyalty.
What truly sets Mudae apart, however, is how it leverages community participation and generosity. From allowing players to divorce or gift characters (strengthening relationships through shared acts) to supporting user-generated content—20% of players contribute images—Mudae empowers its community to shape the experience. This fosters ownership, loyalty, and a sense of belonging that goes beyond the game itself. Its monetization model, built on offering visibility and perks within this vibrant community, underscores the value of nurturing an engaged user base. For digital communities, Mudae is more than a game—it’s a playbook on how to cultivate active, loyal, and invested audiences by prioritizing participation, collective experiences, and community-driven growth.
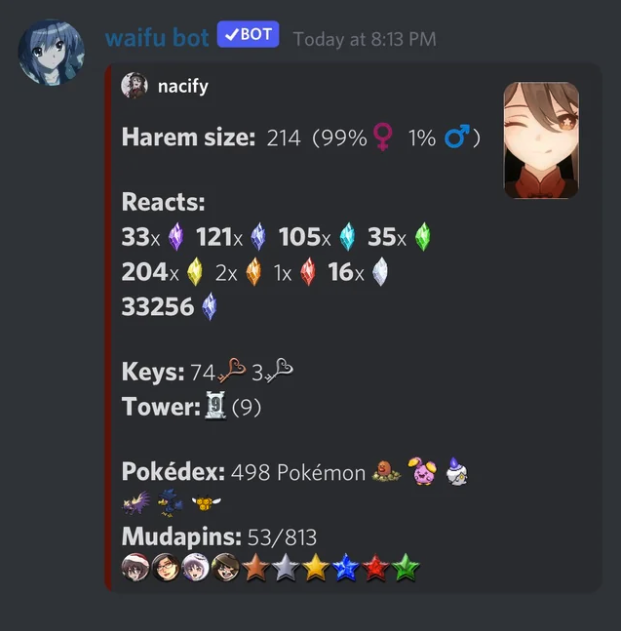
Setting Up Mudae on Your Discord Server
Step 1: Invite Mudae
- Visit the official Mudae website or find it in the Discord App Directory.
- Click Invite → select your server.
- Authorize the bot with Discord.
- In Server Settings → Roles, move the Mudae role above the roles it needs to manage.
Step 2: Permissions Setup
- Required:
- Read/Send Messages
- Embed Links (for character rolls)
- Attach Files (for images)
- Add Reactions (for claiming characters)
- Optional: Manage Messages (to clean up spammy roll commands).
- Best Practice → confine Mudae to specific channels (#waifu-rolls, #games) to keep spam under control.
Step 3: Character Rolling (Core Feature)
Mudae’s main draw is rolling for anime/game characters.
- Basic commands:
$waifu
$husbando
$marry

- These commands roll random characters from anime, games, or manga databases.
- Users can “claim” characters with a ❤️ reaction — fastest person to react wins.
- Each server has a claim timer (default 3 hours per user).
Step 4: Economy & Kakera System
- Characters give kakera (currency) when released or upgraded.
- Users can use kakera for:
- Upgrades (improving claim value or bonuses).
- Customizations (rename, image priority, etc.).
- Key commands:
$kakera
$tu
$upgrade
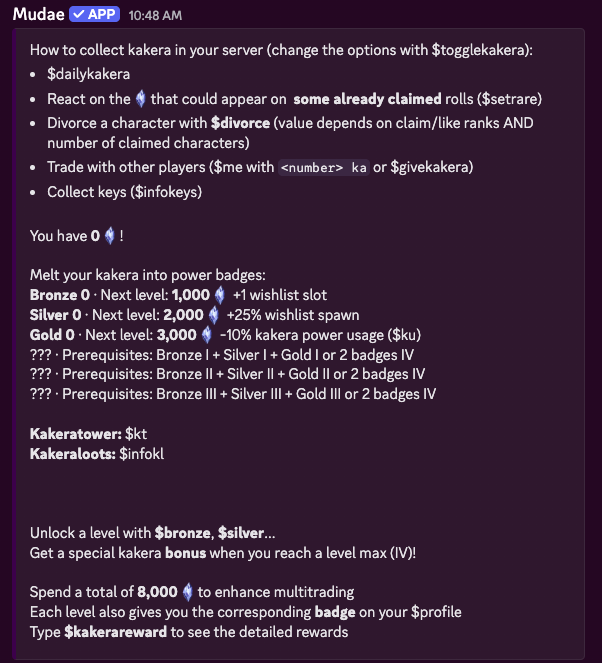
Step 5: Configuring Rolls & Claims
Server owners can customize rolling behavior with $settings:
- Roll numbers: how many rolls per command.
- Cooldowns: time between rolls.
- Claim frequency: how often players can claim characters.
- Disable categories: e.g., exclude “games” if you only want anime characters.
Example:
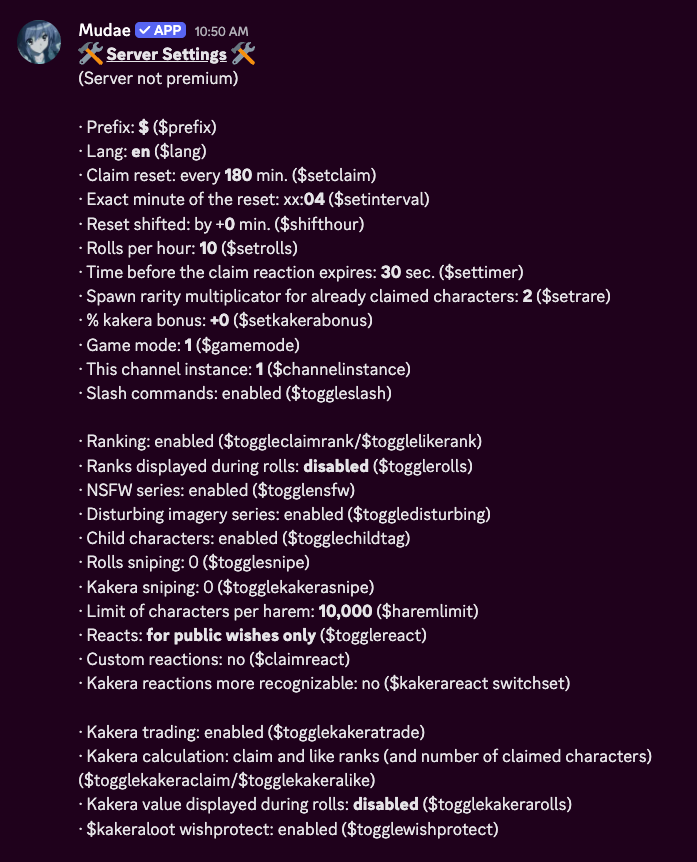
$settingfor a comprehensive list of setupThen toggle categories, timers, or limits.
Mudae Pricing
Mudae is free; currency is earned in‑game and there’s no paid tier
Discord Servers Best for Mudae
Anime and gacha fans who enjoy collecting characters and competing for rare pulls.
Mudae Limitations
Rolls are limited by Discord’s API; there is an optional heart‑reaction feature behind premium boosters
Bonus – Subo (survey bot)
What makes Subo stand out is how it takes a simple concept—Discord polls and surveys—and transforms it into a rich, engaging experience that feels natural inside Discord. Unlike generic bots or external survey tools, Subo is fully integrated into the Discord environment, letting users create and answer polls directly in chat with a single slash command. Responses are collected privately through threads, which protects anonymity and encourages honest feedback—something most communities struggle to capture. This design choice alone builds trust and makes members more willing to participate. Add to that Subo’s customizable settings—like multi-question surveys, conditional logic, and rich media embeds—and you have a tool that works equally well for quick “What should we stream tonight?” polls and serious feedback collection for product research.
Beyond functionality, Subo excels at keeping members engaged. Gamification features like XP points, leaderboards, and role rewards turn participation into something fun, driving much higher response rates than traditional surveys. AI also plays a supporting role—it can draft surveys or summarize open-ended feedback instantly—making the process easier for moderators and community managers without replacing their control. This balance of simplicity for newcomers and depth for power users makes Subo appealing to a wide range of communities, from gaming clans to tech startups. At its core, Subo shows how meeting users where they are, respecting their privacy, and layering in smart incentives can elevate a basic utility into a community engagement powerhouse.
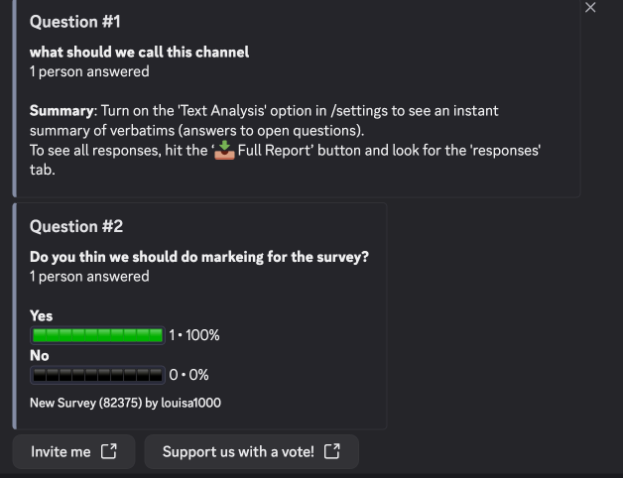
How to install and configure Discord bots
Installing bots generally follows a standard process:
- Choose a reputable bot and visit its official website (for example, mee6.xyz, dyno.gg or carl.gg). Avoid downloading bots from unknown sources. If you see a bot in a different server, it might still be worth going to the website to download the bot rather than invite outright via Discord. There are instances where someone creates a fake bot.
- Select the server where you want to install the bot. You must have the “Manage Server” permission.
- Review the permissions the bot is requesting. Reputable bots only need permissions relevant to their functions (e.g., manage messages for moderation, connect/speak for music bots). Uncheck any unnecessary permissions. Try to avoid giving any server admin permission except for security related bots.
- Authorize and complete any CAPTCHA. Discord will add the bot to your server.
- Configure the bot via its dashboard or commands. Most bots include a web dashboard where you can turn modules on or off, set automod rules, create reaction‑role messages or view analytics. For bots without a dashboard (e.g., FredBoat), read the help command to learn slash commands.
- Limit bot permissions after setup. Remove admin privileges unless absolutely necessary and use Discord’s role hierarchy to keep bots in check.
Click the “Add to Discord” or “Invite” button. You’ll be redirected to Discord’s authorisation screen. The MEE6 site shows this step clearly
Discord Bot Security: Best Practices
Adding bots can supercharge your community, but they also pose risks if misconfigured. Treat every bot as if it has the potential to cause harm, and manage them with the same care you’d give to a staff member.
Principle of Least Privilege
- Start small – Only grant the minimum permissions the bot actually needs. If a bot only plays music, it shouldn’t have moderation powers.
- Avoid blanket Administrator – Administrator permission gives full control over your server. Reserve it only for the most trusted bots (ideally verified and widely used).
- Granular permissions – Use Discord’s role and channel settings to limit bot activity. For example, give a bot “Manage Messages” only in a specific moderation channel.
- Audit regularly – Review your server’s bot permissions every few months. Bots update over time, and new features may request more permissions than you originally allowed.
Verifying Bot Authenticity
- Use official sources – Only install bots from the Discord App Directory, top.gg or the bot’s official site. Avoid random invite links shared in DMs. Try to avoid inviting a bot directly from another server, especially if you don't trust the server.
- Look for verification badges – Verified bots display a blue checkmark badge on their profile. This means Discord has vetted the bot and developer.
- Check permissions on install – When the invite screen appears, carefully read the requested permissions. If a “fun” bot is asking for “Ban Members,” that’s a red flag.
- Research the developer – Search for reviews on sites like top.gg or Reddit. Established bots usually have community feedback and transparent documentation.
Extra Safeguards
- Limit bot roles – Place bots in their own roles and keep these roles below your moderator/admin roles in the hierarchy.
- Use logging – Enable a mod-log channel (Dyno, Carl-bot, or YAGPDB can do this) to track bot activity.
- Have a removal plan – If a bot goes rogue or is compromised, remove its role and permissions immediately, then kick it from the server.
Discord bot FAQ (People also ask)
Are Discord bots safe? Reputable bots are generally safe, but always verify the developer’s website and check reviews on top.gg before inviting them. Only grant the permissions they need and avoid giving bots “Administrator” unless you fully trust the developer.
Can I run multiple bots on one server? Yes. Many servers run separate bots for moderation, music and games. Make sure their commands don’t conflict (choose distinct prefixes or use slash commands).
Do bots work on mobile? All bots run in the server regardless of the client. You can use slash commands or the bot’s web dashboard from mobile, but configuring complex dashboards is easier on desktop.
Why did Groovy/Rythm shut down? Groovy and Rythm were two popular music bots that relied heavily on streaming from YouTube. In 2021 YouTube issued cease‑and‑desist letters, leading both services to shut down. Current music bots like Lara and Jockie Music use different streaming methods and licensing models.
Are premium bots worth paying for? If you manage a large or commercial server, premium tiers can save time and enhance engagement. Features like unlimited backups (Xenon), recurring events (sesh), advanced analytics (CommunityOne), and persistent music streams (Lara, Jockie Music) justify a small subscription cost. For smaller communities, stick to the free versions until you outgrow them.
Conclusion
Top recommendations by category:
- Best overall: Sapphire (all‑rounder), Dyno (customisable moderation) and Communityone (analytics & engagement). They cover most server needs, from welcoming newcomers to preventing spam and rewarding activity.
- Best moderation & analytics: YAGPDB for its automod depth, Carl-bot for lightweight reaction roles and Xenon for backups.
- Best music: Lara for its rich feature set and multiple streaming sources, and RythmCore for AI-powered high-quality music
- Best fun/engagement: Dank Memer and Unblievaboat add games, memes and economies, while Mudae is the best off-the-shelf solution.
Ultimately, the right combination of bots depends on your server’s size and purpose. Start with free tiers, monitor what your community actually uses, and upgrade to premium features only when they clearly add value.