How to Customize Your Discord Server Like a Pro: A Step-by-Step Guide

You might be surprised to learn that a well-laid-out Discord server with the right keywords can boost your discoverability by a lot. Customizing your Discord server goes beyond just looks. It's about creating a space that captures attention and draws in the members you want.
My experience with Discord communities of over 120,000 members has taught me something valuable. Strategic server customization helps you outshine competitors and builds lasting member involvement. The right customization can turn a simple chat room into a dynamic, branded space. This applies to gaming communities, study groups, and professional networks alike.
Want to 4x your Discord engagement and get free nitros & steams every week✌?
Custom emojis and stickers give your community unique ways to express themselves. These elements strengthen your shared identity and create an inside culture. Discord Nitro users can also set different avatars, banners, and bios for each server they join. This creates more ways to personalize the experience.
Setting up more than 1400 successful Discord servers has shown me that proper customization needs a systematic approach. The numbers tell an interesting story. You should have one moderator for every 1000 members and one admin for every 10 moderators. This ratio helps your customized server run smoothly.
In this piece, I'll show you how to customize your Discord server like a pro. We'll cover everything from simple visual elements to advanced features that make your community unique. Let's change your Discord server into a place your members will love!
Start With Visual Identity
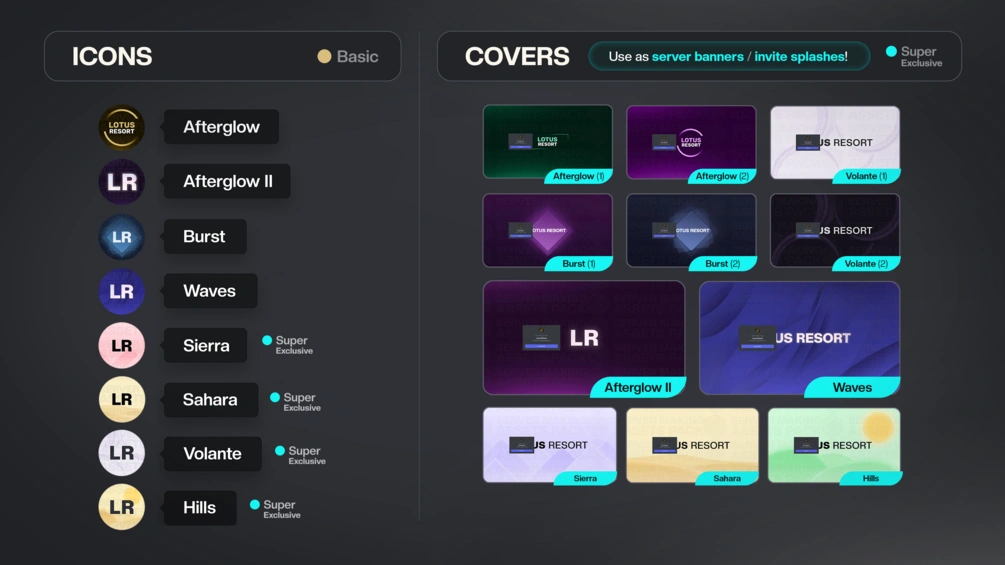
Image Source: Aeno
Visual elements build your Discord server's identity. Members who find your server get instant visual cues about your community's purpose and atmosphere.
Set a unique server name and icon
Your server name catches potential members' attention first as they browse Discord. Pick a name that shows your community's theme and add relevant keywords to help others find you. You can use up to 100 characters, but a short and memorable name works better.
To update your server name:
- Click on your server name at the top of the channel list
- Select "Server Settings" from the dropdown menu
- In the Overview section, modify the Server Name field
- Click "Save Changes" at the bottom
Your server's icon acts as your community's profile picture and shows up next to your server name in the sidebar. A good icon should be easy to spot—usually your logo or a simple symbol that represents your community's theme. Discord suggests using an image sized at 512 × 512 pixels in a 1:1 ratio. You can use JPG and PNG files up to 8MB (or 50MB with Discord Nitro).
To change your server icon:
- Head to Server Settings > Overview
- Hover over the current icon until "CHANGE ICON" appears
- Upload your selected image
- Save your changes
Add a custom banner for branding
Banners sit at the top of your channel list and give you extra space to show off your brand. You'll need to reach Boost Level 2 to use this feature. Your server can display animated banners once it hits Boost Level 3.
Best banner specs include:
- Recommended size: 960×540 pixels with a 16:9 aspect ratio
- High-resolution option: 1920×1080 pixels (automatically scaled)
- Supported formats: PNG, JPG, or GIF (for animated banners)
- Maximum file size: 10MB
Your banner will look best if you:
- Leave the top 48 pixels simple so your server name stands out
- Skip putting logos or text right on the banner
- Use images that match your community's theme
- Keep animations subtle if you use them
Use custom emojis and stickers
Custom emojis give your server personality and help members feel at home. These tiny visual touches show off your community's culture and let members express themselves in special ways.
Emoji specs to remember:
- Recommended size: 128×128 pixels in a 1:1 ratio
- Displayed size: Shows up as 32×32 pixels
- Supported formats: PNG, JPG, GIF (animated works too)
- Maximum file size: 256KB
Regular Discord servers can have 50 standard custom emojis and 50 animated ones. Server boosts increase these limits: Level 1 gives you 100 of each, Level 2 bumps it to 150, and Level 3 lets you have 250 of each type.
Custom stickers work like bigger emojis to spice up your messages. Basic servers start with 5 sticker slots. Level 1 boosts raise this to 15, Level 2 gives you 30, and Level 3 maxes out at 60 slots.
To add custom emojis or stickers:
- Go to Server Settings > Emoji/Stickers
- Click "Upload Emoji/Sticker"
- Select your file and give it a name
- Click Upload
A well-designed visual identity makes your Discord server memorable and helps build a community that members want to join and stay in.
Enhance Member Experience
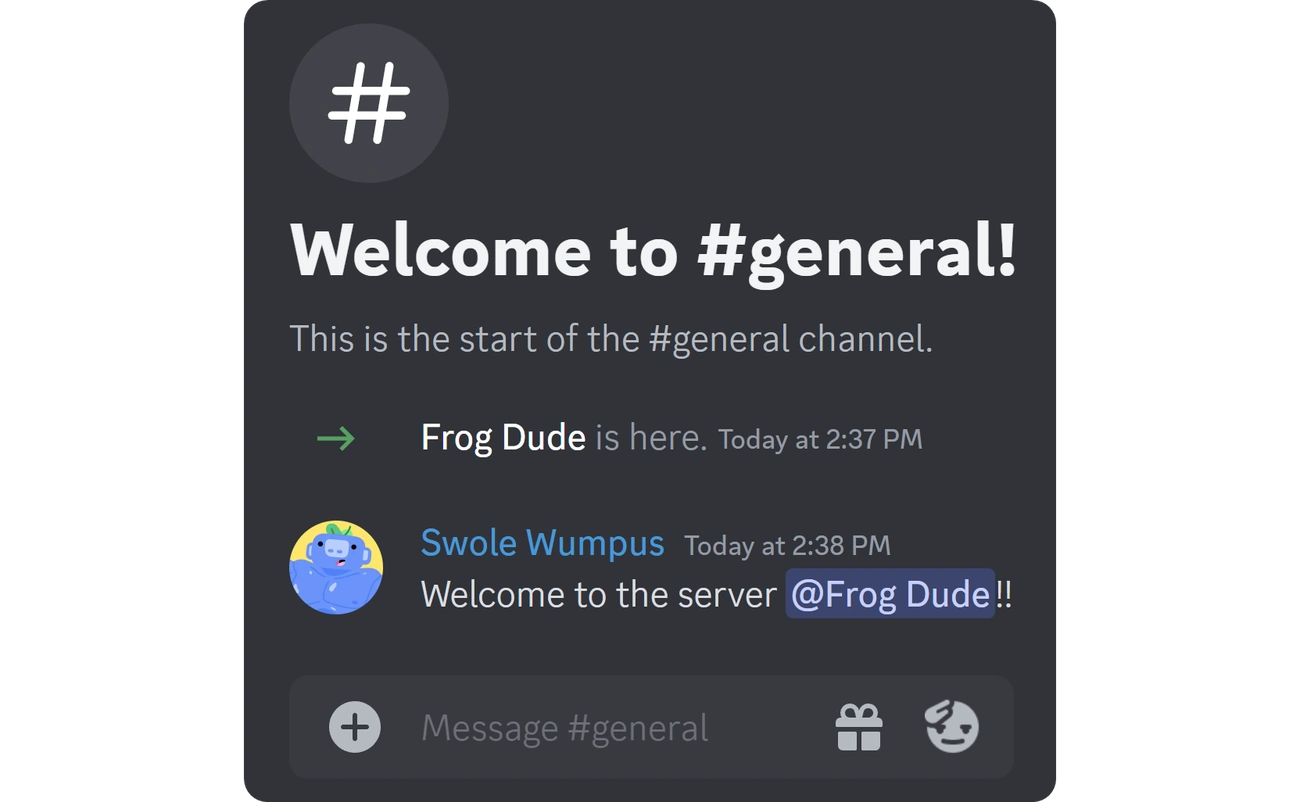
Image Source: Whop
Member experience plays a vital role in keeping people active on your server. A well-laid-out Discord server design with clear roles, smart onboarding, and time-tested guidelines helps create a community where members feel welcomed and valued.
Create custom roles and permissions
Your community needs a smart role structure to organize and define access levels. Roles work in a top-down hierarchy where higher positions override lower ones. Members show the color of their highest-positioned role, which makes permission and status identification quick.
Here's how to create roles:
- Use the @everyone role as your template for simple permissions
- Make specific roles based on responsibilities or interests
- Position roles by importance (drag them up/down in the roles list)
- Give each role the right permissions
The Administrator permission needs extra care since it gives all permissions and bypasses channel restrictions. Security demands selective assignment of the "Manage Roles" permission—users can only modify roles below their position. A proper role and permission setup helps prevent spam and unwanted activity in your community.
Set up a personalized welcome message
First impressions make a difference in digital communities. Discord lets you create welcome messages that greet new members automatically when they join your server.
Welcome message setup steps:
- Open Server Settings and direct yourself to the Overview tab
- Look for the "System Messages Channel" section
- Pick which text channel should show welcome messages
Custom workflows help newcomers adapt to your community. You might want to show a welcome screen with key information or ask them to introduce themselves. Personal greetings work better than automated ones—try this format: "Greetings @user welcome to the server!" plus a question about your server's topic.
Write clear and engaging server rules
Server rules set behavior expectations and become "the law of the land" for your community. Good rules create a welcoming space while keeping order and meeting community needs.
Rules should be:
- Specific – Define what's okay and what's not
- Fair – Apply to everyone equally
- Available – Quick to find and grasp
A dedicated "Rules" channel works well when new members must read and agree before joining server discussions. Discord allows 16 rules per server, so you need to focus on what your community values most.
Rule enforcement needs planning—you could use case-by-case judgment, an infraction system like "three strikes," or points where different violations have different weights. The system you pick matters less than using it consistently.
Smart roles, friendly welcomes, and clear guidelines help create a tailored Discord server that keeps members involved and coming back.
Add Functionality With Bots
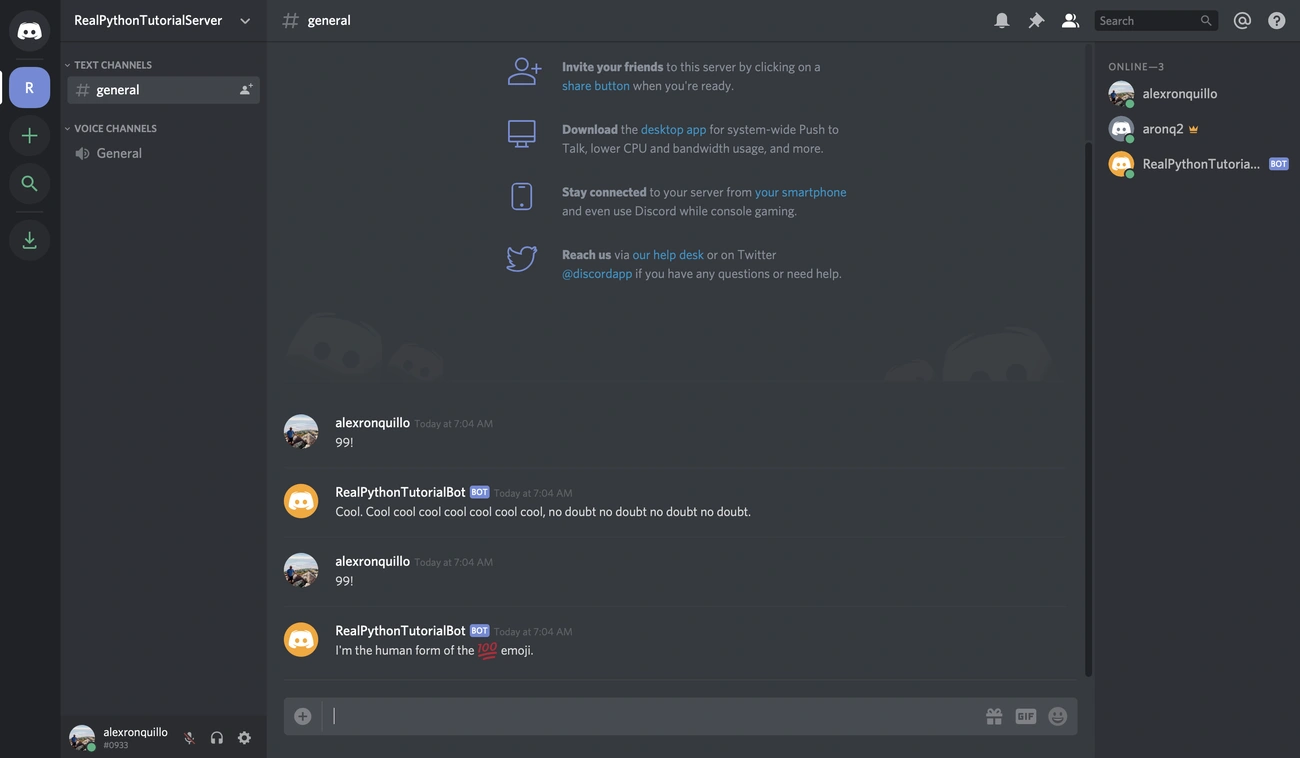
Image Source: Real Python
Discord bots serve as powerful assistants that raise your Discord server from simple to brilliant. These automated programs manage everything from moderation to entertainment. You can focus on growing your community while they handle the routine tasks.
Use bots for moderation and automation
Discord moderation bots automate critical tasks throughout your server and work as round-the-clock digital helpers. These programs manage functions like welcome messages, channel organization, and member activity tracking. Moderation bots become vital tools for servers with growing communities. They work non-stop to filter content, prevent spam, and enforce your community guidelines—even during your offline hours.
MEE6, a popular moderation bot, offers over 15 pre-made moderation commands that give the core team proper tools to maintain order. These bots come equipped with features like:
- Content filtering to block inappropriate material
- Spam prevention to detect raid attempts
- User management options to warn, mute, or ban rule violators
- Detailed logging to track server activities
Discord's official safety documentation emphasizes that auto moderation proves valuable especially when you have larger servers, as it addresses common issues faster than human moderators can respond.
Enable custom commands and reaction roles
Custom commands change how members connect with your server. These individual-specific commands, triggered by typing "/", perform various actions such as sending messages, assigning roles, or providing information. Your custom command setup needs these steps:
- Access your bot's command page or dashboard
- Name your command and add a description
- Define what happens when a member uses the command
- Deploy the command to make it available
Reaction roles offer another revolutionary feature. Members can self-assign roles by reacting to specific messages with emojis. This system lets members:
- Access topic-specific channels based on their interests
- Receive notifications for content they care about
- Display their priorities or identities within the community
Carl-bot makes setting up reaction roles straightforward with its user-friendly interface.
Add music, games, and polls
Entertainment features keep your community active and involved. Music bots let members play songs from YouTube, Spotify, and SoundCloud in voice channels during hangouts or gaming sessions. Gaming bots bring interactive experiences directly into your text channels.
Discord's built-in poll feature offers a quick way to gather opinions. The + symbol next to the chat box creates a voting poll with up to 10 different answer options. This tool helps with decision-making, event planning, or just having fun with your community.
These functional elements make your customized Discord server visually appealing and truly interactive for everyone involved.
Unlock Advanced Customization
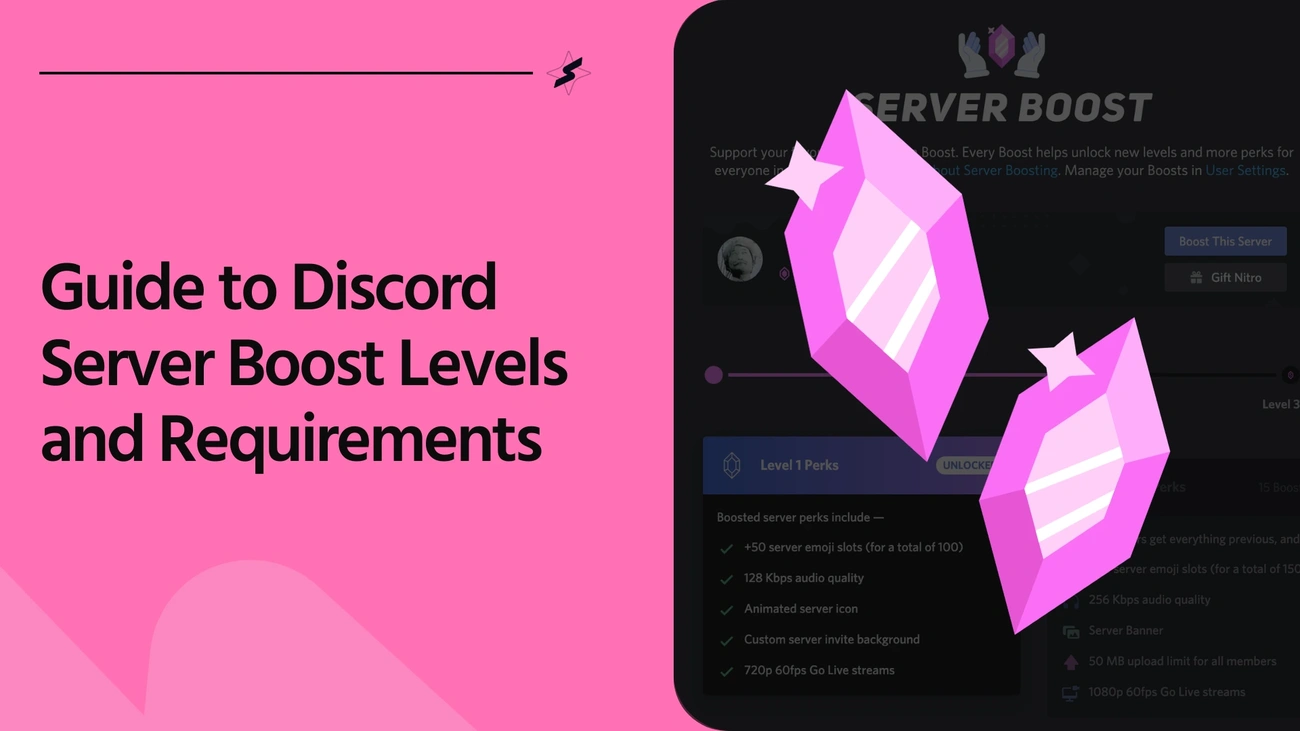
Image Source: SuperProfile
Discord server boosting lets loose your server's full potential through premium features that reshape the customization experience. Here's how you can elevate your Discord server with advanced options.
Use server boosting for extra features
Server boosting works as a subscription system where members help realize the server's potential through progressive perks. Your community should reach specific boost thresholds to access premium features. Level 1 needs 2 boosts, Level 2 requires 7 boosts, and Level 3 needs 14 boosts total.
Each level offers valuable perks:
- Level 1 gives you animated server icons, custom invite backgrounds, and 100 emoji slots
- Level 2 adds server banners, 256 Kbps audio quality, and 30 sticker slots
- Level 3 gives you animated server banners, vanity URLs, and 100MB upload limits
You can now use available boosts to unlock specific features directly. Features like Enhanced Role Styles or Server Tags cost 3 boosts each.
Set up vanity URLs and invite splash screens
Vanity URLs create memorable addresses like discord.gg/yourcommunity instead of random codes. Your server can access this professional feature at Boost Level 3.
Invite splash screens create visual impact behind the invite popup when new members join. This feature becomes available at Boost Level 1. You can use JPG or PNG files at 1920×1080 resolution.
Enable integrations with Twitch, YouTube, and more
Your Discord server gains extra functionality when connected to other platforms. Twitch Partners and Affiliates can link their channels to create subscriber-only areas. YouTube Partners can connect their channels and give members exclusive access. You can also connect your X with Discord.
Platform integrations sync subscribers automatically, create special roles, and let members bypass server screening. Each integration adds unique benefits that expand your server beyond Discord's core features.
Use Templates and Layout Tools
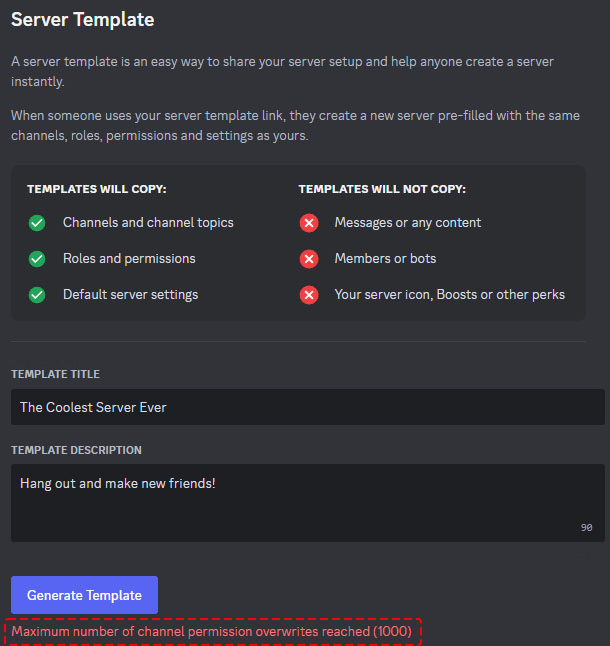
Image Source: Discord Support
A well-organized Discord server saves you time and helps maintain consistency in your communities. The right templates and tools are a great way to get your Discord servers customized without building everything from scratch.
Apply pre-made server templates
Discord Templates let you set up pre-configured server structures with channels, categories, roles, and permissions in one click. Here's how to use an existing template:
- Click the "+" button to create a new server
- Select the "Template" option
- Browse available templates or enter a template link
- Name your server and click "Create"
Setting up your own template is simple:
- Go to Server Settings > Server Templates
- Add a title and description
- Click "Generate Template" to create a shareable link
Organize channels and categories effectively
Good organization helps new members navigate channels easily. Your server structure should look like this:
- Important channels at the top (rules, announcements)
- Main chat channels in the middle
- Off-topic channels at the bottom
Each category works best with 4-5 channels. Role-locked channels help larger servers control access and reduce clutter. Clear channel names with relevant emojis make it easy for members to find what they need.
Back up your server settings
Templates protect your server configuration by backing up your channel structure, roles, and permissions—though they don't save messages or member data. Templates don't update automatically when you change your server settings, so click "Sync Template" after any major changes.
Conclusion
A customized Discord server can turn a basic chat platform into a thriving community hub. This piece explores how different elements work together to build your server's unique identity. Custom icons, banners, and emojis help establish your server's personality. Smart member management through roles, permissions, and welcome messages creates a solid community structure. On top of that, bots automate moderation tasks and boost interaction with custom commands, games, and polls.
Server boosting opens up more options with vanity URLs, better voice channels, and bigger upload limits. Discord already offers great customization choices, but templates and organizational tools make the process smoother and help keep your community consistent.
Note that good customization needs both style and substance. The best Discord servers blend these elements to create spaces where members feel at home and want to participate. Start with the basics like visual identity and clear rules. You can add more advanced features as your community expands.
Want to take your Discord server to the next level? Visit CommunitOne.io to find professional tools and resources that are a great way to get more from your Discord community experience.
Without doubt, a well-customized Discord server needs work to be done upfront, but stronger community engagement makes it worth the effort. Members love spaces designed just for them - it shows you care about their experience. Use these customization techniques wisely, pay attention to your community's feedback, and watch your Discord server become a lively space where members are happy to return.
FAQs
Q1. How can I make my Discord server stand out visually? To make your server visually appealing, set a unique server name and icon, add a custom banner for branding, and use custom emojis and stickers. These elements help create a distinctive identity for your community.
Q2. What's the best way to organize channels in a Discord server? Keep it simple and focused. Start with essential channels like rules and announcements, then add main chat channels. Limit each category to 4-5 channels for optimal navigation. As your community grows, you can add more channels based on member needs and interests.
Q3. How can I enhance member experience in my Discord server? Create custom roles and permissions to give members a sense of progression, set up a personalized welcome message for newcomers, and write clear and engaging server rules. These steps help create a welcoming and structured environment for your community.
Q4. What role do bots play in customizing a Discord server? Bots are essential for adding functionality to your server. They can help with moderation, automate tasks, enable custom commands, and add features like music playback, games, and polls. Carefully chosen bots can significantly enhance your server's capabilities and user experience.
Q5. How can I unlock advanced customization features for my Discord server? To access advanced features, you can use server boosting. As your server reaches higher boost levels, you'll unlock perks like vanity URLs, higher quality voice channels, and animated server icons. You can also enable integrations with platforms like Twitch and YouTube for additional functionality.