Discord 101: how to set up your Discord server

How to Create a Basic Discord Server: A Step-by-Step Guide
Discord has become a vital tool for community building online, whether for gaming groups, study circles, or even professional networking. If you're looking to start your own Discord server, you're in the right place. This article will walk you through the discord setup process from start to finish, complete with screenshots to help you along the way.
Step 1: Set Up Your Account
Before you can create a server, you need a Discord account. If you haven't signed up for the Discord app yet, go to Discord's website and register an account. It's quick and easy!
Step 2: Create Your Server
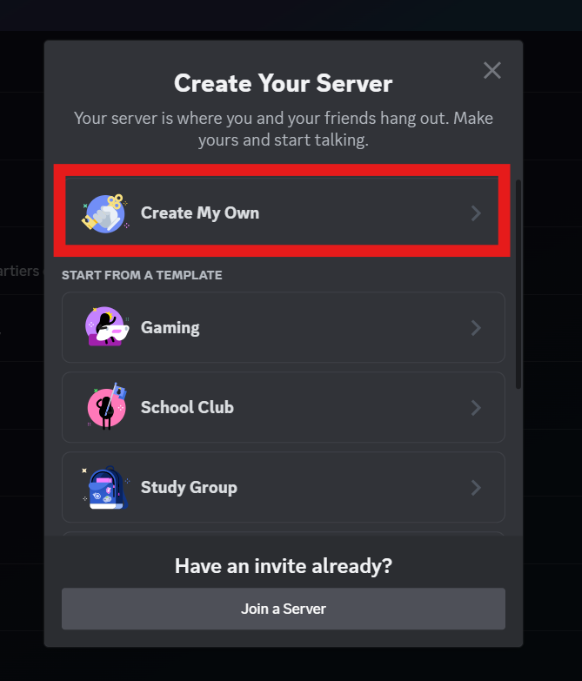
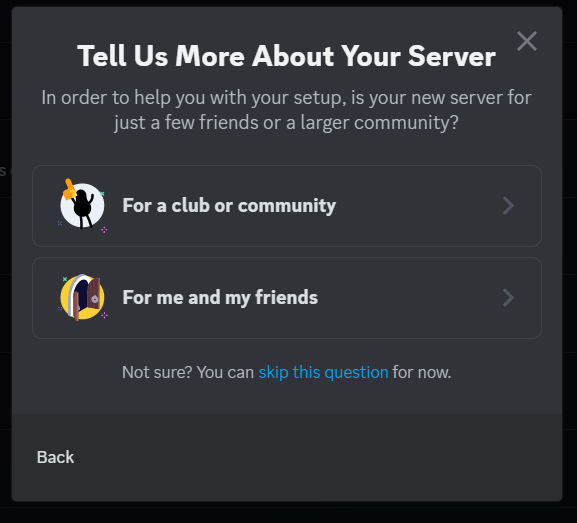
Once you're logged in, it's time to create your Discord server. Click on the plus icon on the left sidebar which is labeled "Add a Server." You will be prompted to create or join any existing discord servers. Select "Create My Own" for our purposes.
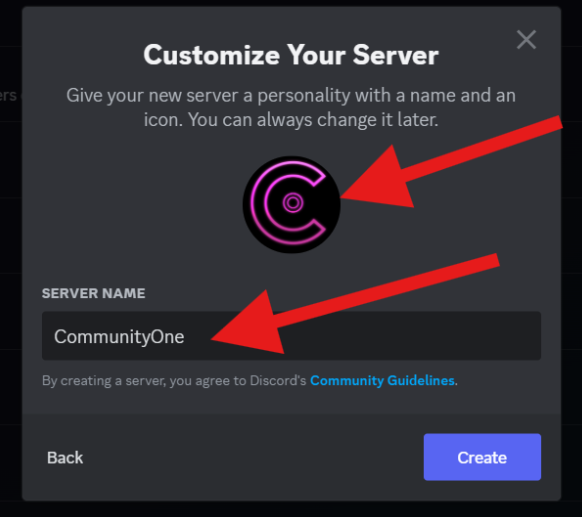
Step 3: Configure Your Server
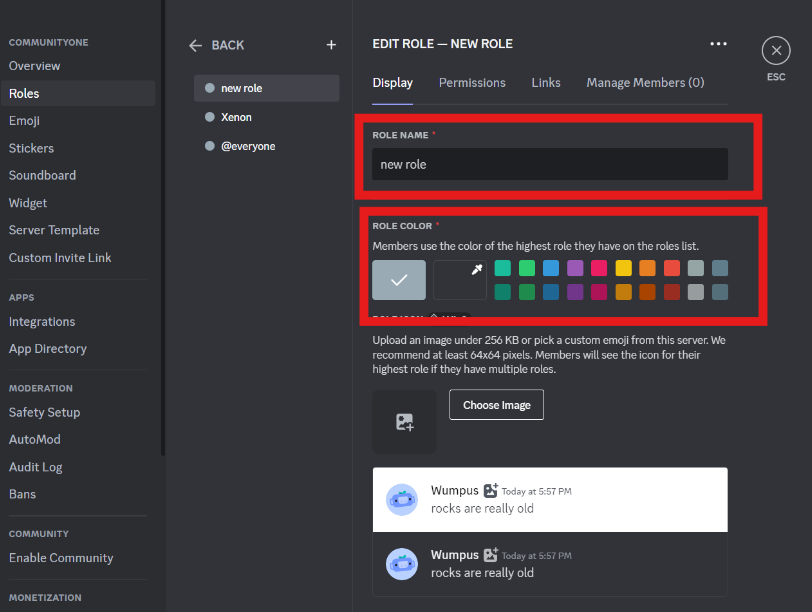
After choosing to create a server, you'll be asked to name your server. The server name can be anything relevant to its purpose.
Step 4: Set Up Server Roles
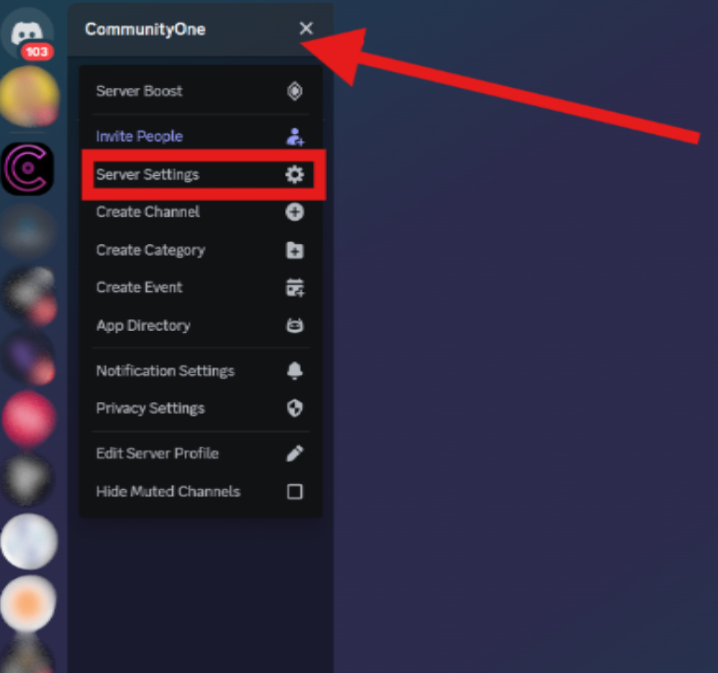
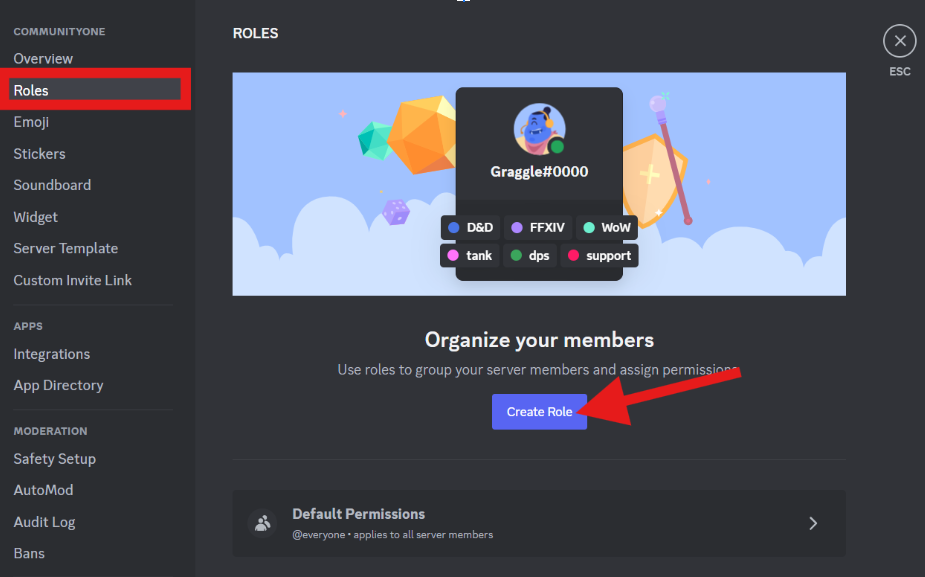
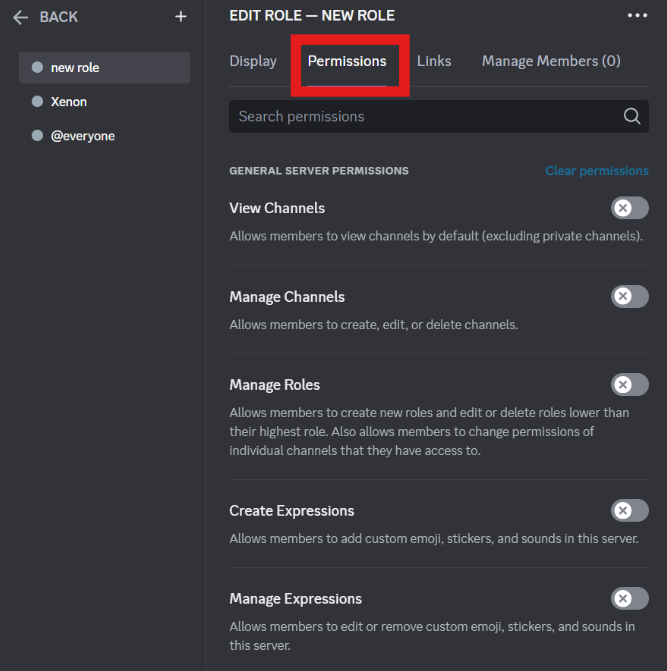
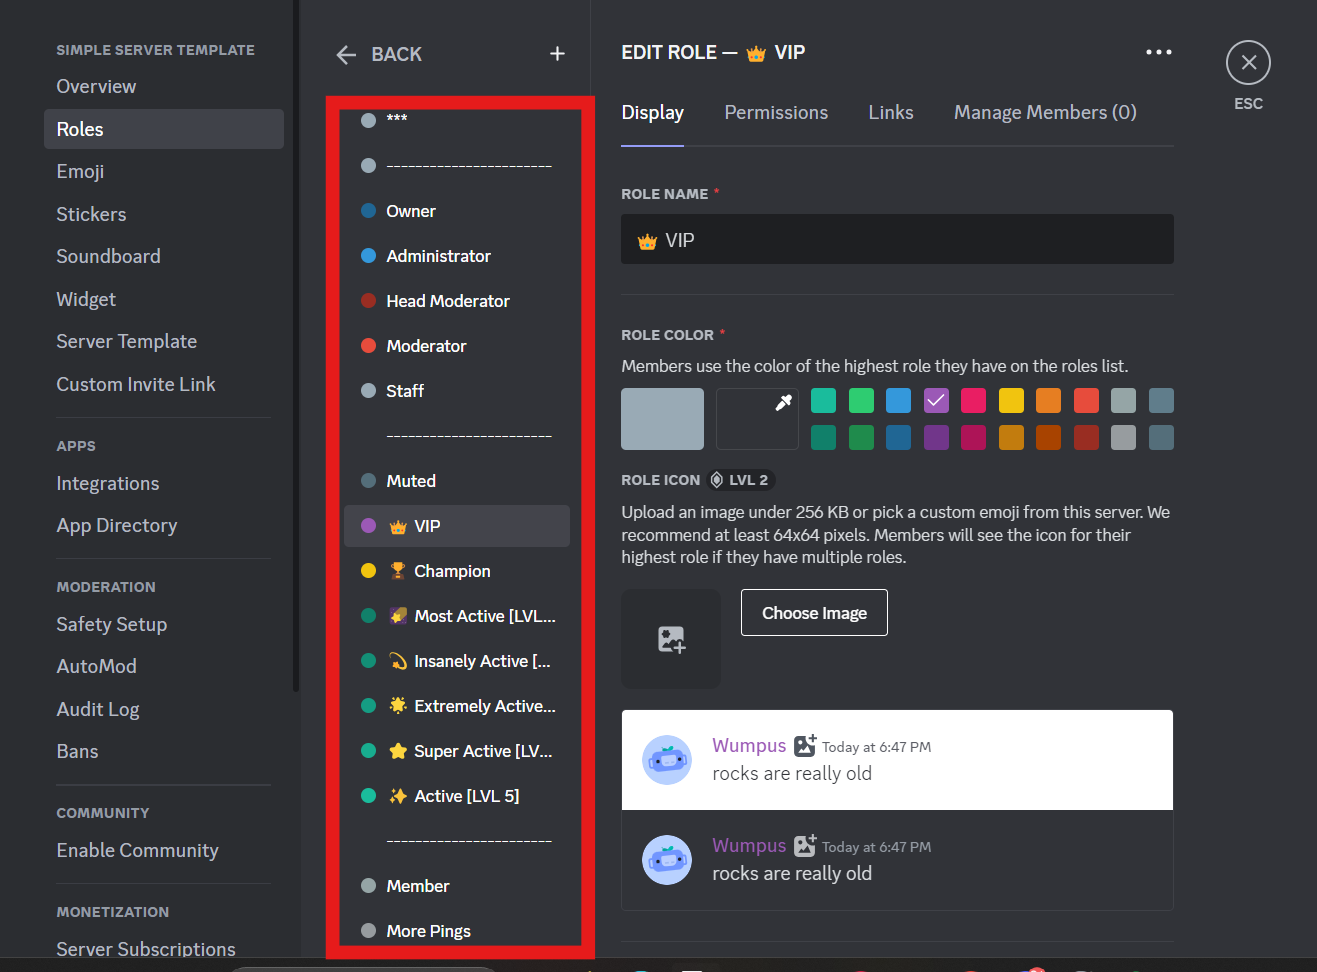
Roles are a fundamental part of managing your own discord server. They define what members can and cannot do. Go to your server settings, click on "Roles," and then click the plus icon to create a new role. Assign permissions based on what you want each role to do.
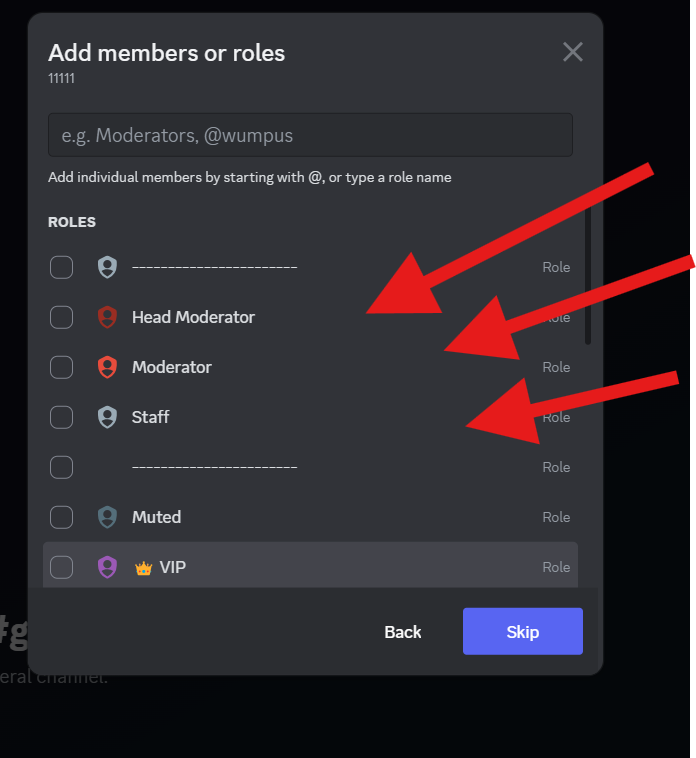
These roles don't need to have any permissions for the whole server (like a role for Moderators would), since they are only used to gate access to the region categories.
You can optionally assign these roles a color to allow community members in specific roles to stand out in channels, or host them in the member list to make it easy to find users in a group (for example, it's useful to host Moderators so people know who to get in touch with).
Choosing the Right Roles and Permissions
When creating roles for your admins and moderators, there are a few important things to keep in mind.
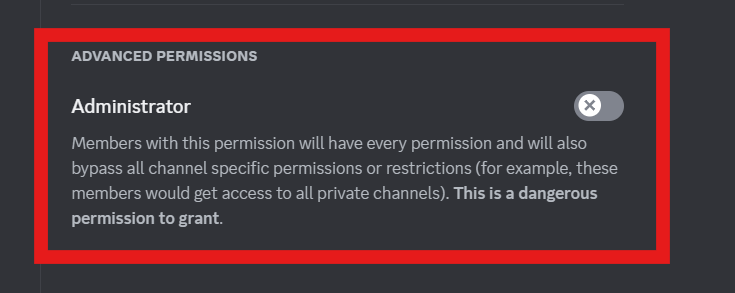
Think Carefully About Who Gets Permissions
Never give Admin or Kick Members permissions to anyone you don't fully trust—including the bots. This permission should be reserved for you and people you know and trust.
Good Permissions to Give to Your Moderators
- Manage Roles
- Manage Messages
- Ban Members
- Delete Messages
Good Permissions to Give Your Members
- View Channels
- Create Invite
- Send Messages
- Read Message History
- Embed Link (Only if you want users to leverage memes and not too worried about spam)
- Connect, Speak & Use Voice Activity
Make Use of “View Server as Role”
When you're setting up server roles, use the “View server as role” feature (found in your server settings) to see what members with that role will be able to see. This allows you to see other role's view without logging out of your own discord account and test out the server main onboarding process.
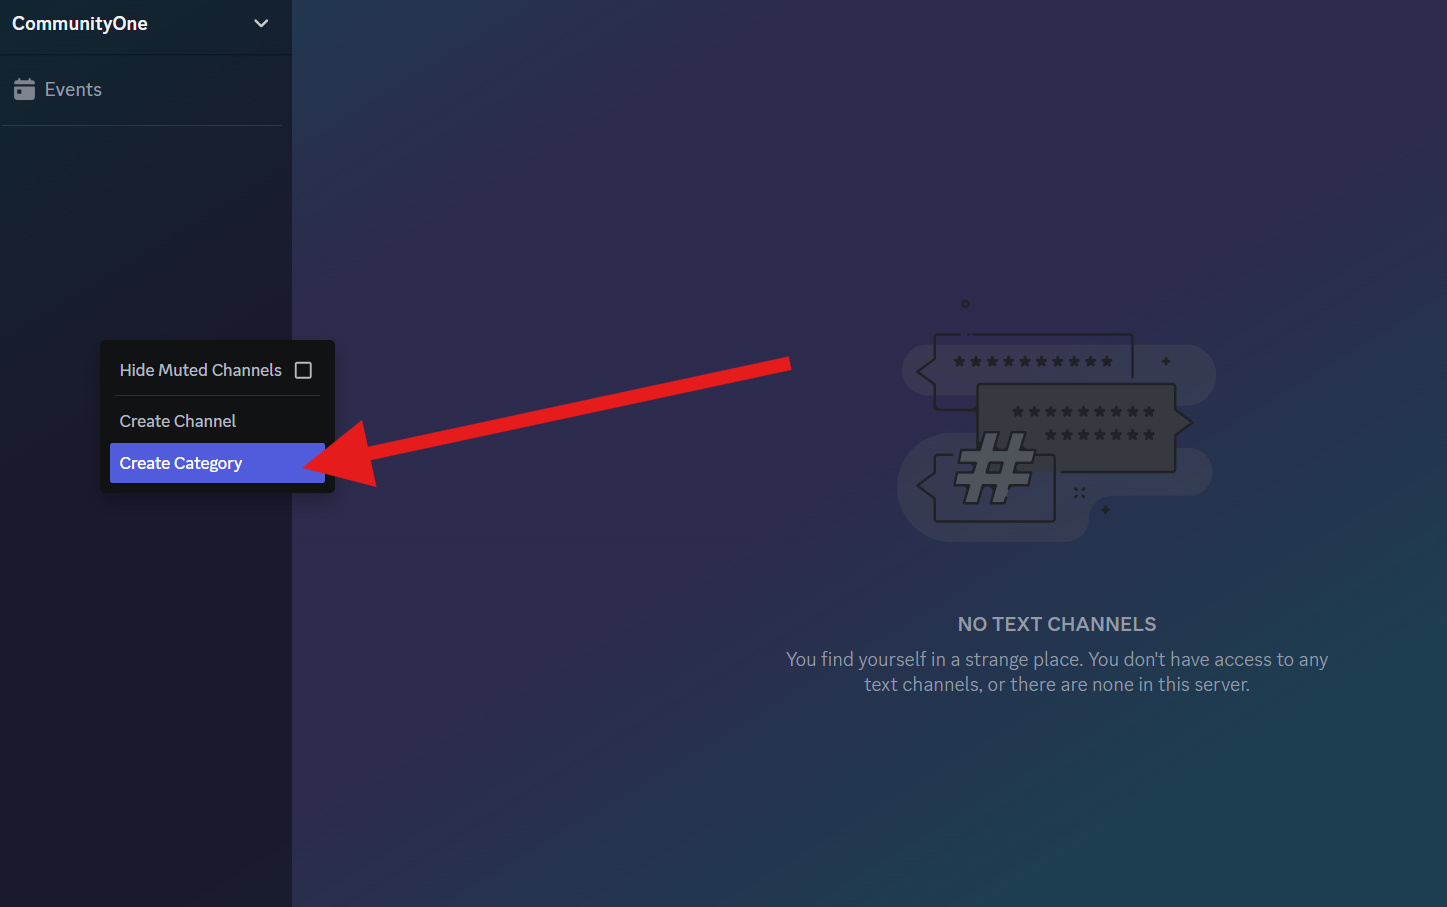
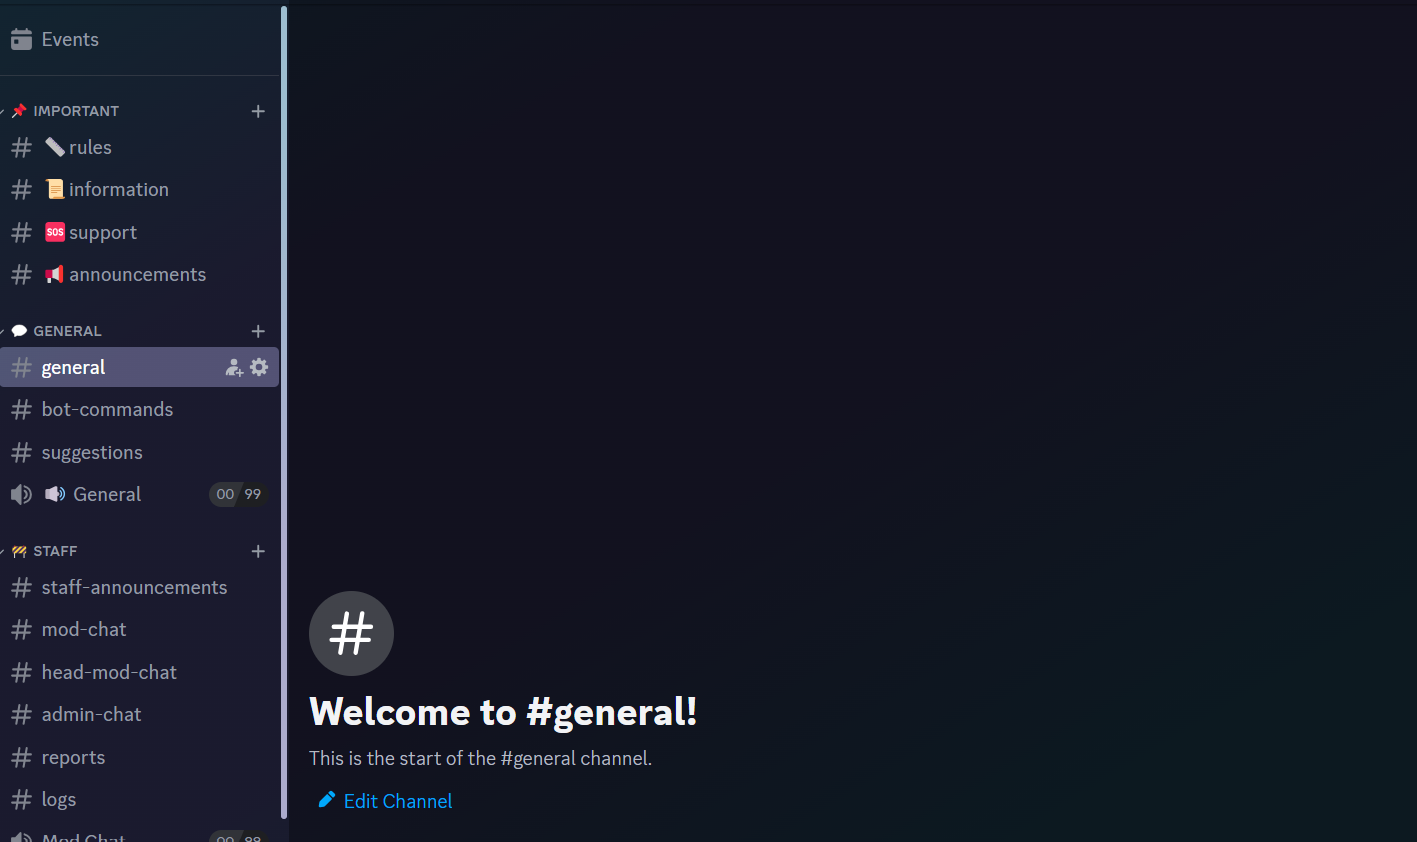
Step 5: Create categories, Text, Voice Channels
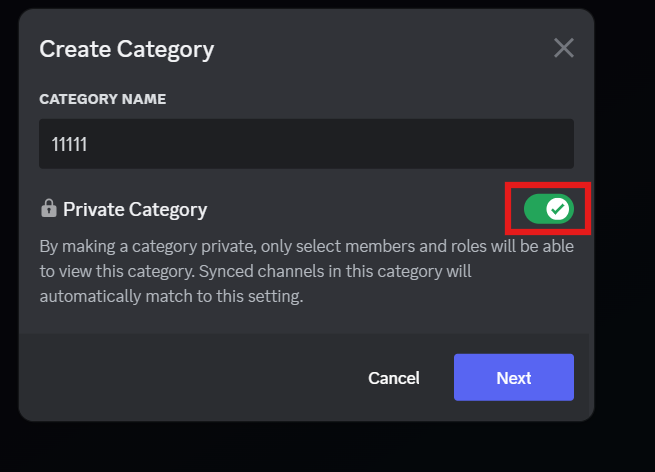
Discord provides you with a way to group related channels together into Category.
Channels are the spaces where you'll communicate over text or voice. Discord has multiple channel types, some of which you can only use on a Community server:
- Text channels: Here, you can communicate through text-based messages, images, GIFs, and emoji.
- Voice channels: These channels act like voice calls where you can also have voice or video chat and/or share your screen. Your members are likely to use VC channels to play a game or listen to music
- Forum channels: This new channel format works like a classic forum where you can post threads about topics and reply to them. They are easier to navigate vs a regular thread channel.
- Announcement channels (Community servers only): An announcement channel works kind of like an RSS feed for your discord server. You can post announcements in one of these channels that people from other servers can automatically share in their servers.
- Stage channels (Community servers only): If you need more focused voice chat for an event featuring speakers, use this channel type to make sure only approved members can talk.
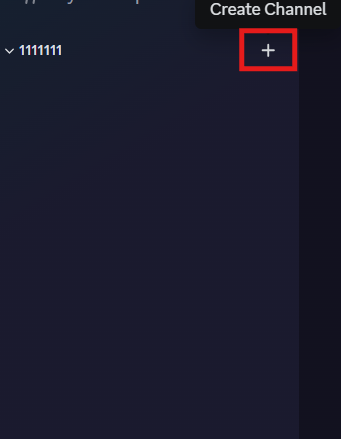
Your server can have multiple channels for different topics. To create any new channels, right-click on the top of the channels, choose "Create Channel," and select whether it should be a text or voice channel. Name your channel and set the appropriate permissions for who can access it.
This above server setup instructions are applicable for both public and close discord where you only want to invite friends that you know in IRL, for example.
(Optional) Switch to a Community server
If you plan on opening up your community to the public (vs a close discord), consider making your server a Community server. This discord server mode adds a variety of features for easier community management on a larger scale, such as:
- Announcement channels that other server owners can publish in their channels
- Stage channels where a small group of members can speak to listeners
- A welcome screen that introduces your server to new users
- Server insights that provide analytics about member behavior and your channels
- A built-in rules screening process that requires new members to agree to rules before posting
- The option to join Discord's discovery network so people searching for new servers can find you
If these features sound helpful, go to your server settings to find the Community server menu. Click on your server name in the upper-left corner of your screen, then go there.
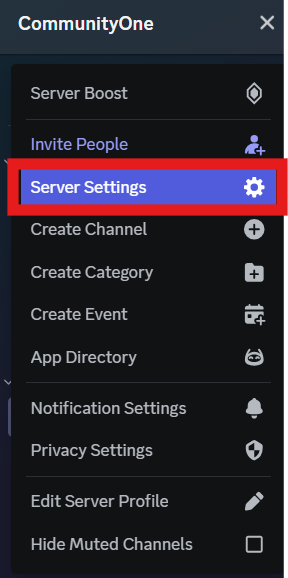
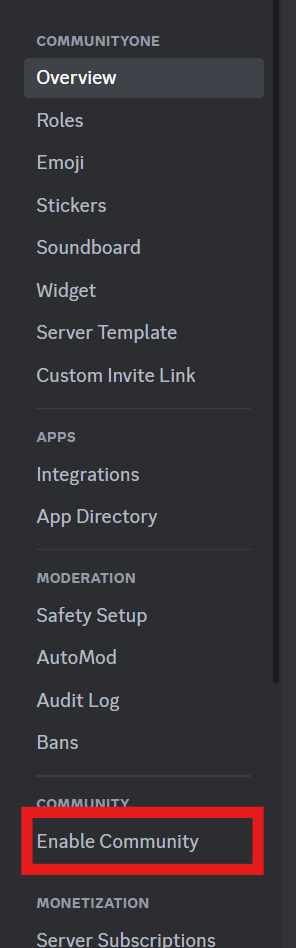
From there, click Enable Community under the Community header to turn your server into a Community server.

Discord will prompt you to follow three steps:
- Safety checks: Require a verified email from the discord users and turn on media scanning for explicit content.
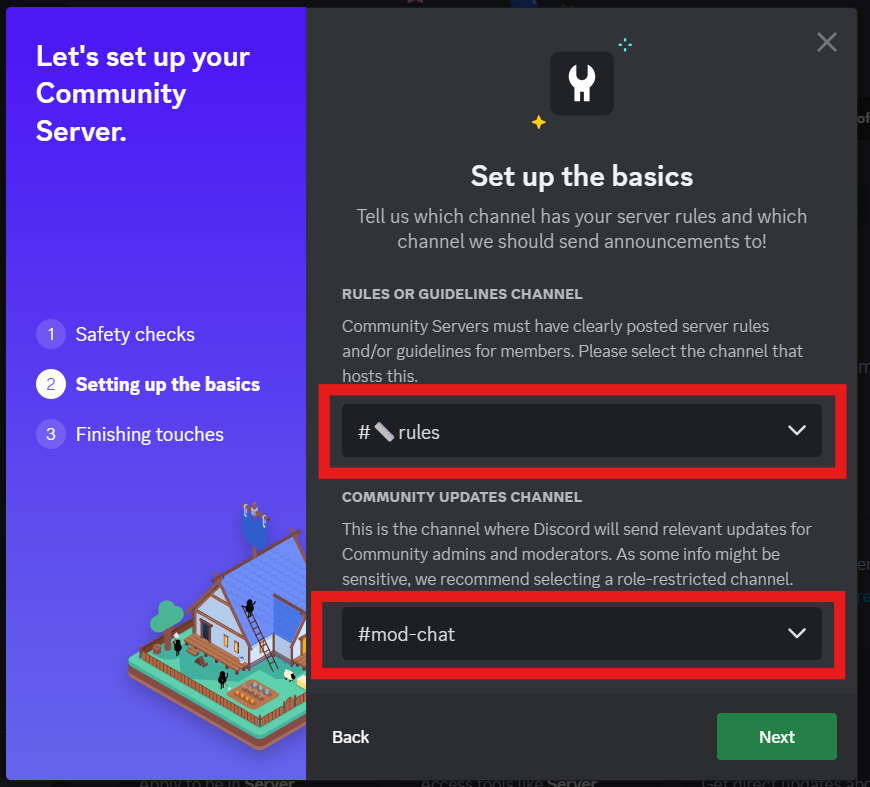
- Setting up the basics: Create channels for rules and community updates. Discord app can automatically create these for you if you don't have them yet—very nifty!
- Finishing touches: Set default notifications to Mentions Only and disable "risky permissions" like channel management for the @everyone role. Then, agree to the Community Server Guidelines and Community Guidelines.
You will be asked to select a rules channels And a community update channels (if you don't have one it will be created automatically for you )
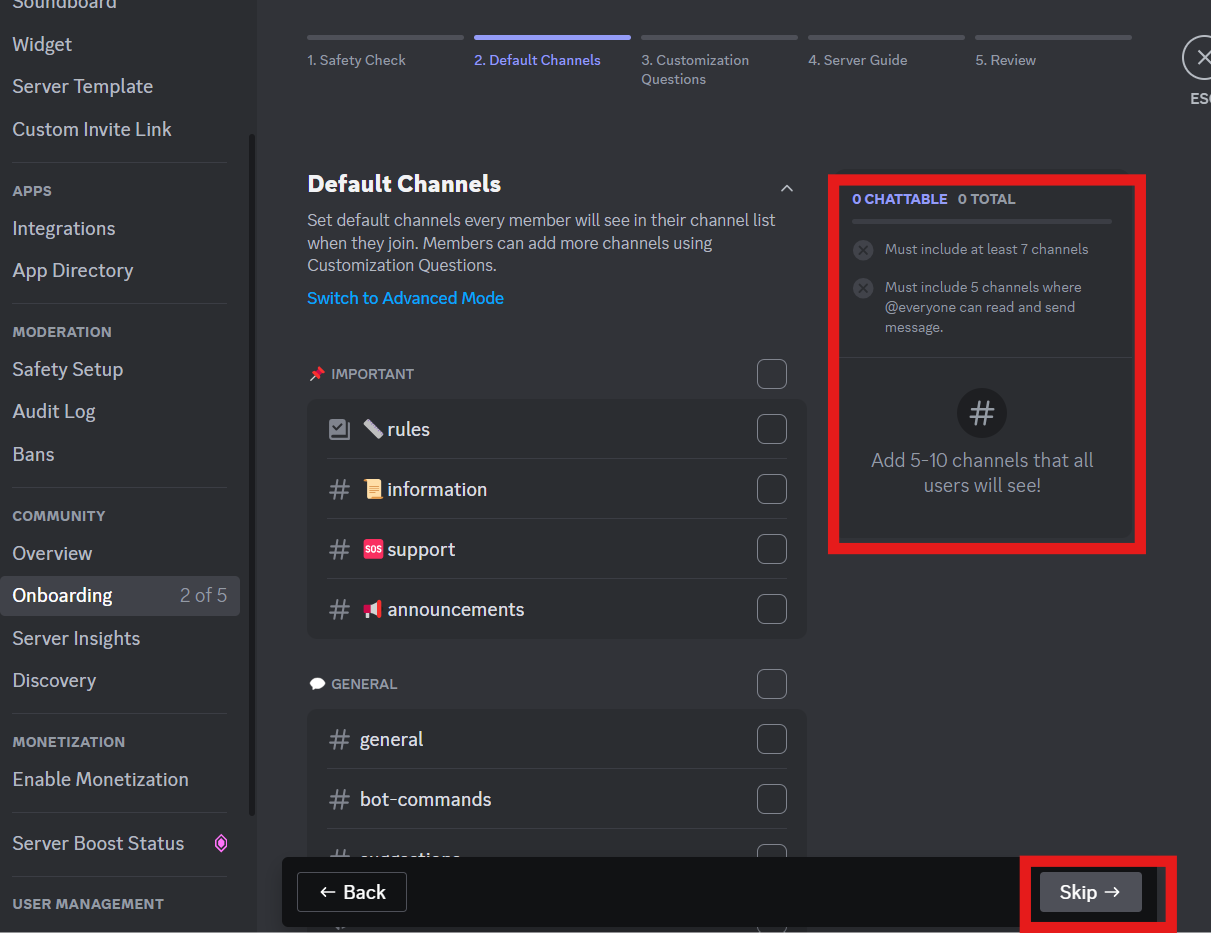
Community servers also give you the option to create an onboarding experience involving default channels, new member questions, and a server guide. Click your server name and go to Server Settings > Onboarding > Check it out to set it up.

After prompting you to check your safety setup, the onboarding setup will ask you to choose some default channels. These are the channels that users join automatically when they become part of your community. You need to include at least seven channels total, with at least five that let everyone read and send messages
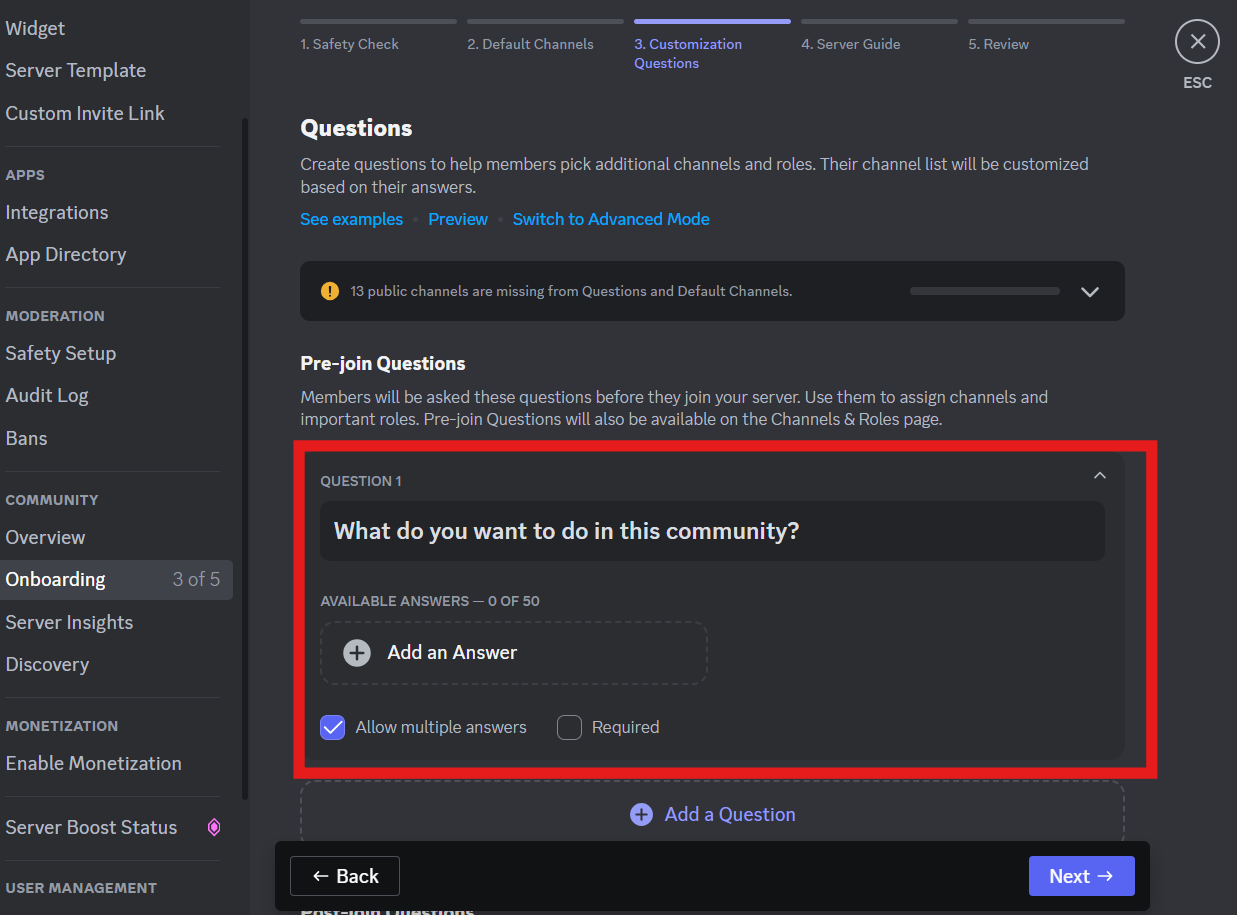
In the next step, you'll create customization questions to sign users up for relevant channels and roles. Click on an existing question or answer to edit it, and choose Add a Question to add more. These questions fall into two categories:
- Pre-join questions, for before members join your server, work well for setting someone up with their fundamental roles and channels.
- Post-join questions, for after members join your server, fit roles and channels to choose whenever.
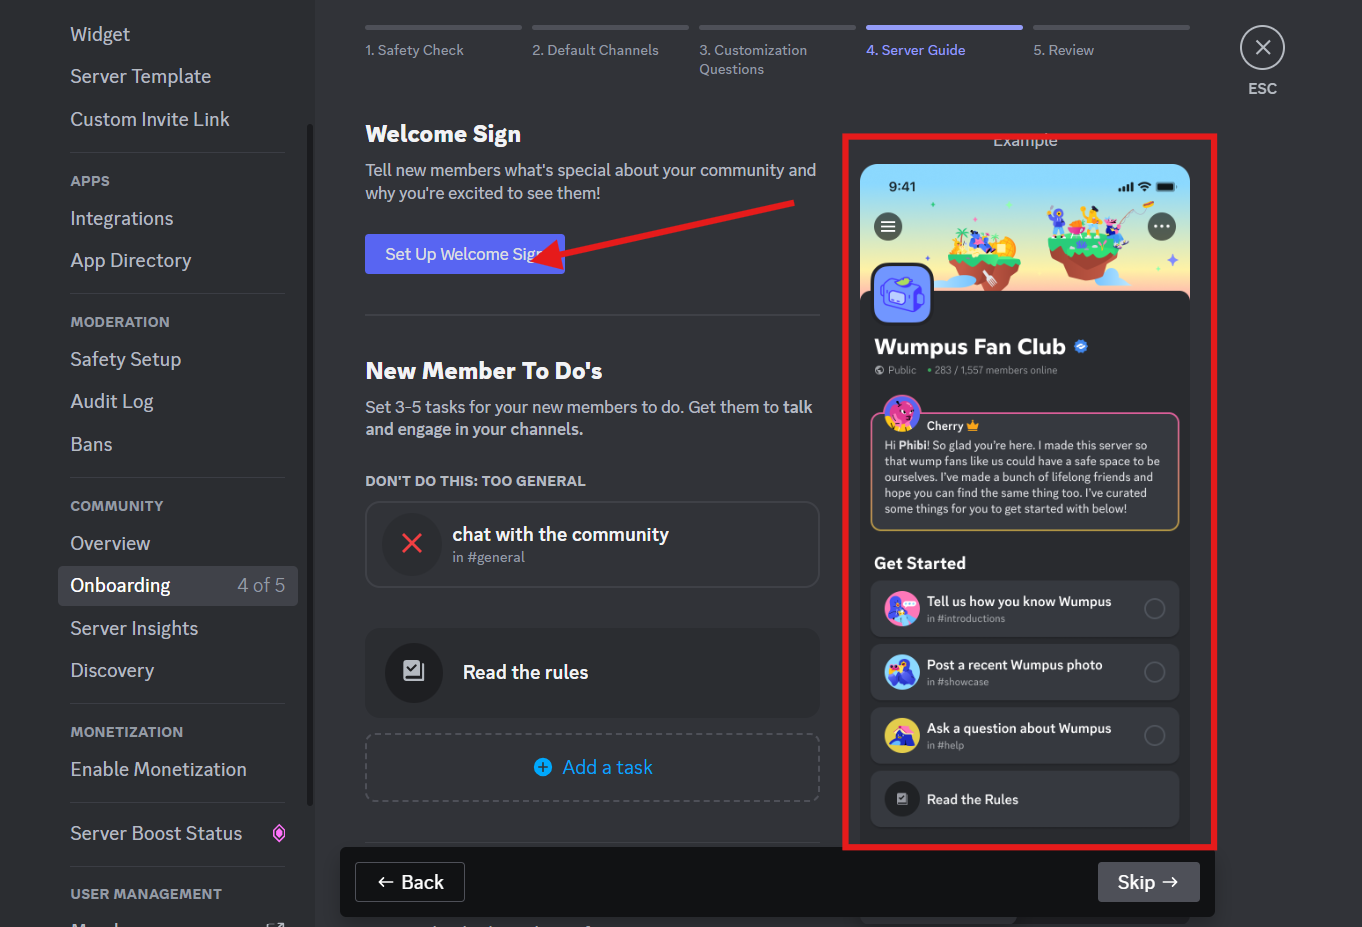
Once you finish setting up your questions and answers, you'll get the prompt to make a welcome sign, member to-dos, and resource pages. The page that will include these items will give new members a setup process and provide existing members with resources to reference.
- Click Set Up Welcome Sign to create a welcome message from one of your administrators.
- Under New Member To Do's, choose Add a task to add a setup task related to visiting or sending a message in a channel. You should think about this feature as a automated task manager.
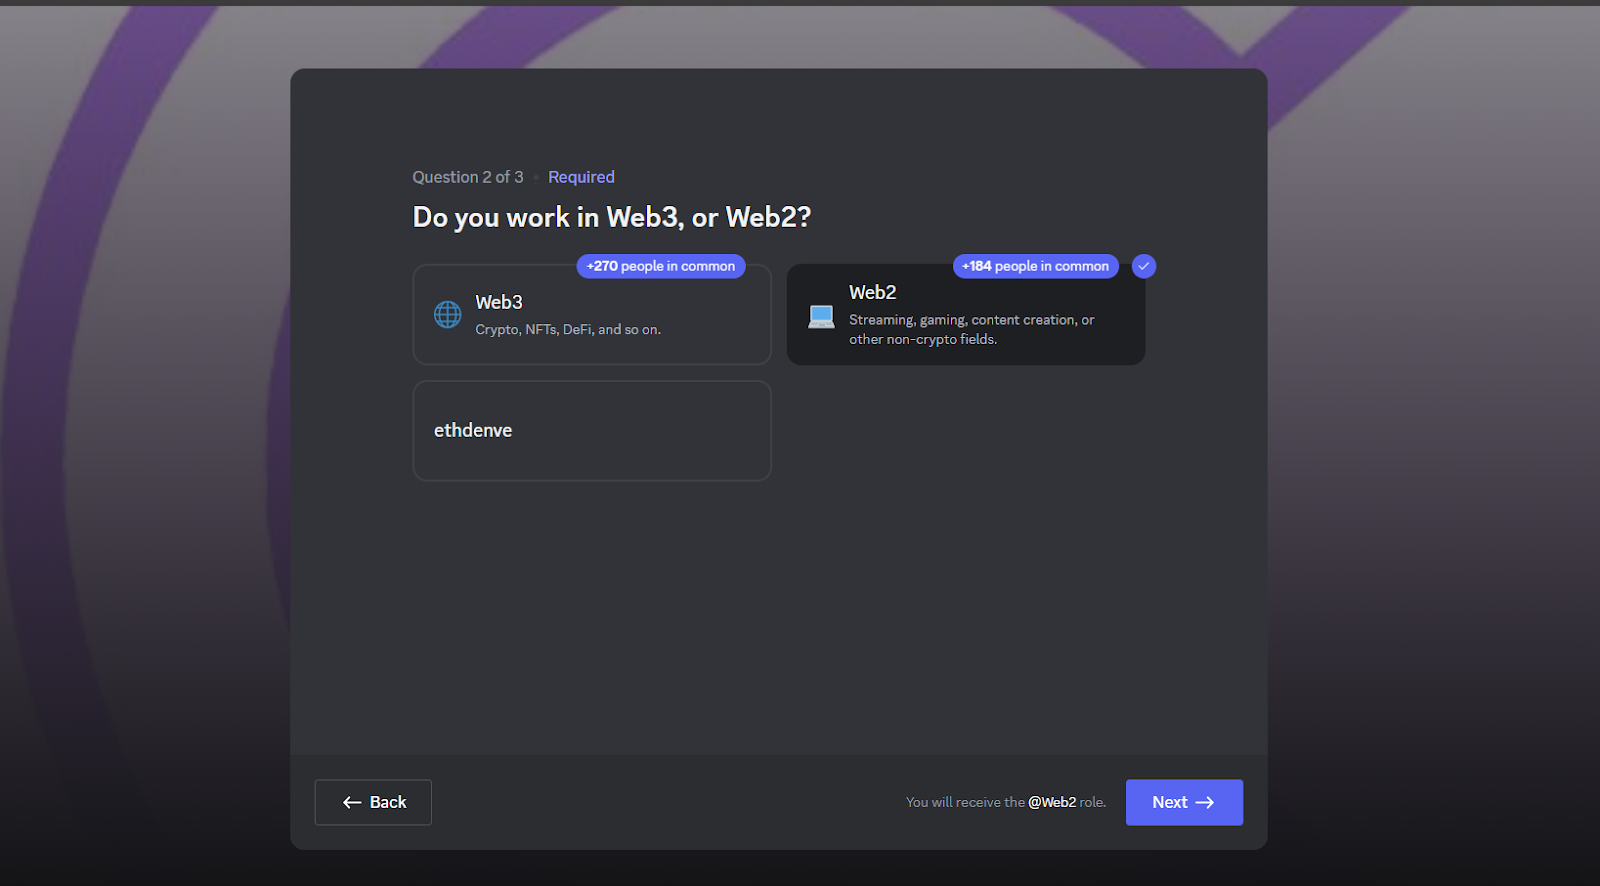
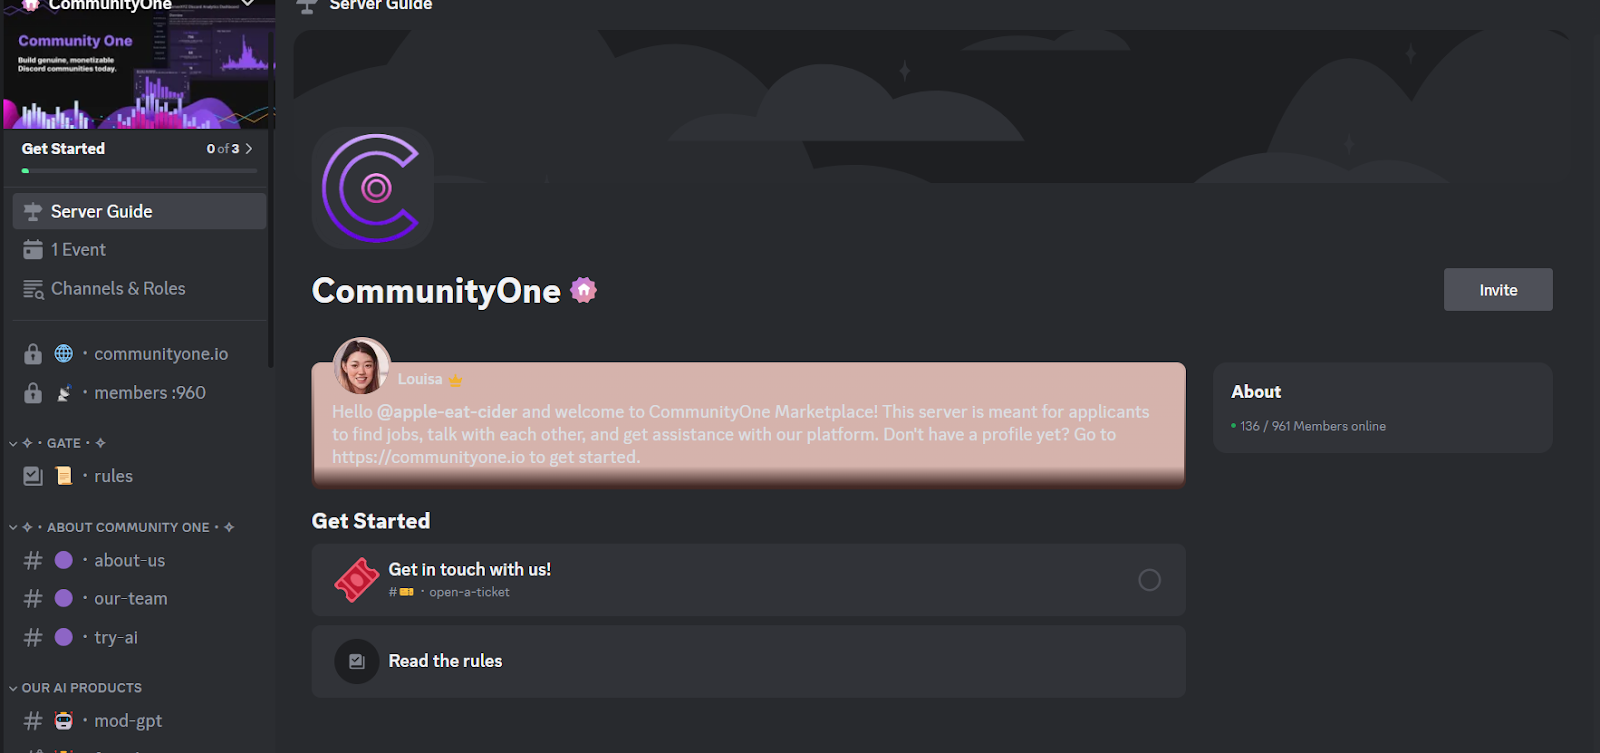
After you finish the onboarding setup this what your welcome screen should look like
Add bots and apps
You can add a variety of digital doodads to Discord to automate your server's daily operations. Click on your Discord server name and go to the App Directory to find bots and integrations for your server. The Discord community creates apps for all sorts of purposes, including fun games, easier server moderation or just better discord app log. While some bots might not be easy to download and install, once installed, all bots will work on your discord regardless of your own os system, let it be mac or windows.